|
There are tools – some mythical and magical – to reduce volumes of unnecessary emails, and automatic processing via features like the Focused Inbox or Clutter can help to filter out stuff that is getting in the way, but fundamentally the decision on whether to delete, defer, delegate or just leave it lying about, rests with the user. There is still an AutoArchive function in Outlook, but you probably don’t want to use that.
If the Archive option shows up in the web UI (with suitable icon), the folder should also be visible in desktop Outlook in the main folder tree. Just like you have an Inbox, Drafts, Sent Items Check out the Archive folder properties, and you can see its size on your own machine or on the server (assuming that you’re not storing everything in your mailbox within your Outlook cache). To fire an email into the Archive folder from the desktop Outlook client, just press backspace if you’re currently viewing the message in the preview window. The default shortcut key to archive a message in Outlook Web App is E though you can reconfigure the app to use different shortcut schemes, in case you’re more familiar with other web clients. To see the shortcuts in Outlook web app at any time, just press the ? key. |
578 – Let’s talk about fonts
 Most people don’t really think too much about which font they’re using in written works. The novelty of having different font designs, weights and sizes soon wears off, especially if you like to try all of them in the same document. Most people don’t really think too much about which font they’re using in written works. The novelty of having different font designs, weights and sizes soon wears off, especially if you like to try all of them in the same document.
Yet, there is a lot of thought which goes into creating a font, especially when considering how it’s likely to be used. Typeface design goes back to the earliest days of printing, with fashions changing from heavy and elaborate block type to lighter and perhaps easier to read lettering. To serif or to sans? The author Simon Garfield has written extensively on the subject of typography, including articles on What’s so wrong with Comic Sans? or The 8 Worst Fonts In The World and his really excellent book, Just My Type, which delves into the history behind lots of common typefaces and how or why they came about. It really is fascinating. Even the design of the text used on road signs was a hot topic in the 1950s, with the UK facing a need to choose a standard for the upcoming motorway network, which could be easily read at speed. Designers Jock Kinneir and Margaret Calvert came up with many road signs and the typeface design still used today (theorising that at 70mph, a driver looking for Birmingham won’t actually read the letters, but will recognise the shape of the word). Trials were done by fixing words to the top of a Ford Anglia and driving it past a group of seated, bemused volunteers, to test the fonts’ efficacy. A lot of technology we take for granted today has its roots in the 1970s at Xerox’s PARC research establishment or was materially advanced there – ethernet, bitmapped displays, laser printers, the mouse, the GUI, object orientation, distributed computing and so much more – and the two founders of Adobe, who went on to define PostScript, started their work together there. This font-rendering software – along with the Apple Macintosh & LaserWriter and the Desktop Publishing software PageMaker – laid the way to revolutionise the printing industry.
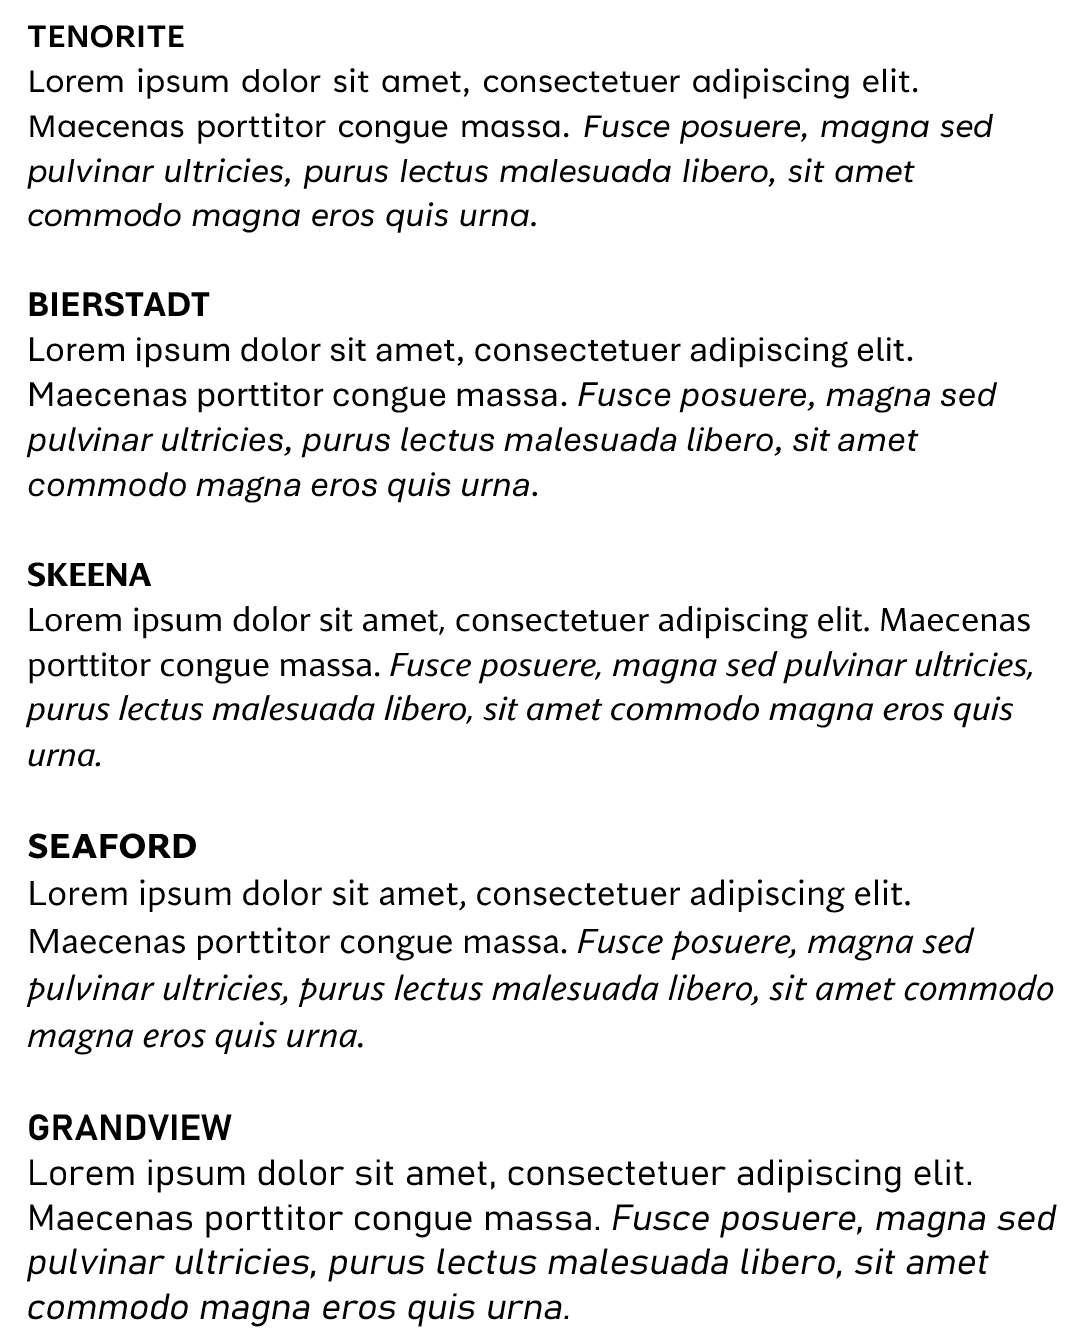
“Cloud Fonts” are available to Microsoft 365 subscribers (more info here) – in Word, go to File / Account and look for the optional settings. Five of the Cloud Fonts collection are being considered to be the new default font for Office apps in the future… which would you choose?
|
577 – Wir Fahren auf der Autobahn (virtuell)
|
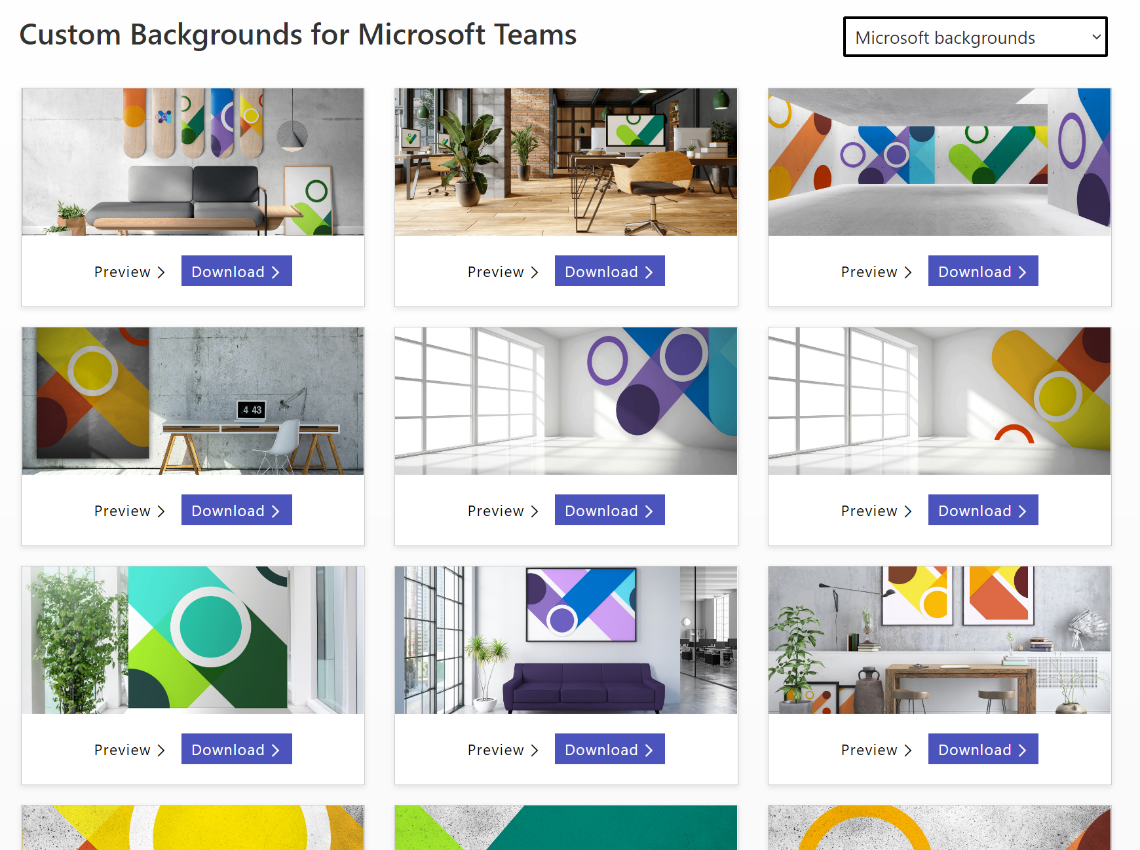
You can jump between the apps in Teams by pressing CTRL+n, where n is the corresponding location on the bar (ie CTRL+1 for the top app, CTRL+2 for next down etc). Open the Insights app to see the first-released Viva application, which has also been recently updated. Viva Insights lets you send praise to colleagues, do some quick & mindful breathing exercises, check on actions you may have mentioned in email (eg “I’ll get back to you on Monday…”) and block out time that’s currently free in your schedule to give you a chance to focus on work you’re supposed to do, rather than meeting with people to talk about it. Newly added, is the Virtual Commute – go to the Protect Time tab, or look in the top-right settings menu “…”, to set up the time to finish your work day. You can now have Teams remind you that it’s time to go home, even if you’re home already. Jared Spataro wrote recently about the need to give yourself breaks between meetings and to transition from “work” to “home” modes. If you’d like to jazz up your Teams background image rather than showing your real backdrop, check out the Viva backgrounds now available in the custom backgrounds gallery for Microsoft Teams. |
576 – Presenter guidance
|
It’s still worth tailoring your presentation style, especially so when you can’t necessarily see the audience – that guy who’d be dozing off in the front row of the presentation room? He’s now doing that on mute and with camera switched off. Creating compelling content is another huge topic which is even more important than the means by which you present it.
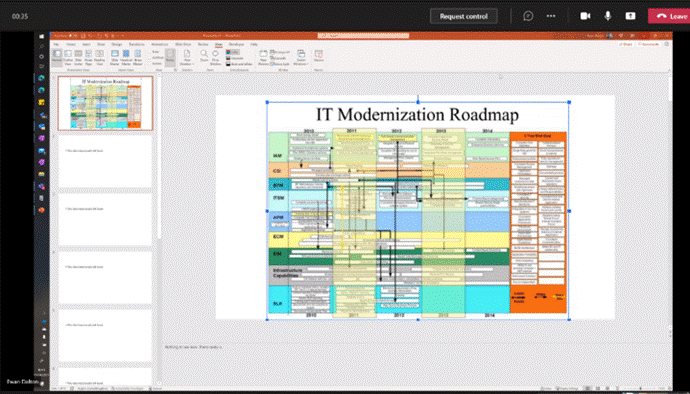
If you have a specific reason to share the screen or app then please at least “Present” in PowerPoint, since simply showing a PPT window is a massive waste of screen real estate and your attendees won’t be able to read it.
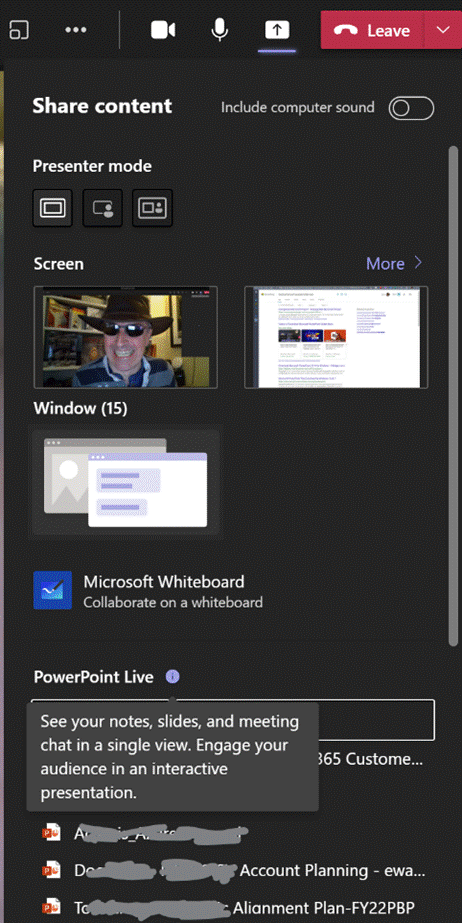
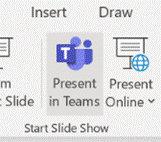
The simplest way to present slides on Teams is to use the This view will let you share content in a more efficient manner, and also gives the option of letting other presenters easily manage the transition from slide-to-slide, rather than having to rely on trying to take control of the presenter’s PC in order to advance them, and avoiding the “Next Slide Please” request. Attendees can privately move around your deck if you allow it. You can also start the sharing from within PowerPoint, as long as the source slide deck is saved to OneDrive or Sharepoint, as the content is rendered as a web view. Go to the Slide Show tab Assuming you’ve managed to create slides which are not a mess and are comfortable about how you’re going to present them, the next step might be to polish your own performance. You could use Rehearse Timings to do a dry run of your presentation, and it will record the time it takes to cover each slide (and will also save that timing so If you’d like an unbiased assessment of your presentation style, try out the new Rehearse with Coach feature – as well as getting some real-time tips during the rehearsal, you’ll get a report when completed, praising for a job well done or admonishing you for speaking too fast, just reading the slides out loud, using, errm, non-inclusive language etc – all of which might be used to help improve your delivery for the next time. Have a play with the Presenter Coach – presuming it’s an automated service rather than a real human listening in, it’s fun to try and see how the recommendations given – see how many profanities you can get it to recognise? |
575 – Who’s meeting?
 Organising a meeting in Outlook means sending out requests to participate – effectively you’re creating an appointment or event in your own calendar, then converting into a meeting by inviting other people to join you. If you’re putting something in your diary and want other people to know about it, but without expecting them to join you (eg you’re going on vacation and presumably don’t want your teammates to tag along), simple tricks can reduce the annoyance you might foist onto your co-workers… Organising a meeting in Outlook means sending out requests to participate – effectively you’re creating an appointment or event in your own calendar, then converting into a meeting by inviting other people to join you. If you’re putting something in your diary and want other people to know about it, but without expecting them to join you (eg you’re going on vacation and presumably don’t want your teammates to tag along), simple tricks can reduce the annoyance you might foist onto your co-workers…
Who has responded? Have most people declined?
If you are organising or attending a large business meeting with lots of attendees, it’s useful to be able to slice and dice the attendees more effectively – have most people declined and should I move the date, for example – click on the big Copy Status option at the top of the list.
If you right-click the table and select Table > Totals Row then if you filter the headings – like the responses, for example, you’ll be able to quickly see how many Accepted, Declined and so on. What could be interesting, too, is showing attendees names alongside their role, department, which office they’re from, their actual email address etc… Well, thanks to the magic of macros, use this Address Book Resolver spreadsheet, and just paste the responses from the Copy Status… step into cell A1, then hit the Resolve button. Some attendees might be external users (so won’t be known to your address book), and some of the names in the first column might not be unique enough to resolve, and will be highlighted (alongside external users) by a red Unknown in the Job Title column.
To use this sheet for resolving any list of bulk display names or alias names, just paste them into column A (and hide Columns B and C if you’re not using the output from a meeting invite tracking list). To prepare the spreadsheet for use, download the Address Book Resolver file as above (here it is again). Open the ZIP file and open the enclosed XLSM file or save it somewhere on your machine, then open it. Make sure you Enable Editing, then Enable Content so you can run the Macro that does the lookups. This is an evolution of the Alias resolver sheet posted back in ToW 417. |
574 – Teams Times Countdown
|
As many of us have spent the last year meeting people through Teams instead of in person, our methods and behaviours may have altered. Most people stopped getting dressed up as if they were going to work, though some found that after months of wearing jogging pants and hoodies, actually getting smartened up helped them get into “Work Mode”. There’s even the idea of having a virtual commute to separate work life from home life.
Clicking the double-arrow on the top right will make the timer fill the whole Alarms & Clock app, and you could even make that app full screen if need be. It’s possible to have multiple timers running simultaneously – you could set one for the duration of the meeting, then line up timers for each point on the agenda, though you do need to start them manually.
A more gentle use of this technique would be if you’re going to allow attendees a couple of minutes to join before getting started – so you’d start and share the timer and then people will know that it’ll get underway at 2 minutes past the hour. If you’re hosting a long meeting with breaks scheduled, the same could be used to indicate when proceedings are going to resume. |
573 – Searching in Outlook
|
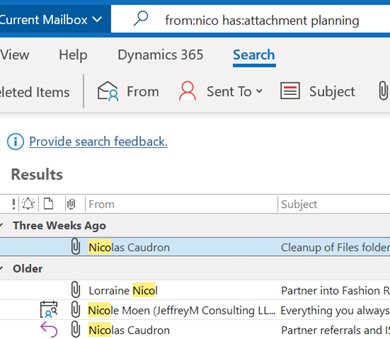
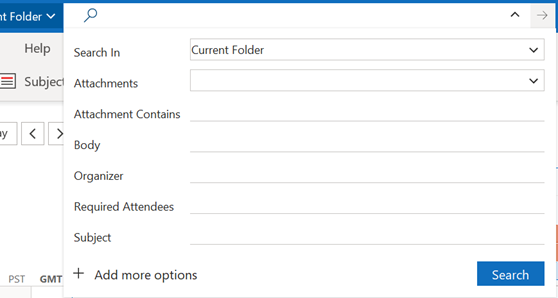
Or has:attachment, which will only show you mails that have other files attached. Combined with a few other criteria, you can filter the results of your search pretty hard, rather than sifting through them. Adding some other smarts like received:”last month” can streamline some more. For more info on search terms, see here. The scenarios our reader posed, though, were specifically around searching in the calendar – eg, do I have a meeting in my calendar with a particular person? Or what recurring appointments are due to expire this month? If you navigate to your Calendar and click the down-pointing arrow to the right of the Search box, it will display a Click + Add more options to bring up a picker that lets you add even more – such as whether the meeting is a recurring one, or if it shows in calendar as Busy or not. Selecting the options builds the query as before, so you can see a variety of defined names – like organizer | organiser (depending on your locale) or requiredattendee:. Coming back to the original question; if you want to find all future meetings in your calendar with anyone called Tony, you could type something like requiredattendee:tony start:>today. And if you want to find out which
Don’t be alarmed if some of them are due to keep happening until a very long way into the future. We’ll probably have stopped using email by then. History Lesson Before Outlook arrived as part of Office 97, users of Exchange Server had an email client and a separate calendar app (Schedule+; that’s why some diehards still say things like “send me an S+”, meaning send a meeting request). Both would maintain a connection to the server and would chat back and forth, only downloading data when a message or attachment was opened. Although this put something of a penalty on the network, it meant there was no need to cache large amounts of data on a PC hard disk. Outlook replaced both the mail and S+ clients, but maintained the same synchronous connection to the server. Outlook 2003 and Exchange 2003 changed the default model, since PC hard disks were getting much bigger and cheaper, so it made sense to have Outlook deal primarily with a cached copy of the user’s mailbox, bringing all kinds of performance benefits to both end user and to the operators of the server back-end. One really notable improvement was the ability to run fast searches against mailbox data that’s in the cache, rather than having to execute searches on the server. Prior to the cached mode, the best-case scenario for running a search was the server returned messages that fit a particular query asked by the client – mails received this week, mails with FOO in the subject line etc. If the server had indexed the relevant properties (received date, subject etc), it was pretty quick at sending back the results. If the user wanted something more in-depth, it was a punishingly slow process as each message would need to be picked up and inspected to see if it met the query – so searching for every email with a particular word in the message body text would be laborious. Three cheers for cached mode and client-side indexing.
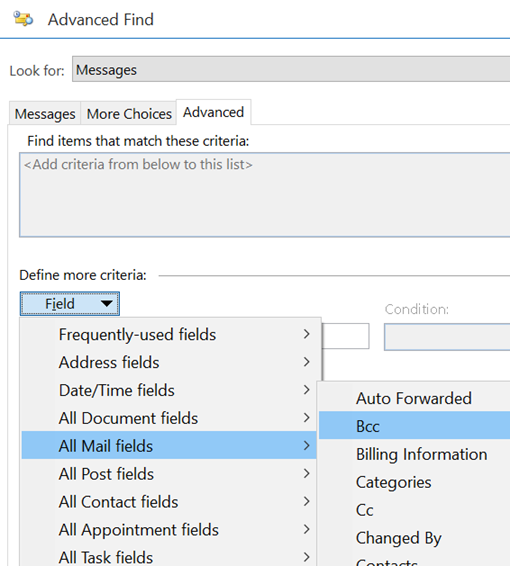
The first couple of tabs on the Advanced Find dialog let you search for mailbox items that fit some common criteria – but the third tab is a window into how Exchange stores and categorises messages, appointments, tasks etc.
Aside: most apps use CTRL+F to invoke Find – try it in Word, Excel etc – but in the mail client, CTRL+F forwards a message instead. Find out why, here. The idea here is that you can build a query based on properties of messages – and when you select the Field from the extensive drop-down list, it would let you choose appropriate filters (some, like Flag Status or Receipt Requested would only have a couple of possible values, but others would let the user enter text, date or numeric filters). Not all of the fields are used for much these days – eg InfoPath Form Type harks back to the days when the now-defunct InfoPath could be used to create mailable forms – but having a poke around in Advanced Find can give a curious user some insight into how Exchange and Outlook organises their data. |
572 – simple OneNote tricks
|
To try to simplify the roadmap somewhat, the app formerly known as OneNote 2016 is now just “OneNote”, and the Store app that shares more of its UX with the mobile and web versions, is OneNote for Windows 10. For more detail on the differences between all the versions, see here. At one point, the plan was to discontinue the more functional desktop app, and shift development to the simpler Store version, however that plan was rowed back and OneNote (the Office app) will continue to be part of Office, even though it wasn’t installed by default in 2019. The perpetual version of Office (as opposed to the subscription service that is Microsoft 365) will be updated later this year, and OneNote will still be part of that. Probably.
As has been covered on ToW passim (here, here), you can start OneNote from the Run command, by pressing WindowsKey+R then onenote <enter> for the desktop version, or onenote: for the modern Windows 10 version. In the latter, you can also pin particular pages to the Start menu, handy if you want to jump to a particular page of quick notes or ideas.
Or maybe by typing a quick few lines at first, and formatting as a list once you’ve got some text. There are some shortcuts to help that formatting; in both OneNote and OneNote for Windows 10, to quickly select what you’ve just typed, hold the shift key and press the up arrow to grab a row at a time.
To create a table, just press TAB to turn whatever you’ve just typed into the first column, and keep pressing TAB to create new columns, or CTRL+ENTER to accept the column layout and start adding extra rows, or to insert a new row into an existing table. Once have content in your table, you can easily move rows around by simply putting your cursor in the row you want to shift, and hold ALT+SHIFT then use the up / down arrow keys to move that row. Much simpler than faffing about with copy & paste.
You can manually create links to any page by selecting the text you want to hot-link from, and press CTRL+K; then either select the destination in the dialog box, or paste the link to the page (or paragraph) if you’ve already copied that link to the clipboard.
Its big brother, OneTastic, also allows using pre-written Macros to automate tasks like custom sorting of sections and loads more. |
#571 – Save the Daylight
|
If the country or state you’re in observes summer time, then you’re either about to enter (if in the northern half of the marble) or leave it (if southern). To keep us on our toes, this movement back or forth often happens around the world on different dates. To keep us on our toes, some countries have less-than-hour gaps between time zones, and in the past, others have decided to change time zone permanently.
– eg if it’s 2:30am in Iran, then lining Tehran up with the red hand would put both London and Paris at midnight, since they’re both at GMT+1. eh? In October 1968, the UK decided to move to British Standard Time – GMT+1 – all year round. This particular wristwatch was produced between 1968 and the end of 1971, when the practice was reversed – so for a while, it was correct that London would be in the same time zone as Paris and Rome. Except the watch wouldn’t know when Paris and Rome went into summer time, thus putting them an hour further ahead… oh well, never mind. In a global working environment, especially one where everything is done online rather than having people in the same location, the friction of time zones changing has never been more obvious. Usually, you’ll only move through time zones relative to everyone else when you travel – flying across large distances, or maybe just driving across a bridge or dam. But now, a digitally-oriented meeting can shift its time for some of its attendees, relative to the others – depending on where the originator is based.
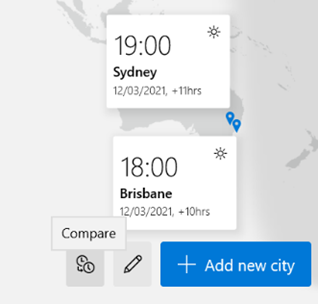
Those parts of the US which observe DST, are due to move an hour forward this coming Sunday (ie March 14th). In common with doing things differently to everywhere else, that brings the US (and Canada) one hour nearer most of Europe for the next two weeks, until the end of March. Much of the southern hemisphere comes out of DST the week after that, so by then Sydney will be two hours nearer London than currently. The impact of this can be seen in peoples’ calendars, when regular meetings somewhat inexplicably start to clash with each other – if a UK organiser set a recurring meeting for 4pm GMT, that would normally compel Seattleites to be there at 8am, but since they’ll be only 7 hours behind for a couple of weeks, that shifts to 9am in their calendar, potentially clashing with some existing 9am Pacific Daylight Time meeting. Conversely, a 9am PST / 5pm GMT meeting as created by the person in the US a few weeks ago, would now start at 4pm in the afternoon in London. Great news if that meeting is a Friday afternoon, as it brings beer o’clock one hour forward. Although Outlook does a pretty decent job of juggling the differences between time zones, there is no obvious way to show what time zone a meeting had been created in (eg show me all meetings that are going to be affected by this shift for the next 2 weeks). A simple trick if you want to check on a specific meeting, is to start a Reply to a meeting you’ve been invited to, whereupon you’ll see the time zone of its creator…
While It won’t help you identify the meetings that are causing the clashes, it might help restrain you from firing angry missives at the organiser of the meeting, if you know what’s causing it. |
570 – Automation for all
|
All were replaced in time with rebranded but otherwise similarly targeted variants:
2020 saw a fast move to hosting everything digitally and for the most part got away with it. 2021 was always going to be different, and the first big do of the year took place this past week – a spring Ignite. When you don’t need to book a conference centre 12 months in advance and get thousands of people to fly in to attend, why not do some of the big events more often or a different time of year? For a summary of what was being announced at Ignite 2021, check out the excellent Ignite Book of News. Charles Lamanna’s keynote on Power Platform highlighted some news around Power Automate – one of the key components of the Power Platform and formerly known as Microsoft Flow, Power Automate began as an online service that could make workflows to stitch together actions that happened across multiple online applications –a new booking alert email to a hotel mailbox could add an appointment to a Google Calendar and send a notification to someone on Microsoft Teams, and so on. Just announced is that the fairly new Power Automate Desktop will be included in Windows 10 and is free to download and use now. This tool brings automation concepts right down to the desktop, allowing any end user to create flows that span multiple apps and services; it’s not unlike an advanced Macro Recorder, where the user can perform a task that is regularly repeated, and the software will keep track of the steps they’re making. With PAD, however, it’s more than just repetition – they can go back and inject data into those steps, like take the email addresses from column B of this spreadsheet and send a specific email to each one, with logic determining what should be different for each message (so a lot more granular than a simple mail merge).
This capability has come about through Microsoft acquiring Robotic Process Automation specialist company Softomotive in early 2020. The impact of RPA is explored when looking at how this technology could remove boring, repetitive tasks thus freeing up clever and creative people to do something better with their time and attention. On one hand, automating processes could be a threat as we’ll need fewer people to do the same things, but a more optimistic view is that it will increase productivity and satisfaction. If you have 17 minutes free, then check out a great TEDx talk on “White Collar Robots”. There’s a great demo of Power Automate technology being used in real-world scenarios, on Microsoft Mechanics. See more videos from the makers on Microsoft Mechanics – YouTube |


