![]()
There’s a long history of people building cool add-ons and tools for Windows. From “Tiny Elvis” which amazed Win3.1 users, to a whole suite of tech-nerd extensions called Winternals, offering stuff that could peer under the hood of the then-new Windows NT system. Some were officially produced – the Microsoft Plus! pack for Win95, or numerous Resource Kit tools spring to mind.
Microsoft internal teams released a free set of utilities called PowerToys for Windows 95: some background to the developments came out 20 years ago.
A new PowerToys package appeared more recently for Windows 10 and 11 – it’s a free collection of numerous utilities which extend Windows in some way. Some have featured in previous ToWs – #647 and #15 among them (the former being Old Testament before the Great Reset, the latter being in the new world).
PowerToys is updated regularly on GitHub (see details on https://aka.ms/powertoysresleasenotes) and gets bug fixes for some of the tools, or periodically, whole new additions. After 5 years, it’s still “Preview” and has reached v0.90.1. Perhaps that version number is asymptotic, in that it will never actually be 1.0.

There are currently 25+ tools ranging from occasionally useful things like Find My Mouse to larger, previously separate utilities which might be used every day, like Mouse without Borders.
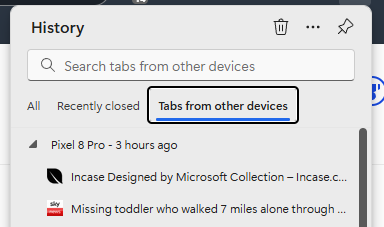
Look on the system tray for the colourful PowerToys icon and left-click on it to get the Quick access menu (currently non-customizable, which is a bit odd – like, how often do you need to edit your Hosts file? ).

Double-click on the PowerToys system tray icon and you’ll get a more expansive dialog, allowing you to enable or disable individual utilities and get a reminder of what the keystroke is to invoke it.

Don’t fall asleep
One of those occasionally handy tools that, when enabled, has its own system tray icon, is Awake.

It shows up as a coffee cup in the System tray and can be used to over-ride any compulsion your PC has to go to sleep or even blank the screen. Handy if you’re downloading something from a slow network and you need to keep the PC active, or you want to keep the machine available for remote access etc.
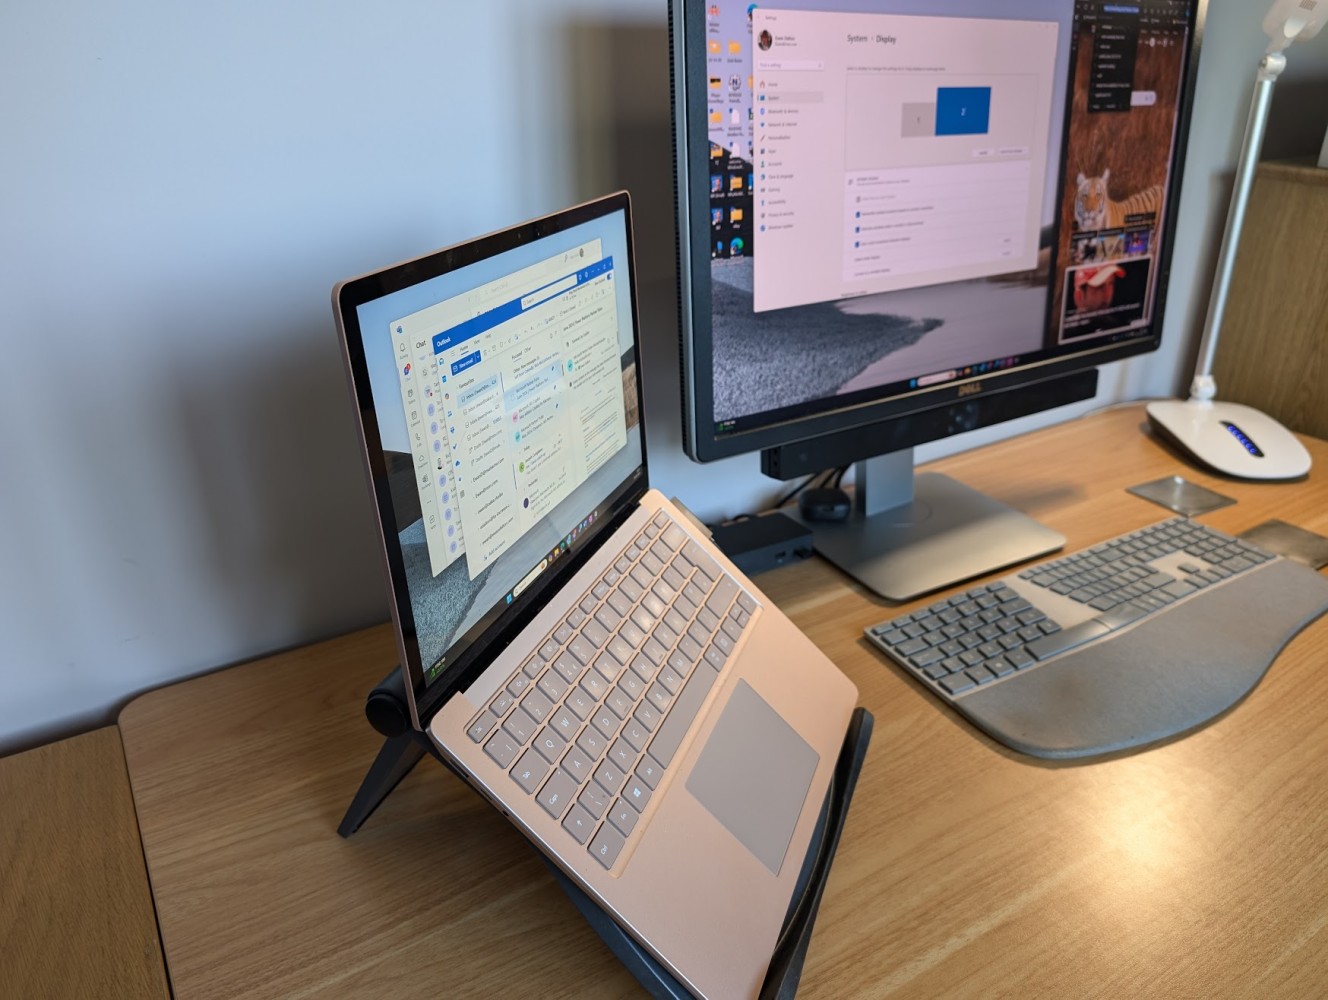
Another use case is when using PIP/split-screen modes on large monitors, things can get a bit unpredictable if the primary input disappears through power saving schemes. Setting a longer timeout for the “Keep awake” will mean the screen doesn’t blank so quickly, until you revert to normal and let the machine’s power plan take over.
Zoom Zoom!
A recent addition to PowerToys is ZoomIt (not to be confused with the metadirectory services company which was a forerunner to Microsoft Identity Manager).
If you’ve ever watched Azure CTO and all round technical fellow Mark Russinovich present at a major conference, you’ve almost certainly seen him using ZoomIt. In a nutshell, you can zoom into a static grab of the screen, using the mouse or trackpad to smoothly zoom in and out. It lets you annotate highlights using the mouse – Mark would do this to underline some part of a demo he was giving, showing where something has changed or where a command should be entered.

As well as zooming on a static view, it can also zoom into a live part of the screen too (which might be handy for doing precision mousing), plus some other neat presenter-friendly tricks like having a full-screen countdown timer.
ZoomIt was originally built by Mark’s company Winternals, which became SysInternals, and was acquired by Microsoft in 2006. The tool is available standalone from PowerToys if you prefer, alongside many other technical utilities.


![clip_image004[4]](http://www.tipoweek.com/wp-content/uploads/2024/11/clip_image0044.gif "clip_image004[4]")
")


