581 – 21H1 is not a flu

clip_image002[4]Last week, the latest set of changes to Windows 10 started to become widely available. The 21H1 update – following the naming convention established in October 2020 with 20H2, rather than using a version number like 1903is now rolling out.

There are few major visible changes in 21H1; it’s mostly an under-the-hood arrangement, with a few minor features involving things like having multiple Windows Hello capable web cameras (in case you decided to splash out on a better camera for your online meetings, to better highlight your carefully curated backdrop?) Even some of the latest Surface devices only have a 720P front-facing camera, so if you want to upgrade your visuals with a 1080P one, there are plenty available for not much outlay. There’s even a new Microsoft Modern Camera which might be great for Teams, but unfortunately doesn’t support Windows Hello. Maybe that one needs a reboot.

A few legacy bits of technology have been removed from 21H1 – like the “original” Edge browser, ie the “Project Spartan” one that was launched with Windows 10 before being replaced with the Chromium-based version we enjoy today. For a preview of what is next for the block, check out the list of deprecated features – things that are still there but being tolerated rather than enhanced.

In other Windows news, the previously-announced slimmed-down version, called Windows 10X, is not going to happen any time soon, if at all. Where is Surface Neo now?

Having tried to “simplify” Windows previously with WinRT and then Windows S Mode, the latest turn is to do a “Cairo” by deciding to bring some of the planned features into a different release schedule, ie the mainstream one.

clip_image004[4]

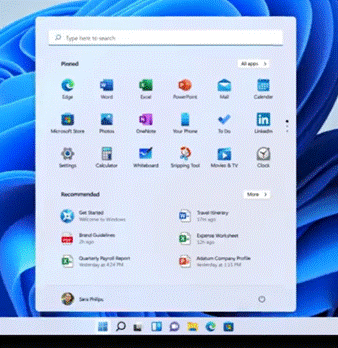
The next frontier for visible Windows enhancements might be the 21H2 update which logic would suggest should be with us midway through the fourth quarter of 2021. Reportedly codenamed “Sun Valley” and bringing a fresh new UI sheen, this next big update is expected to be announced soon – maybe something else is to follow?

578 – Let’s talk about fonts

clip_image002Most people don’t really think too much about which font they’re using in written works. The novelty of having different font designs, weights and sizes soon wears off, especially if you like to try all of them in the same document.

clip_image004Some strange choices do persist, though – Comic Sans on a warning sign at an electricity substation?

Yet, there is a lot of thought which goes into creating a font, especially when considering how it’s likely to be used. Typeface design goes back to the earliest days of printing, with fashions changing from heavy and elaborate block type to lighter and perhaps easier to read lettering. To serif or to sans?

The author Simon Garfield has written extensively on the subject of typography, including articles on What’s so wrong with Comic Sans? or The 8 Worst Fonts In The World and his really excellent book, Just My Type, which delves into the history behind lots of common typefaces and how or why they came about. It really is fascinating.

Even the design of the text used on road signs was a hot topic in the 1950s, with the UK facing a need to choose a standard for the upcoming motorway network, which could be easily read at speed. Designers Jock Kinneir and Margaret Calvert came up with many road signs and the typeface design still used today (theorising that at 70mph, a driver looking for Birmingham won’t actually read the letters, but will recognise the shape of the word). Trials were done by fixing words to the top of a Ford Anglia and driving it past a group of seated, bemused volunteers, to test the fonts’ efficacy.

A lot of technology we take for granted today has its roots in the 1970s at Xerox’s PARC research establishment or was materially advanced there – ethernet, bitmapped displays, laser printers, the mouse, the GUI, object orientation, distributed computing and so much more – and the two founders of Adobe, who went on to define PostScript, started their work together there. This font-rendering software – along with the Apple Macintosh & LaserWriter and the Desktop Publishing software PageMaker – laid the way to revolutionise the printing industry.

clip_image006Most fonts used until the 21st century had been designed to look good in print, but 14 years ago, Microsoft shipped a new font in Office 2007 and Windows Vista. Designed specifically to be easy to read on-screen, presuming that most documents and emails will be read on a display rather than printed out, that font was Calibri. It became the default font used in Office applications and has remained so since.

But that’s all about to end.

clip_image008

Cloud Fonts” are available to Microsoft 365 subscribers (more info here) – in Word, go to File / Account and look for the optional settings.

Five of the Cloud Fonts collection are being considered to be the new default font for Office apps in the future… which would you choose?

fonts


573 – Searching in Outlook

clip_image002A reader recently got in touch to ask for help in finding stuff in Outlook. The search capability within the application most of us use most of the time has evolved considerably throughout its life, with a prominently placed search bar now adorning the top of the main window. When you click into it, lots of helpful filtering and searching capabilities are offered in the ribbon below.

clip_image004It’s worth getting to grips with a few simple text search terms, though, so when you’re typing some search term you can direct Outlook to particular items. Helpfully, using the options in the menu will actually build the query that is fed to search, so you can type them in future. Simple quick wins include things like using from:name to show only clip_image006emails that originated from a particular sender.

Or has:attachment, which will only show you mails that have other files attached. Combined with a few other criteria, you can filter the results of your search pretty hard, rather than sifting through them. Adding some other smarts like received:”last month” can streamline some more. For more info on search terms, see here.

The scenarios our reader posed, though, were specifically around searching in the calendar – eg, do I have a meeting in my calendar with a particular person? Or what recurring appointments are due to expire this month?

If you navigate to your Calendar and click the down-pointing arrow to the right of the Search box, it will display a clip_image008small form with series of other fields you can complete, in this case relevant to appointments rather than messages.

Click + Add more options to bring up a picker that lets you add even more – such as whether the meeting is a recurring one, or if it shows in calendar as Busy or not. Selecting the options builds the query as before, so you can see a variety of defined names – like organizer | organiser (depending on your locale) or requiredattendee:.

Coming back to the original question; if you want to find all future meetings in your calendar with anyone called Tony, you could type something like requiredattendee:tony start:>today. And if you want to find out which clip_image010recurring meetings are expiring soon, start by searching is:recurring start:>today. That will show you a list of future recurring appointments, but not give all the info we’re looking for since the default results view doesn’t show anything about the pattern of recurrence – so right-click on one of the column headings of the search results and select Field Chooser, where we can add some extra columns to the view.

clip_image012Now, in the pop out window, change the filter from Frequently-used fields to All Appointment fields, and scroll down to find Recurrence Range End. Now drag and drop that field into the column list, then click on it to sort descending so you’ll now see all the meetings that are set up with a recurring pattern, ordered by when that pattern is due to end. For added context, you could put Recurrence and Recurrence Pattern on there too.

clip_image013

Don’t be alarmed if some of them are due to keep happening until a very long way into the future. We’ll probably have stopped using email by then.

History Lesson

Before Outlook arrived as part of Office 97, users of Exchange Server had an email client and a separate calendar app (Schedule+; that’s why some diehards still say things like “send me an S+”, meaning send a meeting request). Both would maintain a connection to the server and would chat back and forth, only downloading data when a message or attachment was opened. Although this put something of a penalty on the network, it meant there was no need to cache large amounts of data on a PC hard disk. Outlook replaced both the mail and S+ clients, but maintained the same synchronous connection to the server.

Outlook 2003 and Exchange 2003 changed the default model, since PC hard disks were getting much bigger and cheaper, so it made sense to have Outlook deal primarily with a cached copy of the user’s mailbox, bringing all kinds of performance benefits to both end user and to the operators of the server back-end. One really notable improvement was the ability to run fast searches against mailbox data that’s in the cache, rather than having to execute searches on the server.

Prior to the cached mode, the best-case scenario for running a search was the server returned messages that fit a particular query asked by the client – mails received this week, mails with FOO in the subject line etc. If the server had indexed the relevant properties (received date, subject etc), it was pretty quick at sending back the results. If the user wanted something more in-depth, it was a punishingly slow process as each message would need to be picked up and inspected to see if it met the query – so searching for every email with a particular word in the message body text would be laborious. Three cheers for cached mode and client-side indexing.

clip_image015If you look at Advanced Find in Outlook today, though, you’re staring into a time vortex that transports you right back to the late 1990s, as it hasn’t really changed, even if the speed of getting results back will be noticeably better since you’re almost certainly pulling them out of a local copy of your mailbox.

The first couple of tabs on the Advanced Find dialog let you search for mailbox items that fit some common criteria – but the third tab is a window into how Exchange stores and categorises messages, appointments, tasks etc.

clip_image017You can start Advanced Find from the Search Tools menu option as above. Or press CTRL+SHIFT+F.

Aside: most apps use CTRL+F to invoke Find – try it in Word, Excel etc – but in the mail client, CTRL+F forwards a message instead. Find out why, here.

The idea here is that you can build a query based on properties of messages – and when you select the Field from the extensive drop-down list, it would let you choose appropriate filters (some, like Flag Status or Receipt Requested would only have a couple of possible values, but others would let the user enter text, date or numeric filters).

Not all of the fields are used for much these days – eg InfoPath Form Type harks back to the days when the now-defunct InfoPath could be used to create mailable forms – but having a poke around in Advanced Find can give a curious user some insight into how Exchange and Outlook organises their data.

#571 – Save the Daylight

clip_image002In the Northern Hemisphere, spring feels finally underway – and following a long locked-down winter, it can’t come soon enough. For many of us, even if meteorological spring started nearly 2 weeks ago, the promise of summer starts when the clocks go forward to daylight saving – or summer – time.

If the country or state you’re in observes summer time, then you’re either about to enter (if in the northern half of the marble) or leave it (if southern). To keep us on our toes, this movement back or forth often happens around the world on different dates. To keep us on our toes, some countries have less-than-hour gaps between time zones, and in the past, others have decided to change time zone permanently.

clip_image004In olden days, some people wore GMT or World Time watches, which allowed the user to tell what the time was in different locations. With the World Time example here, the red arrow hand points (on a 24hr scale) to the current time; when the user rotates the outer bezel so that the nearest location is pointed to by that hand, the other locations listed on the bezel will be aligned with the 24hr number of the current time in those places…

– eg if it’s 2:30am in Iran, then lining Tehran up with the red hand would put both London and Paris at midnight, since they’re both at GMT+1.

eh? In October 1968, the UK decided to move to British Standard TimeGMT+1 – all year round. This particular wristwatch was produced between 1968 and the end of 1971, when the practice was reversed – so for a while, it was correct that London would be in the same time zone as Paris and Rome. Except the watch wouldn’t know when Paris and Rome went into summer time, thus putting them an hour further ahead… oh well, never mind.

clip_image006There may be trouble ahead

In a global working environment, especially one where everything is done online rather than having people in the same location, the friction of time zones changing has never been more obvious. Usually, you’ll only move through time zones relative to everyone else when you travel – flying across large distances, or maybe just driving across a bridge or dam.

But now, a digitally-oriented meeting can shift its time for some of its attendees, relative to the others – depending on where the originator is based.

clip_image008The excellent Alarms & Clock app, which is part of Windows 10, lets you pin cities around the world to a map, showing their approximate location (bet you didn’t know Brissie was south east of Sydney?) and what the time is currently, and if you click the Compare icon to the left of Add new city, you’ll see a grid indicating the relative time in all of your pinned cities. You can jump to a specific date, so if you’re planning a meeting with people in different time zones, it might be a good idea to check what the impact of Daylight Saving Time (DST) changes might be.

Those parts of the US which observe DST, are due to move an hour forward this coming Sunday (ie March 14th). In common with doing things differently to everywhere else, that brings the US (and Canada) one hour nearer most of Europe for the next two weeks, until the end of March. Much of the southern hemisphere comes out of DST the week after that, so by then Sydney will be two hours nearer London than currently.
More info.

The impact of this can be seen in peoples’ calendars, when regular meetings somewhat inexplicably start to clash with each other – if a UK organiser set a recurring meeting for 4pm GMT, that would normally compel Seattleites to be there at 8am, but since they’ll be only 7 hours behind for a couple of weeks, that shifts to 9am in their calendar, potentially clashing with some existing 9am Pacific Daylight Time meeting.

Conversely, a 9am PST / 5pm GMT meeting as created by the person in the US a few weeks ago, would now start at 4pm in the afternoon in London. Great news if that meeting is a Friday afternoon, as it brings beer o’clock one hour forward.

Although Outlook does a pretty decent job of juggling the differences between time zones, there is no obvious way to show what time zone a meeting had been created in (eg show me all meetings that are going to be affected by this shift for the next 2 weeks). A simple trick if you want to check on a specific meeting, is to start a Reply to a meeting you’ve been invited to, whereupon you’ll see the time zone of its creator…

—–Original Appointment—–
From: originator

Sent: 14 February 2021 08:03
To: people

Cc: more people

Subject: meeting that could have been an email
When: 12 March 2021 08:30-09:00 (UTC-08:00) Pacific Time (US & Canada).
Where: Microsoft Teams Meeting

While It won’t help you identify the meetings that are causing the clashes, it might help restrain you from firing angry missives at the organiser of the meeting, if you know what’s causing it.

570 – Automation for all

clip_image002Before The Event, if you were an IT professional in the Microsoft ecosystem for any amount of time, you may have marked your calendar by conferences you were going to attend – PDC, WPC, maybe TechEd? The big ones always happened in the US, but some were followed up with regional replays.

All were replaced in time with rebranded but otherwise similarly targeted variants:

  • Build (in the spring, initially in SFO to appeal to the cool cats writing apps, then moved to Seattle with a focus on cloud),
  • Inspire (in the summer, with thousands of partners, latterly held in Las Vegas) and
  • Ignite (in the autumn, home to lots of IT pros, often in Orlando).

2020 saw a fast move to hosting everything digitally and for the most part got away with it. 2021 was always going to be different, and the first big do of the year took place this past week – a spring Ignite. When you don’t need to book a conference centre 12 months in advance and get thousands of people to fly in to attend, why not do some of the big events more often or a different time of year?

For a summary of what was being announced at Ignite 2021, check out the excellent Ignite Book of News.

Charles Lamanna’s keynote on Power Platform highlighted some news around Power Automate – one of the key components of the Power Platform and formerly known as Microsoft Flow, Power Automate began as an online service that could make workflows to stitch together actions that happened across multiple online applications –a new booking alert email to a hotel mailbox could add an appointment to a Google Calendar and send a notification to someone on Microsoft Teams, and so on.

Just announced is that the fairly new Power Automate Desktop will be included in Windows 10 and is free to download and use now.

clip_image004

This tool brings automation concepts right down to the desktop, allowing any end user to create flows that span multiple apps and services; it’s not unlike an advanced Macro Recorder, where the user can perform a task that is regularly repeated, and the software will keep track of the steps they’re making.

With PAD, however, it’s more than just repetition – they can go back and inject data into those steps, like take the email addresses from column B of this spreadsheet and send a specific email to each one, with logic determining what should be different for each message (so a lot more granular than a simple mail merge).

clip_image006As well as some pretty advanced integration into all kinds of apps on Windows and services on the web, there are lots of tools to guide the flow of logic; while it might seem a bit scary to some, anyone who’s ever done some basic programming will be able to quickly figure out how to describe the logic without needing to break out a line of code.

This capability has come about through Microsoft acquiring Robotic Process Automation specialist company Softomotive in early 2020.

The impact of RPA is explored when looking at how this technology could remove boring, repetitive tasks thus freeing up clever and creative people to do something better with their time and attention. On one hand, automating processes could be a threat as we’ll need fewer people to do the same things, but a more optimistic view is that it will increase productivity and satisfaction. If you have 17 minutes free, then check out a great TEDx talk on “White Collar Robots”.

There’s a great demo of Power Automate technology being used in real-world scenarios, on Microsoft Mechanics. See more videos from the makers on Microsoft Mechanics – YouTube

562 – Connect your phone to Your Phone

clip_image002
A couple of years back, an initiative was launched to more deeply connect Windows to certain Android smartphones, notably starting with Samsung devices. Now the “Your Phone” application is built into Windows 10, and offers an increasing amount of utility for Android users, to sync and share content, notifications and even apps between the two devices.

If you’re an iPhone user, the connected experience is somewhat watered-down and achieved in a different way, and is mostly about syncing content and continuing web browsing from your phone to your PC. Thank the differences in Android vs iOS ecosystems for that…

For various Samsung phones and the Surface Duo, you can also control and mirror apps from your phone on the PC as well as transfer content. If you have a phone with the shiniest of shiny Android 11, you may be able to treat mobile apps just as if they are Windows apps – pin them to Start menu, run them in their own window on the PC etc. See more here.

For most other Android devices, you can’t yet do the mirroring within the Your Phone experience, but you do get to share app notifications on your PC (so you’ll get “toasts” in Windows for WhatsApp etc), exchange photos and files quickly and easily, manage messaging and even, should you want to, take and make calls on your PC.

clip_image004To get it up and running, start the Your Phone app on your PC, and the pre-installed Link To Windows app if you have a supported Samsung or Surface device; if not, then install the Your Phone companion app on the phone to get everything set up.

clip_image006It can be handy getting notifications on your PC that originate on phone apps, especially if your device isn’t next to you – but there may be limited use if all the notification on the phone would normally do is make you tap on it to read the story or interact with the app.

If you’re going to enable notifications, be careful – you’ll want to go through the list of apps that are on your phone, and only allow the ones you really need, or you’ll be getting a blizzard of unwanted toasts on your PC, assuming you’re not in Focus Assist mode.

Perhaps the best feature on Your Phone is the rapid ability to copy photos – without having to send them by email or wait for OneDrive to sync them. Using Your Phone, you can copy the file immediately to your PC, or just browse the photos on a larger screen and possibly screen grab bits of interest to insert into documents or emails. Sadly, what it won’t let you do is manage the photos easily, like delete the garbage…

Still, it’s free and it’s potentially useful for anyone with a Windows 10 PC and an Android phone – so definitely worth a look. For more info on how to use and troubleshoot Your Phone, see here.

557 – Making URLs more friendly

clip_image001The URL – Uniform Resource Locator, to give its full name – is familiar to everyone as a way of accessing their favourite sources of online titillation, propaganda and knowledge. Most people pronounce the term “yoo arr ell” though some stick to calling it Earl. Few “regular” users have any idea what magic occurs behind the scenes when you enter an address in the browser.

Early browsers might have been pedantic about the user entering the protocol into the address box, since the application wouldn’t know if you wanted to use ftp, gopher or this new-fangled http thing to try to open the page. So you had to spell out the whole address – with the right number of slashes and colons, sometimes even having to get upper and lower case parts of it exactly correct – or just get denied.

Of course, it’s easier to enter URLs these days – a good proportion of end users just type the thing they’re looking for (eg “bbc news”) into the address bar, and it will search on their favourite engine to display a list of results upon which they then click. Others will know that if you enter a term in the address bar and press CTRL+ENTER, the browser will add the www and the .com to either side of it, and on Chrome, the clip_image002address bar even hides the display of the https://www bit.

Still, pasting a URL into a document or email can sometimes look messy, especially if it’s a link to a file on a Sharepoint or Teams site. Public websites sometimes will have an address which tells the story – like https://www.upi.com/Top_News/Voices/2020/11/19/SpaceXs-Starlink-satellites-are-ruining-stargazing-for-everyone/9351605790233/ – but a new feature in Edge browser aims to make things a whole lot more friendly.

In the latest versions of Edge, instead of pasting the raw address (with all of its slashes, symbols and numbers), when you add a URL into an Office document, the link will use the title of the page as the “text to display” instead of the URL itself. As a result, the UPI story above would look like “SpaceX’s Starlink satellites are ruining stargazing for everyone – UPI.com”.

When pasting a link to a shared document, instead of it showing up like https://microsoft.sharepoint.com/:b:/t/Store%20Planning%20Team/EX3o-R5PRT5Kk-Ndmh5GKFgBx0OfjIWI9d4CGT4nZGi0Dw90980 or similar, Office apps will try to fetch the source document’s details and render its name as the displayed text, hiding the URL under it:

clip_image003

clip_image004

If you’re sending the link in an email, it will even check if all the recipients have permission to open it, and offer to help you fix that by changing the permissions or by attaching the document instead of a link to it. This might even realise the dream that one day, people will stop emailing documents to each other and instead will use proper collaboration tools. We can but hope.

clip_image005

clip_image006If you’d rather keep the raw URL, paste it into your document using the Paste Options / Text only choice. If you don’t like the new feature, you can switch it off in the Edge settings – navigate to the Share, copy and paste settings, or just enter edge://settings/shareCopyPaste into the browser address bar to jump straight there.

This useful feature was a preview in the Edge beta, but is now part of Edge 87 that released last week.

One potential side effect, though, is if the website you’re looking at doesn’t properly manage its page title (as displayed in the browser tab), it could paste as the wrong thing: some sites might set the title when you search for something, but then not set it properly when you click through into the results. You can always right-click the link and Edit Hyperlink to fix the issue if that occurs, and hope that enough people complain to the site owner so they fix it.

552 – snip snip, cap cap

clip_image002
One of the more popular Windows utilities, especially amongst people who need to share instructions on how to use other software, was the Snipping Tool. It lets you capture all or part of the screen, which means if you want to paste just a section of a screen dialog or menu into a doc or email, it’s very useful. For anyone writing user documentation, or even sending weekly emails to thousands of people for years and years, it’s a handy tool.

clip_image004It was announced a couple of years ago that the old Snipping Tool that was part of Windows was to be clip_image006retired – in fact, it’s still there (following lots of user feedback, akin to the Save the Blibbet campaign) but its successor – the Snip & Sketch app – offers more functionality and is included with current versions of Windows 10. Invoking it with the WindowsKey+SHIFT+S is the quickest and simplest way to grab some or all of the screen, and if necessary, draw or annotate on it, save it as an image file and so on.

clip_image008There are other screen capturing tools, of course – OneNote had a precursor feature which could be used to do much the same as Snip & Sketch, and even used the same shortcut key. OneNote makes such a great destination for screen grabs that the Clipping option is still there in the trad. version, and of course both variants can be the destination for something that’s been grabbed to the clipboard using Snip & Sketch.

There’s also theclip_image010 super-handy OneNote Web Clipper browser extension, which lets you grab web pages to add to your notebook with a couple of clicks.

clip_image012Now the Edge browser is going to add some web capture capabilities natively – currently in testing and rolling out to a subset of Insiders, there will be a new menu option to grab a section of a page, including the ability to scroll down the page while capturing (rather than just grabbing what’s on the screen).

Eventually, the new Edge will adopt some of the functionality that legacy Edge had when it comes to annotating web pages with ink, adding notes to pages etc – but the forthcoming web capture is a first step. Note – if you use Mouse Without Borders, it already has the CTRL+SHIFT+S keyboard combo in use, so you’ll need to change that…

551 – Ticking away the moments

clip_image002Keeping track of time is ever-present in our normal working lives, all the more so during These Difficult Times™, and the subject has featured in many ToW’s passim.

There’s a great little app built-in to Windows 10 called Alarms & Clock, which lets you set alarms on your PC, show a world map with multiple locations / time zones displayed, and also provides a neat countdown or count-up timer.

clip_image004Using the timer function can be pretty handy if you’re speaking as part of an online meeting, and need to keep a check on how long you have left to go.

You can create multiple separately-controlled timers with different durations & names; so you could have an overall meeting countdown timer, and then a separate one for each participant, if you were acting as the time cop to keep everyone else in line.

The Stopwatch is simply a fast-running counter of elapsed time, and by using the clip_image005icon on either Timer or Stopwatch screens, you can easily fill the display to help focus on the elapsed or remaining time. Handy if you’re in a physical meeting (remember them?) and are able to display a laptop screen showing the time for everyone.

Those of us who still wear physical, mechanical wristwatches may be passingly familiar with a few features that have existed for decades to achieve the same kind of function, albeit more for individual rather than shared use.

clip_image007Diver bezel

So called “diver” watches were popularised in the 1960s and 70s, as tough, waterproof and utilitarian. The most striking feature of any dive watch is generally the rotating numbered bezel which goes around the outside.

The simple idea was that when you entered the water (knowing you might have 20 minutes of air), you would turn the bezel so the arrow / zero marker was set to where the minute hand was at that point – meaning a later glance at the watch will tell you how many minutes have passed since.

Lots of other non-dive watches also have rotating bezels or indicators, and can be useful for things other than scuba – when the activity above started at 5 minutes to 10, the bezel was set, and it’s easy to see in a trice that was 11 or 12 minutes ago. Not sub-second accurate, but it’s a simple way to mark the passing of time.

clip_image009Tachymetre /Tachymeter

Many chronograph watches – which combine the function of a stopwatch and a regular timepiece – have a Tachymetre scale around the outside, yet most people these days will have no clue what it’s for. The basic function of the watch is that pusher buttons on the side will start and stop the movement of the chronograph hand which ticks round to indicate elapsed time.

The deal with the TACHY scale is that if you know a distance – the length of a straight on a motor-racing track, for example – and you time something going over that distance, then you can quickly calculate its speed across the ground.

In practice this is easier said than done, since the TACHY scale reads how many of the <distance> would be covered in an hour at this speed. If the measured distance was exactly 1km or 1mile then it’s an easy calculation – if it took 12 seconds to cover 1km, that would equate to 5km per minute or 300km/h. If the measured distance was a fraction – let’s say the length of the 12-second straight was 150m – then the calculation would be 300 x 150m per hour, or 45km/h. By the time you’ve done that in your head, the subject will be half a lap further on…

clip_image011Another variant on the theme would be if you know the speed – e.g. you’re in a plane with inflight map display, or passenger in a car on cruise control on the motorway – then you could use the Tachymeter to calculate distance travelled.

If you were cruising at 120km/h, and started the timer, then stopped it when it reached 120 on the scale… (after 30 seconds) – then you know you will have travelled 1km in that time.

Yes, there probably are hundreds of times a month when you need to know exactly this.

Pulsations

clip_image013Slightly more useful to the average person, some chronographs have a Pulsations bezel rather than a Tachymeter scale, or maybe even have both (since the Tachymeter would typically be used for more than 15 seconds, it’s possible to have one quarter of the bezel represent pulsations and the rest of it be a Tachy).

Watches with Pulsations bezels are sometimes nicknamed “Doctors’ watches” as the utility is to help count a patient’s pulse – the method being you start the chronograph, count 15 pulses and the corresponding number on the bezel would tell you what the pulse/minute rate is.

Smart watches, eh, who needs them when you have space-age timing technology like this?

549 – Quick & easy screen recording

clip_image002
It’s not uncommon to want to make a quick recording of how to do something on your PC – maybe you’re capturing a demo for someone, or want to show a team member how to use a particular tool. There have been lots of ways to achieve this over the years – from professional-grade software like Camtasia, to a variety of adware-laden freebies that you can find around the web. There used to be a whole product line of video encoding software – free and pro versions – called Microsoft Expression Encoder. Sadly, no more.

There are other more accessible and arguably easier ways for the modern PC user to capture the screen, though. You could start a Teams meeting with yourself (a handy way to check how you look and sound on video) by going to the Calendar node in Microsoft clip_image004Teams and click Meet now. Once you’re in the meeting with only yourself, you can share your desktop or an app in the usual way, and record the “meeting” for later enjoyment.

clip_image006Depending on how your Teams/M365 environment is set up, your recording may be stored on OneDrive or SharePoint (as opposed to being automatically uploaded to Microsoft Stream – a new change that was announced at Ignite), but one way or another you can download the MP4 recording to a file, and share it more widely.

A simpler method might be to just go to the Stream portal – if you’re a subscriber to Microsoft 365 – and create a screen recording from there.

If you’re not looking for anything too fancy, though, a quick & easy way to grab a recording of an application – not the whole screen, only the current app window – is to use the Xbox Game Bar that’s probably included in your Windows 10 install.

Although the Game Bar is designed to be used for recording snippets of gameplay, it’s also a really neat way of capturing the video and audio of pretty much any other application; with a bit of practice, you could record your own instructions on how to carry out some task in an application, while showing just that app window, and it’ll be available to share in a few moments.

Simply open the app you want to record, then press WindowsKey+G to bring up the overlay GameBar UI.

clip_image010Click the floating toolbar along the top to show or hide various docked windows which will appear on the left side; if you want to record a commentary over the top of your screen capture, then click the settings cog at the far right of the toolbar and set the option to record system audio as well.

clip_image012


clip_image014

When you’re ready, press the round record button in the Capture dialog (or press WindowsKey+ALT+R), also making sure your mic isn’t muted if you want to record your voice. Once you’re live, you’ll see another clip_image016floating toolbar that lets you mute your mic and stop the recording, and when complete, it’ll show a confirmation that the recording is done – click on that notification to go straight to the folder where the recordings are held.

clip_image018To find or set the capture location, or to tweak settings like the video frame rate and quality, just press WindowsKey and start typing Capture to jump to the settings page.

clip_image020The captures generated are full-fidelity, so on a large screen monitor, sizes can be pretty big.

A 1m30s demo captured on a 4K display could easily be 200Mb in size; a quick solution is to use the built-in Video Editor in the Photos app.

clip_image022Just open the Editor and create a new project, add the clip_image024huge video capture file, drag it to the Timeline then hit Finish video to save an encoded version at a lower quality – for rough screen caps, Medium (1280×720) is probably good enough, and drops from 130+ MB/minute to more like 5MB/min.