|
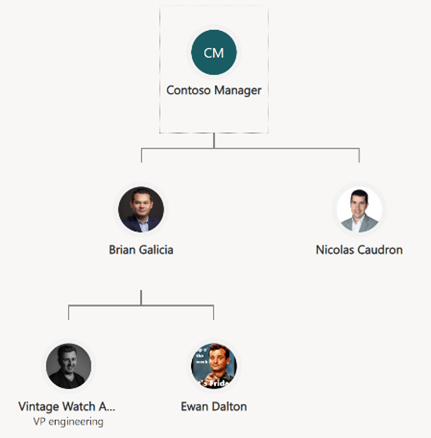
Depending on the rules of your particular system, you’ll probably need to provide a job role and maybe some other fields, and you might not be able to associate that contact with an account yet – perhaps you’ll need to save it to Dynamics first, then make the association with the account to which the contact belongs.
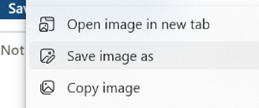
Getting images from LinkedIn can be a little more laborious especially if you’re doing this in batches. Here’s a fairly simple technique to make it easier.
|
Category: Apps


659 – Sounding out apps

How you control the sonic emissions from your PC has changed repeatedly over the years; volume is often adjustable by hardware buttons or function keys but more advanced controls are usually found by double-clicking a speaker icon in the system tray. Windows 11 evolved the UI further, in the hope of making it easier to use.
Now, if you click the speaker, you don’t jump to the full blown sound control panel, but to a quick settings dialog which 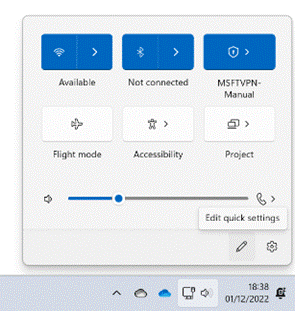 controls some commonly used connectivity and display settings, customizable if you like. Desktop PCs typically don’t need Flight mode, but nocturnal users may want to add night light for quickly changing screen colour.
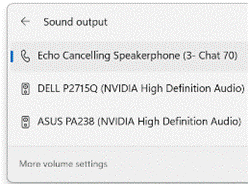 Drag the slider by the volume icon and the predictable happens but click the icon to its right and you can easily choose which output device you want to use, if you have several (like headphones, speakers, monitors etc). Clicking More volume settings at the bottom takes you to a more fully-featured volume control panel.
If you have multiple monitors connected to your PC – especially if HDMI is involved – it’s 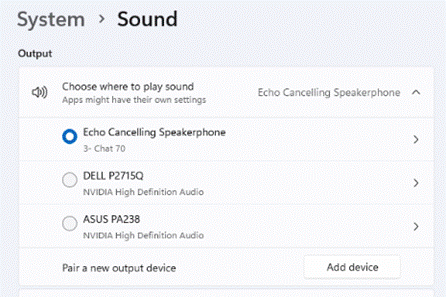 possible your machine might expect to route sound to one or more of them; unless you do actually have speakers attached to the monitor, or it’s in fact a flippin’ big television, you’d probably prefer it didn’t show up on the list of potential output devices.
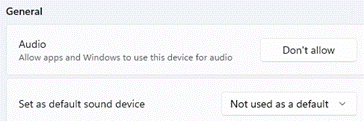 Click on the arrow to the right of the device you want to exclude – the ASUS monitor, in this case – and then hit the Don’t allow button: next time you look in the quick volume settings UI, it’s no longer there.
Some apps might have a UX for controlling audio output directly, over-riding the system default and probably sticking with whatever device you choose – Teams or Zoom, for example, may choose a USB speaker/mic or a headset if connected, rather than using the laptop speaker. If the app doesn’t know anything of sound devices, then ordinarily it will use the default (as per the options above), but there is a somewhat hidden setting that lets you tweak things further rather than having to alter the system’s chosen output just for that app or session.
If you want to fire the audio stream from a particular app at a different endpoint than the system default – let’s say you have a Bluetooth speaker connected, but you’d prefer system sounds and the likes to keep coming from your laptop speakers – you could tell Windows to send that app’s audio output to a different place, and the app will never know about it.
 In the main System > Sound control panel, scroll down to Volume Mixer and click the arrow to open it up. In that page, you’ll see a list comprising the currently-running applications which have made some kind of audio output (in other words, if you want to set an app up, make sure it’s started it and if it’s not in the list, start playing something).
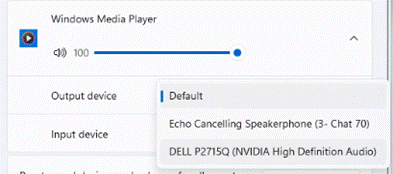
In this case, the Dell monitor does have an amp & speakers attached to its audio line-out socket (where audio is sent to the monitor via the display cable, and it then puts it out to the speakers), so while spending a day of Teams calls and other system sounds emanating from the tinkly-bonk USB speaker, the business of smashing out some banging tunes can go to the bassier speakers.
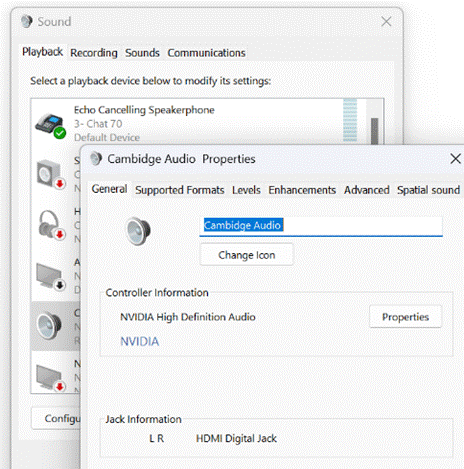 Finally, should you wish to give your devices more meaningful names than the ones shown, look for More sound settings in that first System > Sound settings page. This brings up a Windows
  XP-era dialog which allows more precise configuration of devices and levels.
The Sound dialog lets you choose the sound scheme (controlling all the bongs and bings of Windows), configure the speaker arrangement (if you have surround sound etc), or choose all kinds of enhancements and effects.
It also lets you rename the device altogether and set a different icon, so when it shows up elsewhere – including in the shiny Windows 11 Settings app – then it’ll be a bit clearer what it really is
657 – Bye Bye, OneNote (for Win10)
When Windows 8 was at the planning stage, a new model was envisaged which could deliver Windows applications consistently through an App Store (rather than needing each app to have its own install/uninstall mechanism). Other benefits would come, too –automatic app scaling of the UI depending on the size and orientation of the screen, improved security and power management… not to mention the same app running on phones, tablets, PCs, Hololens, TVs… such nirvana! And the charms!
Both the the app platform and the Windows Phone had lots of great ideas, but when the Phone went away and the multi-platform app dream then stopped being viable, the ”Modern” app model (which became the Universal Windows Platform, or UWP) was on borrowed time. Perhaps the zenith of UWP app functionality, and still one of its best apps, is/was the OneNote store app, later described as OneNote for Windows 10.
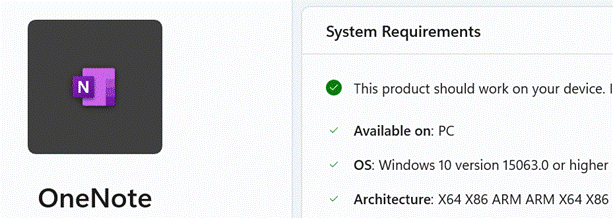 Inevitably, having multiple apps which share the same name yet are fundamentally different can cause confusion. Fortunately, apart from Skype, Teams, Office, Xbox and a few others, Microsoft doesn’t typically have this problem.
Previously, if you’d searched in the Microsoft Store for “OneNote”, you would find the Modern / Metro UWP version, listed as just “OneNote” in the Store even though it called itself OneNote for Windows 10 upon installation, assuming it wasn’t there already by dint of being preinstalled. Capiche?
After deciding to reprieve the traditional Win32 OneNote, having hitherto announced it was to be dropped in favour of the shiny new one, the plan is now to port some of the best features of the UWP app back to the Win32 version and instead consolidate on that. The UWP variant will stop being supported in October 2025, at the same time as Windows 10 reaches end of life.
If you search the Microsoft Store for “OneNote” now, you’ll get 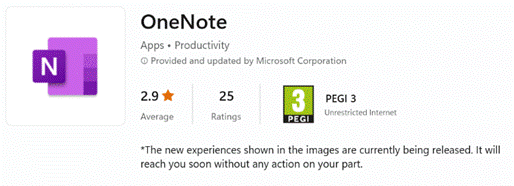 an app with the same name and basically the same icon as the old UWP app, but this one is an updated packaging up of the desktop/Win32 app. The description even points out that some of the pictured features are planned for the future vs available now.
Both versions of Windows OneNote have been able to coexist for years – WindowsKey+R onenote <ENTER> will fire up the desktop application whereas Win+R onenote-cmd: <ENTER> starts the UWP version. Both could even open the same Notebooks so apart from user preference, it didn’t really matter which one was used. The UWP app had a similar look and feel to the web and mobile apps, though they have diverged somewhat in recent months.
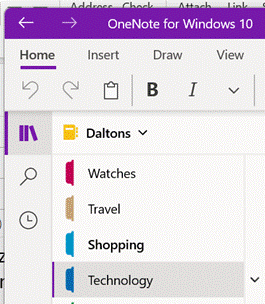
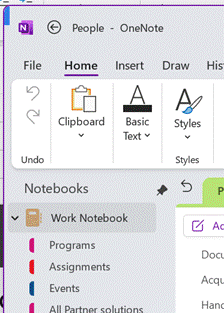 One benefit of keeping both is that it’s a great way of having all your work notes in one and all your home stuff in the other, so when you search for something, it won’t cross over and give you meeting notes when you’re looking for shopping lists.
If you want to more easily distinguish between the versions, you could change the icon of the full-fat version, and potentially pin them both to Taskbar or Start menu.
If you don’t have “OneNote for Windows 10” installed on your Windows PC, you can still get it if you know the secret – well, it’s not much of a secret, you just need to know the direct link to the Store that lets you find it. Shhhh.
656 – Sign-in around the world
 Childhood games sometimes revolved around the goodies and the baddies. Early Western movies often had the convention of good guys wearing white hats and villans wearing black; if nothing else, it helped the viewer distinguish who was who in a fast-moving fight scene when the film is shot in monochrome.
White hat and Black hat are also terms given to computer hackers, the black hats being figuratively worn by criminals trying to break in to systems for nefarious gain, whereas the white hat hackers do it so they can report vulnerabilities and make things more secure. As ever with computing, there are also many shades of grey.
In your own technology environment, you probably never see the bad actors until you are dealing with the aftermath of a security breach. Check that your common usernames and passwords are not being circulated around, by using the Password Monitor in Edge and look for known leaks at Have I Been Pwned.
If you use a Microsoft Account (also known as MSA, commonly identified with domains like outlook.com, hotmail.com, live.com etc), then it’s a good idea to make sure it has a complex password and most importantly that muti-factor authentication is enabled. See best practices for managing your MSA.
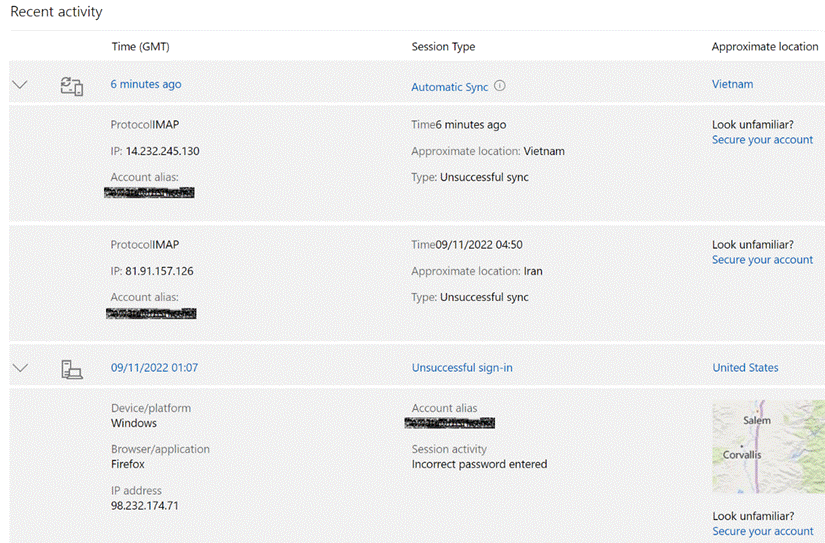 If you’d like to scare yourself, take a look at the activity history for your MSA – here – and you’ll probably see lots of attempts to sign in from places you’ve never been to, if it was even possible to have visited them in the timeframe of the activities.
Hopefully all the unrecognized tries to sign in have been denied… maybe it’s a good time to log in to any old Hotmail.com etc accounts you may still have, just to make sure they are secured appropriately?
It used to be considered a good idea to change passwords regularly, but in recent years that has been discouraged. It would be safer to have a long, complex password which is unique for each website or account you use, probably hooked up with a password manager and authenticator app. You could even remove the password altogether and use only multi-factor authentication.
MFA – or 2FA – isn’t perfect, though. El Reg reports on a very real threat to enterprise security, described as “MFA Fatigue” – when an administrator of a system who normally has to use MFA to access it, is bombarded by authentication prompts at times they don’t expect.
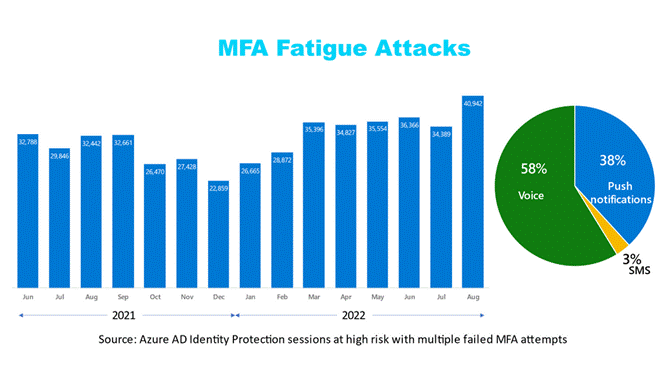 Human nature might assume the system is playing up, and eventually hit “Approve” on the MFA screen, to stop the annoyance.
Microsoft’s security prouct group has some advice on how to protect users from MFA Fatigue Attacks and has released a bunch of updates to the Microsoft Authenticator app and the back-end services to hopefully make it less of a threat.
The primary problem with all IT security though, ultimately sits between the keyboard and the chair.
655 – Like my email

Every time you buy anything, stay anywhere or eat something, you’re peppered with requests to review and recommend whatever it was. If review / like fatigue has not yet set in, there’s now the ability to signal a reaction with emails in Outlook and M365.
The likey-likey feature is only present for emails in your own organization – ie. you can’t like that email that informs you’ve won the state lottery, or that your Apple ID has been compromised (though it is reported that sometimes the reactions do work across tenants). You can, however, send an appropriate emote to any email that originated from someone in your organization (even if there are other externals on it).
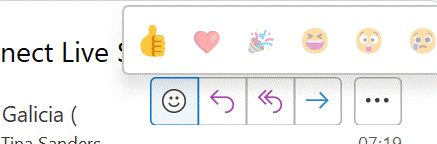 In desktop Outlook, look for the smiley icon in the response area at the top right of a message in the preview pane or when you open it outright; Outlook Web App has a similar UI which might contain other extensions’ icons next to the smiley too.
There isn’t a could have been a 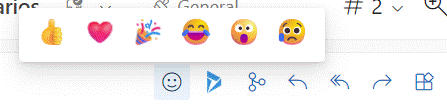 meeting or a please take me off this email button, but whenever you click on the like, love, laugh etc icon, the reaction is visible to the originator of the mail. (Happy Silver Anniversary, btw, Bedlam DL3 – hope you get on the EBC wall)
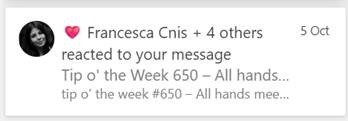 To see what people have to say of the guff you send, look at the Notifications icon in the top right of Outlook / OWA, and as well as any mentions you may have from people who can’t type your name without putting an @ in front of it, you’ll see a summary of who has reacted to each message, and how.
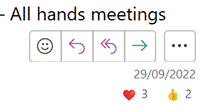 Alternatively, look in your Sent Items and if you select a message you can see what reactions it has had; there isn’t an easy way to show reactions in the table view so you could see which messages are the most popular without having to preview or open them up. It probably can be done – though likely a palaver for limited utility.
Here’s a challenge – if you’re a ‘Softie and you got this in email, react to the message and see if we can break the internet.
Thank you for all that you do!
649 – Exploring SharePoint libraries
 SharePoint is now old enough that it could walk into a bar and buy itself a beer. It has changed a lot over the versions; starting out as a server product that would produce “portals” (or “digital dashboards”) it grew quickly to being rather more document-centric. SharePoint became the back-end for OneDrive for Business storage, and both have evolved a long way.
Two years ago, SharePoint was said to be used by over 200 million users. The following year, the Gartner MQ had it way out in front on the “Ability to Execute” Y-axis and slightly behind only one other supplier on the “Completeness of Vision” X-axis. It won’t be long now for the next MQ report to appear.
Nowadays, SharePoint underpins quite a lot of Microsoft 365 functionality, such as apps like Lists which provide a groovier UI over the top of the base web services, and the document oriented collab in Teams.
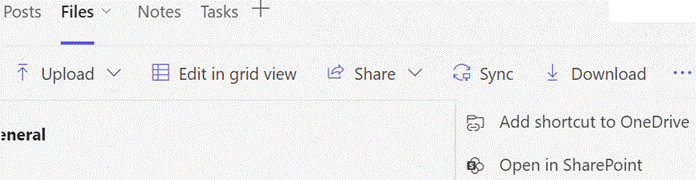 If you look at a file library in Teams, you’ll see a bunch of SharePoint-y options – you can Sync the content offline and it will be held offline, using OneDrive to sync it (and if you like, syncing only the files you’ve opened rather than the whole shebang).
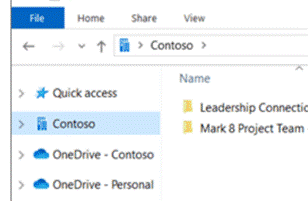 The Sync’ed libraries show up in the Windows Explorer app, and in any number of applications’ File | Open / Save dialog boxes, so you can access and interact with the files through the apps you use rather than browsing to SharePoint.
You’ll see a collection of folders that have been set up to Sync, shown with your organization name, alongside any personal OneDrive and OneDrive for Business synced libraries.
The Download option (next to Sync on the Toolbar in Teams), creates a single ZIP file your computer, with the entire contents of the folder you’re looking at, so use it carefully.
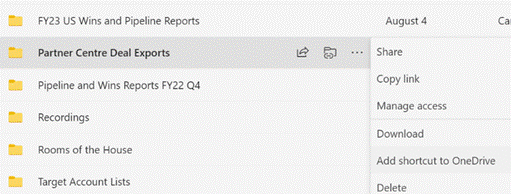 One somewhat overlooked option further to the right of the toolbar (or may be on the ellipsis (“…”) menu): Add shortcut to OneDrive. This creates a shortcut link to the current SharePoint folder within your main OneDrive for Business storage, making it easy to find that SharePoint folder in the future, even though it’s not synced offline. The Add shortcut option is also visible on the ellipsis to the right of sub-folders when viewed in SharePoint or Teams.
Don’t add shortcuts to libraries – or sub-folders – which are already being Synced offline. That would be bad.
One downside to the OneDrive shortcut approach is that it just dumps the link into “My Files”, which is the root folder in OneDrive. The shortcut is named the same as the original source – so if you have lots of Teams folders with the same name (eg “Documents”), they will clash with each other as adding a new link would try to create a shortcut with the same name as one that exists already.
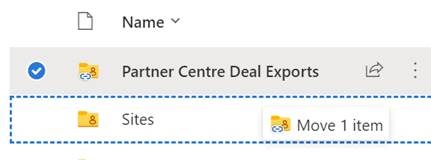
One solution would be to create a subfolder in OneDrive, called Sites (or similar), and after creating the shortcut to your latest Teams/SharePoint site, go to the root OneDrive folder and move your new shortcut – maybe renaming it too, so you can see what its parent site was (since the shortcut doesn’t make it clear what the source SharePoint site is) – you’d then have a Sites folder with lots of Shortcuts like Project Team – Documents etc.
Another side benefit of using shortcuts rather than Syncing offline, is that if you have multiple PCs – or feel like accessing OneDrive through a browser on a different machine altogether – you will always have access to the same collection of shortcuts, whereas the Sync offline capability is configured separately on each machine.
647 – Power of the Toys
 After Windows 95 appeared on 25 August 1995, one of the later updates was to release a bunch of tweaks and addons which had been built to enhance the OS, but not considered mainstream enough to include them in the box – the Windows 95 PowerToys. They included such amazing advances as a round clock, or tools to help manage the country of your modem. Some more history of the PowerToys was covered back in 2005 by veteran commentator Raymond Chen.
In 2019, the Power Toys name was dusted down for a new run at building addins to Windows, this time using an open source approach; the vision document lays out what the team wants to achieve, and they are steadily releasing new versions with fixes, improvements and new features. You can find Power Toys in the Microsoft Store, or if you like to do to prove your geek creds, you can go straight to GitHub and 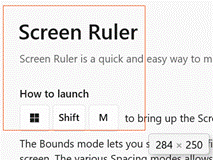 download it.
Recently, v0.62 came out and added some new functions, like a draggable box (Screen Ruler) which shows you the exact number of pixels between the start point and the mouse – useful if you’re looking to figure out how large a part of your screen is.
There’s  a neat Text Extractor tool which can take a selected area of an image and read the text within it straight to the clipboard – handy if you needed to get the serial number from a piece of electronics; take a picture on your mobile of the tiny writing on the back of the device, and quickly extract the details for pasting into some other app or website.
Other PowerToys of note include the Mouse Utilities, which can help find the mouse on screen – a double-tap of the CTRL key and you’ll get a temporary spotlight on the mouse, which can be super useful if you have multiple monitors and are not quite sure where the pointer has gone.
646 – Finding stuff in OneNote
![clip_image002[6]](/wp-content/uploads/2022/09/clip_image0026.png "clip_image002[6]") Many people ❤️ OneNote. It has evolved much over the ~20 years since it sprang from the “Scribbler” project at the turn of the century and was released in the Office 2003 wave, under the name which the developers disdainfully referred to as “Onay-no-tay”. A recent update to the OneNote strategy for Windows was covered in Tip #632.
Many people ❤️ OneNote. It has evolved much over the ~20 years since it sprang from the “Scribbler” project at the turn of the century and was released in the Office 2003 wave, under the name which the developers disdainfully referred to as “Onay-no-tay”. A recent update to the OneNote strategy for Windows was covered in Tip #632.
![clip_image004[4]](/wp-content/uploads/2022/09/clip_image0044.jpg "clip_image004[4]") There were other OneNote tips a few weeks previously, in Tip #617, including OneTastic, a great addin to the traditional desktop app – the
There were other OneNote tips a few weeks previously, in Tip #617, including OneTastic, a great addin to the traditional desktop app – the Metro Modern app never had an addin capability.
As well as powerful macro capabilities, which can do things like generate tables of contents or sort pages and other works in ways that the base app doesn’t offer, the OneTastic addin includes the OneCalendar application – also available to install separately – which lets you see which OneNote pages were edited on each day.
If you keep a note of every meeting, stored in different places – by topic, by customer etc – then this is invaluable when it comes to finding notes, as you can see what you last wrote on a given day.
Of course, OneNote has searching capability where you could look across notebooks for key words. There is the ability to Tag notes too, and you can search across notebooks for tagged content.
![clip_image006[4]](/wp-content/uploads/2022/09/clip_image0064.png "clip_image006[4]") A powerful yet somewhat hidden search capability in desktop OneNote is also available – you can press CTRL+F to search on a given page, or CTRL+E to run a simple query across multiple places, for where a particular word is mentioned.
A powerful yet somewhat hidden search capability in desktop OneNote is also available – you can press CTRL+F to search on a given page, or CTRL+E to run a simple query across multiple places, for where a particular word is mentioned.
![clip_image008[4]](/wp-content/uploads/2022/09/clip_image0084.png "clip_image008[4]") Look, however, at the “Pin Search Results (Alt+O)” option at the bottom – it opens search results in a pane to the side, and lets you sort by different criteria, e.g. date modified.
Look, however, at the “Pin Search Results (Alt+O)” option at the bottom – it opens search results in a pane to the side, and lets you sort by different criteria, e.g. date modified.
This ALT+O option can only be invoked from within existing search results, so if you want to find all your recent notes with a searched-for word, press CTRL+E to start, then ALT+O and search by date modified to see the results clustered by month.
645 – mobile ad blocking
The internet just wouldn’t work without the magic that is the Domain Name System, or DNS. If you are not a networking guru, this service is effectively the index of internet hosts (not just websites but also anything else that offers a service on the net), and is used to find the actual address that your computer will connect to, using a name as the reference.
If you put www.bbc.co.uk into your browser, that means you want to connect to a machine called www which belongs to the domain bbc.co.uk, and a beautiful yet simply elaborate system is used to figure out how to find that domain, get the address(es) of the actual host, and provide the info back to your device so you can connect to it and request information.
Being the one service to bind it all also means DNS is often the thing that brings everything to a halt, eg. if your home router can’t connect to your ISP’s DNS server, then you’re basically unable to communicate with the rest of the world as you’d be unable to find anything (unless you hard-code your machine to use a different DNS, like CloudFlare’s 1.1.1.1 or Google’s 8.8.8.8).
Futzing about with DNS can sometimes bring benefits, though. One such is that for the many webpages which contain embedded adverts or clickbait links, if your browser is unable to connect to the source of the advert, then it might just not show the content at all. On desktop computers, you could use ad blocker browser extensions of all kinds, but on mobile devices your choices are a bit more limited.
 If you rely on mobile apps like Google News or Microsoft Start, which show content within the app and have no ability to install 3rd party browser extensions, you may have to take more action to block out all the insidious and stupid adverts.
A true geek’s solution at home could be to set up a Pi-hole; a DNS server (traditionally targeted to run on a Raspberry Pi microcomputer, hence the name) which will filter out the garbage by deliberately blocking the URL-to-address resolution of thousands of known advertisers or clickbait providers. Great when you’re on the home network, but what about if on the move and connected to another network?
One possible solution here is to use a provider like NextDNS, which has been described as effectively running a Pi-hole in the cloud for you to use.
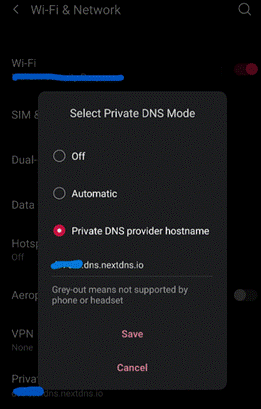 Free for up to 300,000 name resolutions (which sounds like a lot, but in reality, isn’t), it’s a snap to try out and if you sign up, you’ll be given simple instructions on how to plug it into your phone, tablet, desktop or even home router, so as to extend protection to every device connecting through that network.
 DNS queries would be routed to the NextDNS service and if the requested host is from one of a plethora of blocked sites – not just ads, but known trackers, phishing links etc too – then it will simply return a dud response as if the site doesn’t exist.
Your app or browser will either show you an empty box, maybe an inline error frame, or it may silently move on and display nothing at all. Just one small victory!
Using a service like this – others are available – can be switched on or off quickly (in Android, it takes the form of a single switch to configure a Private DNS with a URL unique to your account), and works regardless of whether you’re on Wi-Fi or mobile connectivity.
644 – Desktop, sans frontières

As a companion to last week’s tip on projecting your desktop to anotherPC, here’s another related but slightly inverted topic; using one machine to control multiple desktops. Previously, this would have been achieved by sharing means of input and output across multiple PCs with a KVM device – where you’d plug your keyboard, video and mouse for each machine into one box, and could switch between them somehow. There are other options today thankfully, that don’t result in a rat’s nest of cable.
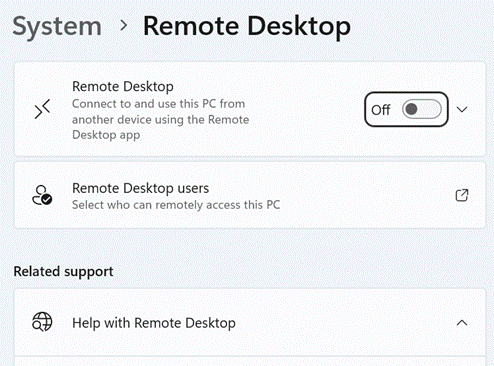 A simple way of using another PC from your main one is Remote Desktop – if you have a Windows PC that’s running Professional or Enterprise version, you can enable the ability to remotely connect to it from elsewhere, a feature that is not enabled by default. To switch it on, type remote at the Start menu and you’ll see the option to swtich it on.
Once enabled, and you’ve chosen which user accounts can access it, you will be able to fire up the Remote Desktop client on your other machine and connect to this one, using its name or IP address. For a quick way to kick if off, enter mstsc /v <name> at the Start menu on your main machine to establish the connection directly.
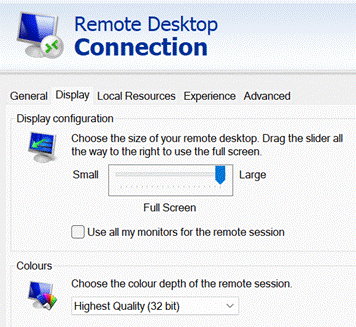 You’ll have the source PC in a window or full-screen, even supporting multiple monitors if the PC that is driving things has several screens, configured in the slightly old-fashioned looking Remote Desktop Connection app that’s used as the client to your remote session.
Remote Desktop has its roots in an old server version of Windows NT, with the idea that users’ desktops could be run and managed in a central location. With Remote Desktop running on a local network, you can get sound and high quality video directed from one PC to another, and even copy & paste between them – it’s a really good way of driving a corporate laptop from a PC with bigger screens and better keyboard & mouse.
Another way of dealing with the frontières (pas de jeux… did you know that Kate Bush sang that French backing vocal?) is to use a more up-to-date variant of the KVM switch.
 If you have multiple machines next to one another, there’s a great, free software KVM from an internal Microsoft project that release semi-experimental software to the outside, which lets you use the same keyboard & mouse to drive both – or multiple, up to 4 – machines. Install Mouse without Borders on each machine, connect them together using a shared password, and you’ll be able to just move your mouse between PCs, and the keyboard in front of you will operate whichever machine the mouse is pointing at.
The UI at set-up for MWB is very early 2000s but once you’ve got it running, it’s pretty much bulletproof – if you have two machines, the keyboard and mouse on both will stay active and be interchangeable… so if you had two laptops, you could use the software on either machine to control both. It’s knockout!