|
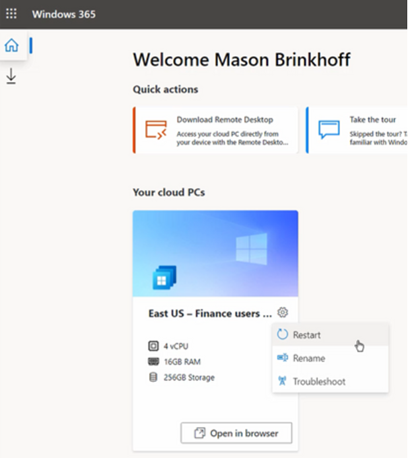
Windows 365 delivers a “Cloud PC” – literally a machine running Windows, which is remotely accessed by an end user and stays just like they left it when they disconnect, but is managed and secured centrally. As you may expect, there will be various SKUs depending on how capable you want it to be; Paul Thurrott opines that there will be many options, as “Microsoft is addicted to tiers”. General Availability is due on 2nd August; it’s sits on top of the existing
According to Mary Jo Foley, it will be reassuringly expensive so use cases will be carefully chosen rather than thinking everyone will sit at home running W365, accessing it over some ancient PC. For more details on machine sizing and the mechanics of provisioning and managing Windows 365, see here. Interesting examples given during the announcement were the remote government of Nunavut, or having hundreds of interns joining Microsoft for the summer; normally they’d come to the office and be given a PC but since they’re all at home, the cost and time burden of configuring the PCs and shipping them out would have been high. Instead, they’re given a virtual desktop via Windows 365 – created en masse in a few minutes – and they connect to that from whatever kind of device they already have at home. When their tenure is up, their access is removed and there’s no data left behind on their iPad/Mac/Chromebook or home PC. Maybe 2022 could finally be the Year of the Linux Desktop? For the rest of us; Windows 10 is still moving forward and the latest release due later this year has entered its latest stage of testing – Windows 10 21H2. And Windows 11 got another update to 22000.71, offering a variety of tweaks and polish. Even though Windows 10 is a modern OS with lots of great functionality, if you have already switched to Windows 11, using a machine with Win10 feels like going back in a time machine. |
588 – Inside(r) Windows 11
|
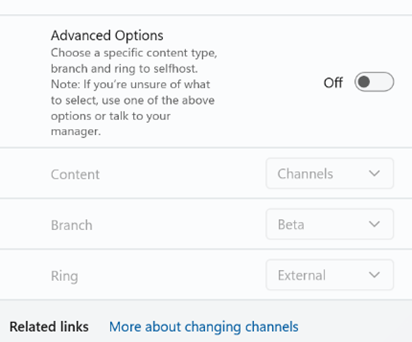
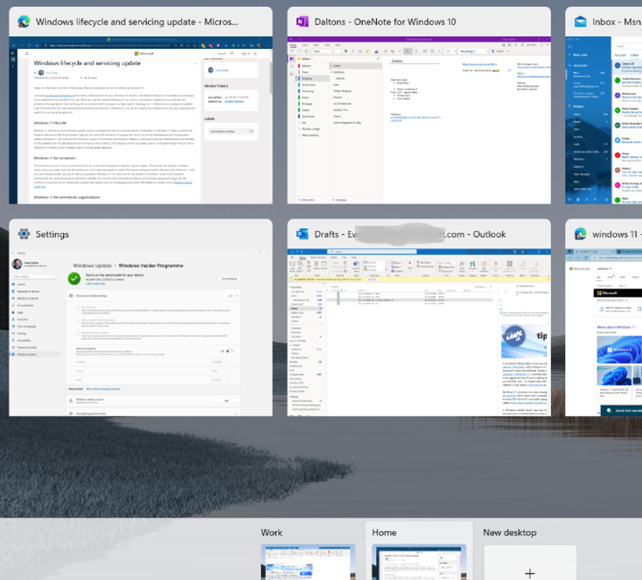
Microsoft people who set up their Insider enrolment as being associated with a @microsoft.com email address will see additional options around which Branch or Ring to use – if that’s you, then unless you’re technically self-sufficient and very comfortable with the level of pain you may feel, be careful. External users get to join Dev / Beta / Release preview Channel. Improved and updated functionality includes not just the fancy new Taskbar and Start menu – there are lots of areas where deeper integration with app functions and the OS itself will help to make it a slicker experience overall. The virtual desktop experience has been improved somewhat – you can set up multiple desktop environments, then easily switch and drag/drop apps between them, but there are improvements over the same feature in Windows 10 – you can set different backdrops/themes for each and they persist between machine reboots. Press WindowsKey+TAB to see the desktops and manage the apps – that’s the same key that used to control the Win 10 Timeline feature which has now been removed.
Some features that have been disclosed – like running Android Apps on Windows – will be delivered in later previews, and doubtless some that are present now will change before final release. There’s already been an update which adds more tweaks and fixes some bugs. A “Windows Health Check” app was released briefly which would report if your PC was suitable for Windows 11, but was short on information as to why a particular PC might not be upgradeable, so the team has pulled the app for now and instead points to the info on Windows 11 Specifications. At least while it’s in Dev channel, it is possible to get Win11 on machines which don’t meet the bar, though there is a warning that your experience may not be all there and some things won’t work. YMMV. |
587 – New Line please
|
As well as the QWERTY keyboard layout, a few things were carried over to the modern computer from the typewriter – the backspace and tab keys and the carriage return key. Purely mechanical typewriters had an end-of- Early computer systems aped the same approach of the line feed (ie the paper being shuffled up one line) and the carriage return (going back to the left side), as being separate activities and they were given specific control codes – so CR, LF and CR+LF are still things. For some time, consternation still applied as Windows considered that CR + LF needed to be noted to really start a new line, whereas the Unix fraternity simply thought that LF was all you needed. It is possible to hack the registry so Notepad acts Unixsy should you need it to. In most applications, if you want to start a new line, you’d just press Return or Enter (in effect, the same thing, though not always the case). Pedants would say that ENTER doesn’t mean you necessarily need a new line, you’re just committing some data you’ve typed, redolent of the old terminal where you might be submitting a form rather than typing in free text. Applications perform sometimes completely different actions when you press a modifier key like CTRL or ALT, and ENTER. In Word, CTRL+ENTER starts a new page, ALT+ENTER repeats the last typing action. In Outlook, CTRL+ENTER sends the current email and ALT+ENTER – like the same keystroke normally does when looking at a file in Windows Explorer – shows the properties of the current message. In Excel, CTRL+ENTER has some other meanings, notably it completes the entry of data into a cell, without moving the selection to the next cell along or to the line below (depending on config). SHIFT+CTRL+ENTER can be used to create a powerful but quite complex array formula. ALT+ENTER also has a useful trick for formatting text in-cell, alongside some tips to control cell text formatting.
Another way of editing text in an existing cell; select it and the text will be displayed in the formula bar, but only the first line, unless you have the formula bar expanded out, by clicking the down-arrow on the right.
|
586 – Pick Up Thy WordPress
|
The extended back story is that there were hundreds of employee blogs which had been published under the technet.microsoft.com and msdn.microsoft.com sites, both of which URLs could trace their birth back to the 1990s, and a project was underway to clean them up and rationalize somewhat. Initially, guidance to MS bloggers was (basically) “unless you’re an official blog, you have <nn months> to move your stuff elsewhere before it gets deleted.” Certainly, there was to be no new content after the cut-off date.
That guidance relented somewhat and content from relatively active blogs was migrated to the Microsoft Docs archive though taking a trip through the final posts from the ToW host blog, The Electric Wand, shows that lots of graphical content was not carried across – more of a lift & dump than a lift & shift. Blogging is a bit old-hat these days but lots of people do still maintain a blog to share stuff they think is interesting; see Scott Hanselman as one example. Anyway, the solution for Tip o’ the Week was to move to an external website – www.tipoweek.com – which is hosted in Azure and, like about a third of all websites, running under the content management system, WordPress.
For more tips on how best to get up and running with WP in Azure, see here.
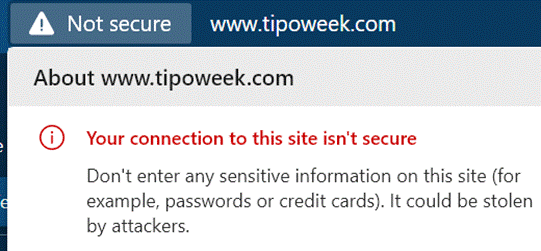
This has, in fact, been a niggling issue for a while, since Chrome (and Edge, given its diet of Chromium) instituted a policy of flagging any website that doesn’t use the secure HTTPS protocol & SSL by default. Secure Sockets Layer, if you’re not overly familiar with it, relies on a way of encrypting data travelling between two points, using a previously-generated pair of mathematically-linked digital keys. If you have one key, you can use it to encrypt data which can only be decrypted by the other key in the pair (ie you can’t even use the same key that encrypted the data to decrypt it again). Typically, one of these keys is publicly accessible and the other is kept private.
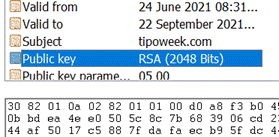
The whole public/private key encryption process has something of a computational overhead associated with it, but once we have established a secure connection, we could use a faster encryption technique for data sharing by using a single key that can both encrypt and decrypt the same data. In other words, if I go to a website that presents me a certificate specifically issued for that URL’s domain, I can be sure that the site handing out the cert is who they purport to be. This could be validated by me generating a random set of numbers, encrypting it with the public key and sending that to the site; it would decrypt the gobbledygook with the private key that only it has, and we now both have the same set of data that has been securely shared between us. That would form the symmetric key that we can use for the rest of the connection. For more detail on these kinds of topics, check out the Cryptography 101 podcast on Hanselminutes.
The trouble is, if you’re hosting a hobby or a community web site, paying for an SSL certificate might seem a bit of overkill; web hosting companies will try to bundle them into domain protection and other security features which might be no big deal for a commercial enterprise but a little stiff for a parish newsletter. Fortunately, there are alternatives, though they do need a bit of spade work to get up and running. Hanselman (yes, him again) discussed using an extension and an organisation called Let’s Encrypt, whose goal it is to make the web 100% secure. They have issued over 225 million SSL certs, and will generate 3-month-validity certificates free of charge, as an alternative to paying anything from $60-200 a year to a commercial issuer. With a bit of practice, it doesn’t take long to create and manage the certs and if you only need to do it 4 times a year, then it could be time well spent and money well saved.
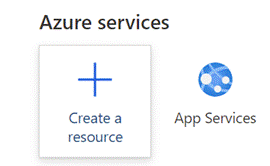
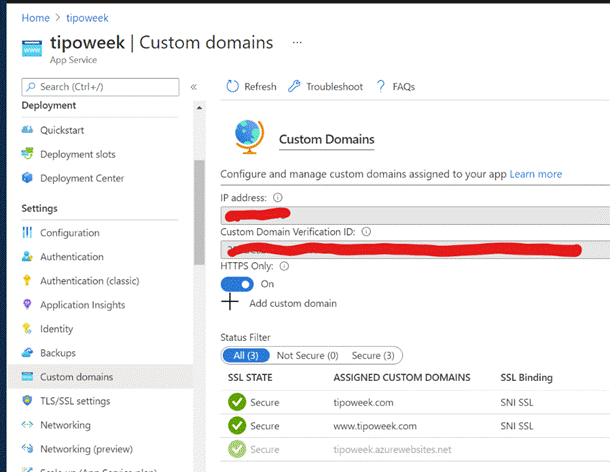
Once you have the certificate exported to a file, it’s a matter of a few clicks to import it into the Azure App Service that is running WordPress, set up the bindings appropriately, and you can then flick the switch to make the site only service up content over HTTPS.
|
585 – Heading to Viva
|
In the UK’s 1970s, Ford had the Fiesta (small), Escort (mid), Cortina (large), Capri (sporty) and Granada (executive). GM operated in mainland Europe as Opel (Kadett/Rekord/Monza/Senator etc) and in the UK, as Vauxhall (Chevette/Cavalier/Carlton etc). Brits of a certain age may fondly? remember the Escort-sized, everyman family car: the Vauxhall Viva. The announcement of the employee wellbeing platform, Microsoft Viva thus brought a misty-eyed moment of reflection for some…
The Insights-defined “Virtual Commute” and calendar-blocking Focus Time has been mentioned previously in ToW #577, but it’s had a new shot in the arm as well as announcements about forthcoming improvements, such as the ability for Teams to quieten notifications when you’re in a focus period, and quiet time when Teams and Outlook will shush pinging you outside of working hours. Now rolling out to Viva Insights is a set of mindfulness and meditation exercises curated from Headspace, who produce a load of online video as well as Netflix series and in-flight channels. See more about Headspace in Viva Insights, here. |
584 – Office Apps expansion
|
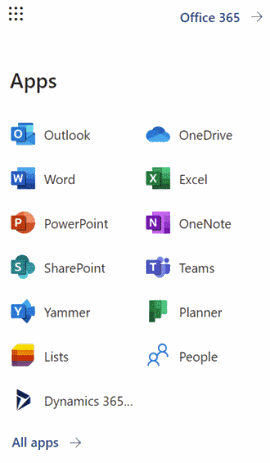
What you’ll see depends on what kind of subscription you have and what previews you might have opted into, as well as what apps may have been published by your subscription’s administrators (eg internal HR website or IT support desk sites could be listed there). To keep things interesting, you can also install most of these web apps as Progressive Web Apps on your PC – using Edge, go to the Settings “…” menu in the top right, and look for the Apps menu option. They will then appear in the Start menu, can be pinned to the Task Bar and run in their own discrete window, just like a “real” program would. One app which could roll back the years for a lot of people is Visio. Microsoft bought the diagramming software company at the turn of the century, for what was the largest acquisition to date – check out the list of other deals and see if you can remember many of those other $100M+ names… Microsoft Visio became a premium addition to the Microsoft Office suite, latterly being sold as an add-on like Project. The software has continued to evolve over the years and has its own band of fans who use it for mind mapping, flowcharting, network diagrams, room layouts and so much more. You can even build Power Automate workflows using Visio (see more here).
If you’d normally turn to PowerPoint to try to create graphical documents like flow diagrams or simple org charts, keep an eye out on the All Apps list to see when Visio makes an appearance, and give it a try. |
583 – Zooming PPT
|
Way back when, there were numerous product incubation groups in Microsoft, who tried out new features as addins or companion products; over time, most of them have disappeared or the prototype products they produced made their way into the mainstream (or just quietly went away). Innovation continues within the various engineering groups, of course, and some is curated in the Microsoft Garage. One OfficeLabs project that showed promise was pptPlex – an addin to PowerPoint that made it easy to create and present “non-linear” presentations, offering a kind of “Seadragon” type experience of zooming into content. The actual pptPlex software is long-gone but if you want a reminder of what it was like, or even to recall how funky Office 2007 looked, check out this video tutorial.
|
582 – Edgy Profile Switching
|
A feature which was added to the profile functionality was the ability for Edge to switch between them automatically – in other words, Edge would try to determine if you’re opening a site in the “wrong” profile, and it also lets you set the default on which profile should be used when you click an external link in an email or a document (other than in the browser itself). This not only changes how the site might be displayed, but also sets where the browser history is saved, and which set of cookies, cached usernames / passwords etc should be used… You could set that a specific profile should be used for “external” links; if set to “Work”, then all external links (from other apps) would open in that profile; automatic does a pretty good job but sometimes gets flummoxed by M365 sites like Sharepoint, which could mean clicking a link to a doc in Outlook will try to open it in your personal profile, and fail to authenticate (since you’d want it to use the work profile’s credentials). Similarly, if you had it set up to open links in whichever profile was last used or to hard-default to Work, then clicking a URL that you’d want to view in Personal might cross the streams. Fortunately, an unreleased feature could be just what you need in this scenario. There’s a still-experimental “flags” feature set that is part of both Google Chrome and Microsoft’s Chromium-based-Edge; different releases of each browser have a changing set of flags features which can be enabled if you know they’re there and are prepared that they might not work, or at least might not work in the same way as they eventually will. Many flags tweak how the browser operates under the covers and will never be noticeable by the average user; others enable features that are hidden by default or are still early in their development cycle.
|
581 – 21H1 is not a flu
|
There are few major visible changes in 21H1; it’s mostly an under-the-hood arrangement, with a few minor features involving things like having multiple Windows Hello capable web cameras (in case you decided to splash out on a better camera for your online meetings, to better highlight your carefully curated backdrop?) Even some of the latest Surface devices only have a 720P front-facing camera, so if you want to upgrade your visuals with a 1080P one, there are plenty available for not much outlay. There’s even a new Microsoft Modern Camera which might be great for Teams, but unfortunately doesn’t support Windows Hello. Maybe that one needs a reboot. A few legacy bits of technology have been removed from 21H1 – like the “original” Edge browser, ie the “Project Spartan” one that was launched with Windows 10 before being replaced with the Chromium-based version we enjoy today. For a preview of what is next for the block, check out the list of deprecated features – things that are still there but being tolerated rather than enhanced. In other Windows news, the previously-announced slimmed-down version, called Windows 10X, is not going to happen any time soon, if at all. Where is Surface Neo now? Having tried to “simplify” Windows previously with WinRT and then Windows S Mode, the latest turn is to do a “Cairo” by deciding to bring some of the planned features into a different release schedule, ie the mainstream one. The next frontier for visible Windows enhancements might be the 21H2 update which logic would suggest should be with us midway through the fourth quarter of 2021. Reportedly codenamed “Sun Valley” and bringing a fresh new UI sheen, this next big update is expected to be announced soon – maybe something else is to follow? |
580 – Let’s Lens
|
The “Office Lens” app was originally produced for Windows Phone before being ported to iOS and Android. Later, a PC version came along but with the death of Windows Phone it hardly seemed worth keeping going, since scanning docs and business cards etc is so much easier from a handheld device. As a result, Office Lens on the PC is now gone – dispatched at the end of 2020; if you had installed it previously, you could still use some of its functionality, though the smarter online services that sat behind it are no longer available.
There are tweaks to the algorithms used to detect edges of documents when scanning pages or turning a receipt snapped at an angle into a square-on image. It’s not always perfect, but you can drag the apices to tidy up the process, and save pages as images on their own or multiple pages of a document into a single PDF file, straight to OneDrive or local on the phone.
Similarly, barcode reading just brings back the number, whereas some other apps will provide a bit more context – Lightning QR Reader for Android, for example, can read any text encoded in a QR code and will also give some more details for barcodes, like decoding ISBN codes on books to let you search for more info on that specific title. Still, Lens provides a neat & quick solution for scanning or capturing all kinds of info.
|











![clip_image002[4] clip_image002[4]](/wp-content/uploads/2021/05/clip_image0024_thumb.jpg)
![clip_image004[4] clip_image004[4]](/wp-content/uploads/2021/05/clip_image0044_thumb.gif)


