|
As detailed in ToW #443, If you’re looking for the shortcut name for your favourite app, there’s a somewhat lengthy process to find out what it is, but at least you only need to do it once…
Try the following:
|
Category: Windows
 there are ways of running Modern Windows apps from a script, command line or maybe just from the WindowsKey+R Run prompt – so you don’t need to use the mouse or your finger to activate them.
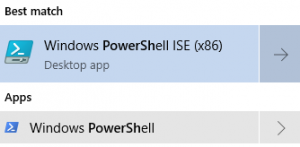
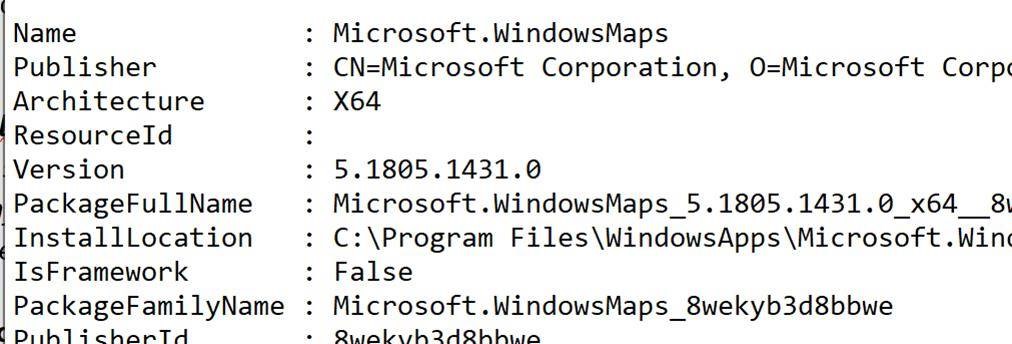
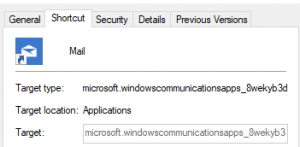 Now, you might be able to figure out from the Name line in the text, which app the following details pertain to, but it’s not always obvious – take the Mail app, for example … if you have it pinned to the Start menu and then drag/drop it onto your desktop to create a shortcut, you can see the target (which is the same as the PackageFamilyName attribute in the text file) is a bit more opaque…
Tip o’ the Week 444 – Computer! Computer!? Hello Computer?!?
|
If you’re an Amazon Echo or Sonos One* user, you’ll already be familiar with barking orders at an inanimate object. If you’re tired of shouting ALEXA… ALEXA!!!, then you can even change the “Wake Word” on the Amazon devices – but not yet others – so you can say other things instead. Handy if your daughter or your dog is called Alexa.
Anyway, who can pass up the opportunity to pretend to be Mr Scott?
Anyway, recent announcements saw the preview of Cortana joining hands with Alexa and allowing access both from Windows 10 PCs to (some) Alexa functionality, and US-based Amazon users can access Cortana stuff through Alexa-enabled devices. On your PC, Voice-searching on the PC using Cortana can be a pretty handy thing to do, as there are plenty of phrases that will give you a direct response rather than take you to a website. It’s quicker to press the WindowsKey+C option than to say “Hey Cortana”, and you could ask stuff like M-S-F-T, what’s the time in New York, what’s the news, what’s the weather, convert pound to dollar and so on.
You’ll also need to grant permission to share info between the two services, and now be able to do things like add items to your Amazon shopping list from within the Cortana UI, or in the reverse, query your Office 365 calendar from your Echo smart speaker. YMMV at the moment, but it’ll surely get more integrated in time. Right now, you can’t stream music through Alexa to the PC (or, it seems, control smart home devices that work through Alexa, though that could be a regional thing for the moment) – and if you’ve a UK-based Amazon account, you can’t add the Cortana Skill to your Alexa account, so there’s no option of querying Cortana from the Echo, yet. US users can, though. Still, Normal People don’t have electronics listening to everything they say… so what if a few nerds need to put up with some temporary friction from having two competing assistants try to work together? Click-Over-bzzzt. |


Tip o’ the Week 443 – Starting modern apps
Apps pinned to taskbar The taskbar in Windows obviously shows you what’s currently running, but can also be used to pin frequently accessed apps or – by default at least – those that Windows thinks should be frequent (Edge, Store, etc – right-click on them to unpin if you disagree). You’ll see a highlight line under the apps that are running, so those without the line are simply pinned there. If you start typing the name of a favourite app at the Start menu, If you drag the pinned apps around, they’ll stay in that position relative to each other, and new apps will always start to the right (or underneath, if you use a vertical taskbar, as you really should). Now, if you press WindowsKey+number, you’ll jump to the app that is n along the line, and if that app isn’t running, then Windows will start it. So in the picture above, pressing WindowsKey+2 would start Edge, or WindowsKey+3 would bring Outlook to the fore. Shortcut to desktop
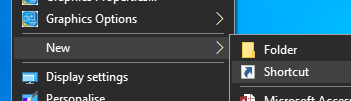
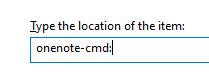
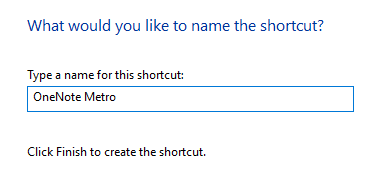
Assuming your Start menu isn’t full screen then you’ll be able to drag icons or tiles from the menu to the Desktop, and if you right-click the shortcut and look at Properties, you’ll see a Shortcut key: This method differs from the taskbar one above, because each press of the shortcut you set might start a new instance of the app (if it supports that) – which may or may not be desirable. If you end up with several windows of OneNote, for example, you could cycle through them by repeatedly pressing the appropriate WindowsKey+n as above. Keep on Running There’s no better mark of being a real PC deity than by launching your apps through running the executable name… you know the drill? WindowsKey+R to get the Run dialog (it’s so much faster than pressing Start), then enter the app’s real name and you’re off to the races. winword, excel, calc, notepad… they’re for novices. The genuine hardcases might even dive into the (old fashioned, obvs) Control Panel applets like ncpa.cpl rather than navigating umpteen clicks. Looking at the shortcut to OneNote’s modern app above, though, it’s clear there isn’t a simple executable to run – onenote will launch the on-life-support OneNote 2016 version. Many modern apps do, however, let you launch them from the Run dialog by entering a name with “:” at the end… Examples include:
|
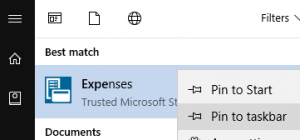 then right-click on it in the list, you can choose to pin it. So far, so good.
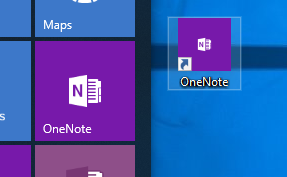 You could try an old-
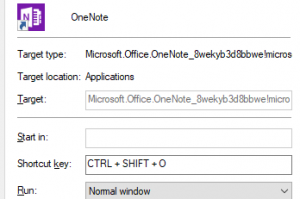 option… just press some key sequence that makes sense to you and press OK to save.
Tip o’ the Week 442 – Whose phone? Your phone…
|
If you’re an Android user, and a Windows Insider, then you can get a preview version of the Your Phone app for the PC; after starting the app on the The Your Phone app actually uses a Wi-Fi connection on the phone to sync content with the PC – they don’t need to be on the same network but they do need to be able to talk to the back end service that coordinates things. For now, it just does photos (and only on Android), but in time, more services will be added. See more details here. And here.
Some features of Your Phone will be tied to particular preview versions of Windows 10 – such as the recent latest build, 17228. |


Tip o’ the Week 441 – OneNote updates again
|
As everyone knows Tips talking about OneNote include coverage of the Modern App version, on ToW’s #320, #386, #427 among others. The tl;dr version is that OneNote 2016 = great desktop app, OneNote metro/store/modern/whatev = not so functional but simpler and getting better, with a consistent UI across Windows, Mac, mobile & web. The OneNote team has basically said the desktop version is on life support and all new function development effort is going into the Store app version. Here’s a summary of their differences.
You might see that the Microsoft Store app itself has had a bit of an overhaul, too…
If you’re a OneNote 2016 desktop user, why not set yourself a challenge and try switching to the OneNote for Windows 10 version for a week? Both versions can happily coexist and access the same data files, so you won’t lose any data and can easily switch back and forth between them, even running them both at the same time and perhaps with different notebooks open. To change the default version of OneNote, see here. |


Tip o’ the Week 439 – Go! Go! Go!
|
But if you haven’t been hiding under a rock for a few weeks, you may have seen news about the Microsoft Surface Go being announced. Is it an “iPad Killer”? No. The tablet market is pretty saturated, and even if potential buyers of one device flock to the Go, it’s not likely to be kryptonite to the other. It’s probably more likely that the Go exists to appeal to potentially erstwhile Chromebook buyers, in sectors like education, or as companion device to existing Windows fans in the same way that some people use a tablet as a PC alternative when they travel. Given its performance, the Surface Go is likely to be a useful 2nd machine for many PC users, rather than an alternative primary device – though some early reviews seem to make it sound pretty good. MJF reckons many variants (LTE, 8GB RAM/256GB SSD) will be forthcoming, so maybe the mix will change in time.
Oh well, start saving up now – or wait until late August and decide (after playing with it in the flesh – in store, maybe?) if it’s the right thing for you. |


Tip o’ the Week 433 – You can have the power
|
As PC systems evolved over time, and Windows got reliable to the extent that you don’t need to reboot every day or even every week (Windows 7, realistically), the needs of power management also changed as the shift from mains-powered desktop to Lithium-Ion battery laptops gathered pace. Sleep states defined what goes on under the covers in as a PC goes into a different power mode – whether that’s automatic (because of timing, or because the battery level gets to a particular point) or if the user chooses to sleep/hibernate, hits the power button, closes the laptop lid etc. Most PCs could go into a low-power (S3) standby state, where the CPU was shut down but the contents of memory were preserved (still consuming power, but a lot less of it), so the machine can be woken up quickly and carry on as before. After some period in standby or at a point where the battery was about to run out, the PC might even wake up and dump the memory contents to a file on disk, then shut down completely (called hibernating), meaning a subsequent wake-up would take a few seconds longer as it would need to resume from hibernate, since the contents of that huge memory file will be read back in before continuing. Windows 8 introduced the idea of “Connected Standby”, meaning that even when a machine was in a low-power state – to all intents, asleep, but with the CPU still able to run in a restricted manner – the system can maintain a wireless connection that means apps could remain up to date. This was a feature that only applied to modern/Store apps, allowing for synchronising contents in the background while the PC was asleep, so that when it wakes up, the app data and live tiles on the Start screen would be up to date. As both hardware and software platforms have improved, the connected standby idea morphed into Windows 10’s “modern standby”. ToW 335 talked about managing battery states in Windows 10, and briefly discussed using a powerful tool to tweak the way your PC handles standby states. Powercfg is a command line tool, run from an elevated command prompt (ie To check and see what power modes your PC can handle, try running powercfg /a; a more traditional, ACPI desktop will You can get some detailed reporting on how your PC is behaving, by using powercfg with one of the following command line arguments: /energy, /batteryreport, /sleepstudy, /srumutil, /systemsleepdiagnostics or /systempowerreport. SKYPE FOR SIGN OUT, OUTLOOK FOR DISCONNECT Now, one side-effect of this S0 low power mode is that Windows 10 PCs will likely enter that mode shortly after the screen is locked (via timeout or by WindowsKey+L). Non-modern apps (ie Win32/x64 apps like Outlook, Skype for Business etc) won’t know how to deal with this effectively disconnected state, and will drop their connection. This means that when you unlock a plugged-in laptop after being away for a while, you’ll see that Skype for Business is signed out, and Outlook might tell you it’s lost the connection to the server (and then immediately re-connects). If you find this annoying and would rather lengthen the time that elapses when your machine is plugged in, before it goes to connected standby mode, then powercfg to the rescue! From an elevated command prompt, run:
Using the flag /setdcvalueindex instead will tweak the behaviour when on battery only. The value in the first command is the number of seconds before the screen will timeout when locked, so substitute 3600 seconds (ie 60 minutes) for a value of your choice. For further details of what Powercfg can do, see here. |


Tip o’ the Week 431 – Hiding your name
|
Paranoid Microsoftie Andrew Brook-Holmes went digging to see how to stop this behaviour, and thus inspired this tip. To switch off the display of your name on the login In the right-hand pane, you’ll see a long list of policy items, many of which won’t be configured but could conceivably be; there are options to hide or show elements on the login screen, but in this case we’re going to try not showing the last named user at all.
Double-clock on the Interactive logon: Don’t display last signed-in, and you’ll have a simple Enable/Disable choice – in this case, we want to use a double negative – enable the fact that we’re not displaying. If you’d like a more detailed explanation of what it does, there’s another tab on the dialog showing exactly that. Now if you lock your screen (WindowsKey+L), you’ll see t If you use Windows Hello to sign in with your face, then you won’t need to do anything except present your boat race to the camera. If you decide you’d rather go back to normal for easier sign-in, just reverse the process you’ve done above.
Press WindowsKey+R – enter regedit – navigate to… HKEY_LOCAL_MACHINE\SOFTWARE\Microsoft\Windows\CurrentVersion\Policies\System …and set the value of dontdisplaylastusername to 1. Log out to apply the change. |


Tip o’ the Week 430 – developers, developers, developers
|
Apple has its WWDC in California every year (for a long time, in San Francisco), and at its peak was a quasi-religious experience for the faithful. Other similar keynotes sometimes caused deep soul searching and gnashing of teeth. The Microsoft one used to be the PDC, until the upcoming launch of Windows 8 meant it was time to try to win the hearts & minds of app developers, so //build/ became rooted in California in the hope that the groovy kids would build their apps on Windows and Windows Phone. Now that ship has largely sailed, it’s gone back up to the Pacific North West, with the focus more on other areas.
With Azure Sphere, there’s a way for developers to build secure and highly functional ways to process data on-board and communicate with devices, so they can concentrate more on what their apps do, and on the data, less on managing the “things” which generate it. For all of the breakouts at Build and the keynotes on-demand, see here. Back in the non-cloud city, Google has adopted a similar developer ra-ra method, with its Google I/O conference also taking place in and around San Francisco, also (like WWDC and Build) formerly at Moscone. It happened this past week, too. Like everyone else, some major announcements and some knock-em dead demos are reserved for the attendees to get buzzed on, generating plenty of external coverage and crafting an image around how innovative and forward thinking the company is. Google Duplex, shown this week to gasps from the crowd, looks like a great way of avoiding dealing with ordinary people any more, a point picked up by one writer who called it “selfish”. Does a reliance on barking orders at robot assistants and the increasing sophistication of AI in bots and so on, mean the beginning of the end for politeness and to the service industry? A topic for further consideration, surely. |


Tip o’ the Week 429 – Windows 10 April 2018 Update
|
Windows watchers have been talking about this April update for months, as there are many notable updates within, some covered only recently in ToW (425 and 428). As well as Timeline, the Nearby Sharing
You can also right-click on files in Windows Explorer to Share them the same way, and it’s likely to appear in the Share experience of other apps too.
The next-to-useless Windows 10 option previously known as Quiet Hours (as per ToW 414), has been given a revamp and a rename, now known as Focus Assist. The intent is not only to silence your machine at times when you don’t need to know stuff (who’s ever been woken at 6am to be reminded that it’s some random LinkedIn person’s birthday, or that there’s an all-day event in your calendar?), but also to control the blizzard of “toast” notifications that modern apps may otherwise throw at you. Note – traditional apps, like Outlook, can still throw up notifications, but if your machine is in a Focus assist mode For a full breakdown of everything else that’s new in the April update, see here. |


