|
There’s also the
Eventually, the new Edge will adopt some of the functionality that legacy Edge had when it comes to annotating web pages with ink, adding notes to pages etc – but the forthcoming web capture is a first step. Note – if you use Mouse Without Borders, it already has the CTRL+SHIFT+S keyboard combo in use, so you’ll need to change that… |
Category: OneNote
Tip o’ the Week 483 – mobile OCR and Office
|
Near OCR functionality is also pervading the slew of freely available Office apps for Android tablets, phones and even Chromebooks, and similar versions for iPad and iPhone. A recent addition to the iOS version of Excel is the ability to scan a table of printed data and use OCR plus a bit of tweaking, to import the data into the spreadsheet. See more here. The same functionality was first made available on Android a couple of months earlier …
Then the OCR goes to work and tries to lay out the data as closely as possible to its source – obviously, your accuracy will be improved by having a well-lit and clear original document, and you’ll get to tweak the contents in context of seeing the OCR’d data and the scan at the same time, before committing to insert it. |
Tip o’ the Week 451 – OneNote auto-listing
 Here’s a quick tip in OneNote – both the full-fat desktop client and the modern app version – which was inspired either through PEBKAC type unexpected clickery or maybe an Office update that inadvertently switched something off. A common feature stopped working, and it caused a serious dent in productivity… Here’s a quick tip in OneNote – both the full-fat desktop client and the modern app version – which was inspired either through PEBKAC type unexpected clickery or maybe an Office update that inadvertently switched something off. A common feature stopped working, and it caused a serious dent in productivity…
Despite the two parallel PC versions of OneNote – which have been covered previously in ToWs #441, #427, #386, #320, et al – offering a good chunk of similar functionality to each other, there are still quite a few areas where the old desktop x86 version wins through. Add-in support is available in the 2016 variant, for example, so you can run OneTastic (and in particular, OneCalendar, which is immensely helpful if you use many notebooks and take a lot of notes throughout your week).
Search in the desktop OneNote is more powerful, too – CTRL-F takes you to the search box, CTRL-E expands your search, but the most powerful and probably least used is to press ALT-O when you have search results from the CTRL-E dialog; it will order them by the date of the page update… helping to filter out current vs obsolete info.
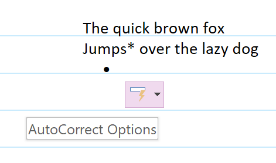
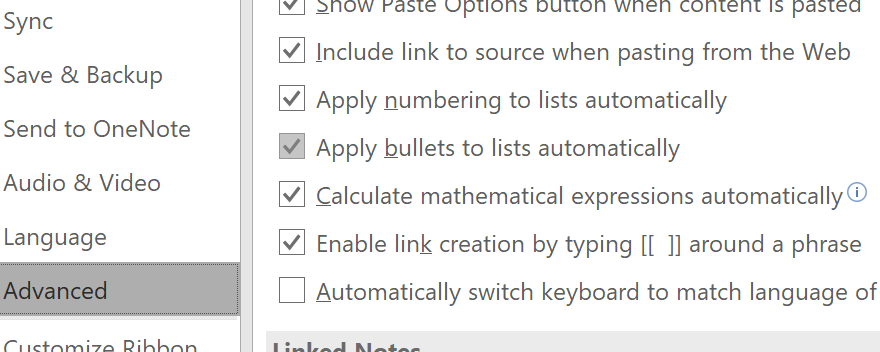
Bullet lists & indentations (sounds like a Muse song) Did you know that, in both OneNote versions, if you’re typing notes and press the asterisk or dash key at the start of a new line, and then the space bar, it automatically turns your text into a bulleted list? Asterisks in the middle of a text block are ignored; it’s only seen as an auto-correct function if on a new line. Just hit enter after you’ve started typing to add another new bullet or hit enter at the beginning of new bullet to finish the list. TAB and SHIFT-TAB lets you indent and un-indent a bulleted line. It doesn’t sound all that revolutionary, but if you’re typing notes during a phone call, it can make all the difference between keeping up or missing discussion points as you fish around with the mouse looking to click the toolbar. If you’re used to it and it gets switched off, it’s a real pain. The same kind of functionality exists in Word and Outlook too, but now and again it does get in the way – if you’re marking a block of text* that you then want to expand on later without auto-bulleting, for example. * The simplest way to get an asterisk or dash at the start of a new line is to quickly press Undo – CTRL-Z – as soon as the indentation with the bullet happens, and you’ll be reverted to simply having the character at the start of the line. To enable or disable the automatic list features on desktop OneNote, go into Options and look under Advanced…
There doesn’t appear to be any way of disabling the feature on the Modern App (which you can start by running onenote-cmd: at the Win+R box, if you read ToW #445 and #443) – maybe that’s a good thing, preventing the user from harming their own productivity… |
Tip o’ the Week 443 – Starting modern apps
Apps pinned to taskbar The taskbar in Windows obviously shows you what’s currently running, but can also be used to pin frequently accessed apps or – by default at least – those that Windows thinks should be frequent (Edge, Store, etc – right-click on them to unpin if you disagree). You’ll see a highlight line under the apps that are running, so those without the line are simply pinned there. If you start typing the name of a favourite app at the Start menu, If you drag the pinned apps around, they’ll stay in that position relative to each other, and new apps will always start to the right (or underneath, if you use a vertical taskbar, as you really should). Now, if you press WindowsKey+number, you’ll jump to the app that is n along the line, and if that app isn’t running, then Windows will start it. So in the picture above, pressing WindowsKey+2 would start Edge, or WindowsKey+3 would bring Outlook to the fore. Shortcut to desktop
Assuming your Start menu isn’t full screen then you’ll be able to drag icons or tiles from the menu to the Desktop, and if you right-click the shortcut and look at Properties, you’ll see a Shortcut key: This method differs from the taskbar one above, because each press of the shortcut you set might start a new instance of the app (if it supports that) – which may or may not be desirable. If you end up with several windows of OneNote, for example, you could cycle through them by repeatedly pressing the appropriate WindowsKey+n as above. Keep on Running There’s no better mark of being a real PC deity than by launching your apps through running the executable name… you know the drill? WindowsKey+R to get the Run dialog (it’s so much faster than pressing Start), then enter the app’s real name and you’re off to the races. winword, excel, calc, notepad… they’re for novices. The genuine hardcases might even dive into the (old fashioned, obvs) Control Panel applets like ncpa.cpl rather than navigating umpteen clicks. Looking at the shortcut to OneNote’s modern app above, though, it’s clear there isn’t a simple executable to run – onenote will launch the on-life-support OneNote 2016 version. Many modern apps do, however, let you launch them from the Run dialog by entering a name with “:” at the end… Examples include:
|
Tip o’ the Week 441 – OneNote updates again
|
Tips talking about OneNote include coverage of the Modern App version, on ToW’s #320, #386, #427 among others. The tl;dr version is that OneNote 2016 = great desktop app, OneNote metro/store/modern/whatev = not so functional but simpler and getting better, with a consistent UI across Windows, Mac, mobile & web. The OneNote team has basically said the desktop version is on life support and all new function development effort is going into the Store app version. Here’s a summary of their differences.
You might see that the Microsoft Store app itself has had a bit of an overhaul, too…
If you’re a OneNote 2016 desktop user, why not set yourself a challenge and try switching to the OneNote for Windows 10 version for a week? Both versions can happily coexist and access the same data files, so you won’t lose any data and can easily switch back and forth between them, even running them both at the same time and perhaps with different notebooks open. To change the default version of OneNote, see here. |
Tip o’ the Week 427 – OneNote roadmap update
|
Talking about OneNote can be confusing, though, as there are the two PC versions – OneNote 2016, the Win32 app that’s evolved ever since the first version shipped as part of Office 2003, and the shiny new codebase that is OneNote for Windows 10, the Store app which also shares a lot of its UX with the Mac, mobile and web versions. Differences are explained here. Major users of OneNote may have noticed that over the last couple of years, the traditional Windows app hasn’t received a whole lot of new functionality, but the Store version has had regular updates with extra features… though it is a much simpler app anyway, so there’s more to improve. The Recently, the OneNote team announced that there will be no further development of the traditional OneNote 2016 application, and that it won’t be installed by default in the next iteration of Office (though it will still be available as an option, in case you can’t live without it). New features are planned for the Store version – like support for tags, and what looks to To get the latest version of the OneNote app, first check it’s up to date, or join the Office Insiders program. Windows Insiders Paul Thurrott – an unashamed fan of the OneNote for Windows 10 app, preferring it to its elder sibling – also reported on the news. Paul points out that the UWP version has better support for ink, that syncing is faster, performance is better etc. Tech Republic has some further commentary too. To keep up with other news on OneNote, you could do well to follow William Devereux from the OneNote team on Twitter, as recommended by Windows Central’s “50 influencers” article. |
Tip o’ the Week 396 – Handling dates in Office apps
|
In Outlook, any time there’s a date field (like when you’re setting a reminder, or In some date fields (like an appointment start time), if you say “4 days” then press enter or TAB, it will evaluate the new date; if you return and put “4 days” again, it may add those extra days to the last date. Try a few other things like “next Christmas”, “3rd Sunday in November”, “2mo” , “7d” or some special days – there are some surprising ones there, like “Lincoln’s birthday”, and other events with static dates … though nothing that might change the actual date from year to year (like Easter, or Thanksgiving).
Another way might be to insert the current date or time into the text: to do so, press SHIFT-ALT-D, or SHIFT-ALT-T for the current time, or SHIFT-ALT-F for the current date and time. The last one is really handy if you’re taking notes about a phone call, and want to quickly note the time that your insurance company said that everything was all fine, or when you started the indefinite call to the airline. The same shortcuts apply to the desktop OneNote 2016 application and also the OneNote store app.
Since Outlook uses Word as its text editor behind the scenes, the same shortcut keys will also insert date fields into the text of an Outlook email. |
Tip o’ the Week 393 – Searching in OneNote
|
Tip o’ the Week ❤ OneNote. Both the full-fat trad Windows app version (OneNote 2016), If you’re using the regular OneNote 2016 application, and go to search content (by entering the search
Referring to this option as “Pin” may make you think it’s a bit more permanent (such as pinning to taskbar or Start, or pinning to a menu somewhere), but it’s There’s no obvious equivalent of this search granularity in the OneNote store app. ☹ |

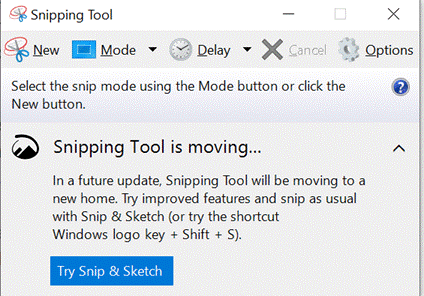

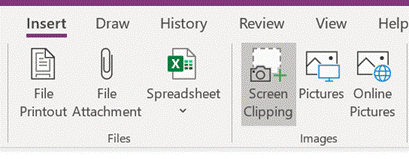


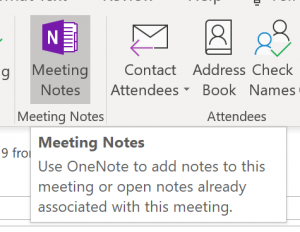 A simpler and more useful feature for many is the ability to grab the contents and context of a meeting request from your Outlook calendar – so you can take notes during a phone call or a meeting, with all the text in the invite, names and email addresses of attendees etc. Can’t do that with
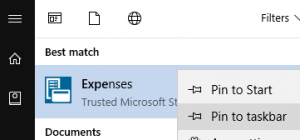 then right-click on it in the list, you can choose to pin it. So far, so good.
 You could try an old-
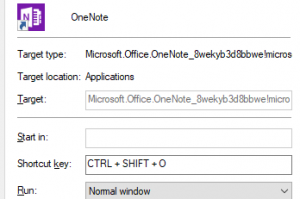 option… just press some key sequence that makes sense to you and press OK to save.


 and the Store
 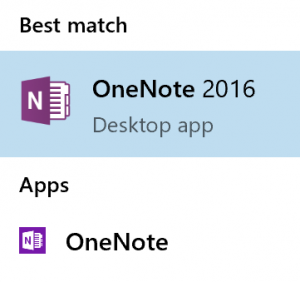 (just “
 term into the box on the top right, maybe by
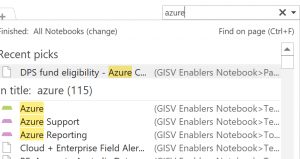 just pressing CTRL+E to jump straight to it), you may find that the results you get include a lot of old content which isn’t all that easy to parse – the name of the notebook occupies much of the column showing the location of the matching page or section, there’s no date of last update or any means of sorting – so it’s hard to know what’s recent and what might be years old.
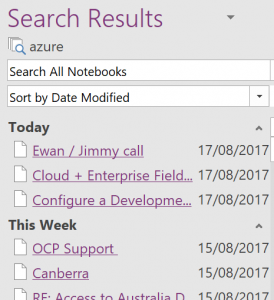
 If you click on “Pin Search Results” at the very bottom of the results list, or press ALT-O, then you’ll see the results appearing in a pane to the right of the OneNote window, where you can change sorting and filtering options, and see the date the pages were last modified.
 as easy to dismiss the results pane as it is to invoke it in the first place – just click the X in the top right of the window pane, or the close option on the drop down arrow which also lets you resize the pane or even move/undock it from the main Outlook window altogether.


