|
There’s supposedly a lot that your choice of profile picture says about you. There’s a tabloid version (akin to the “What Your Horoscope Says About Your Pet” style nonsense more often to be found on the Edge browser homepage). There are some more scientific resources with views on what people think when they see your picture, and some hints on how to choose the right one. Some fun examples of what not to do could be illuminating. Facing left-to-right is supposedly best – maybe it makes you look more powerful, or simply, when your photo is on the left side of a load of content (like the details of your LinkedIn profile), then it’s better to be looking toward it rather than away to the left… Similarly, good advice is to stick to a head-and-shoulders shot, or at least waist-up – if your profile pic is your visible brand on LinkedIn and Office 365, then there’s no point in using a photo that shows your face as too small for anyone to recognise you. How to save photos from Office 365 This tip will probably become obsolete at some future update on O365, such is the march of innovation, but it deals with how you can get to the profile photo that someone else in your organisation has published. The inspiration came from a departmental admin who was trying to build a nice org chart, and had to repeatedly nag members of the team to share a photo of themselves. It can also prove handy when someone has posted a photo of themselves that’s too small to see – if you can open the photo up in a browser, it can show you the original full-resolution image, and you can always use the browser to zoom in, too.
An even quicker way might be to go to https://www.office.com/search/people?auth=2&q=<name> and follow the q= with the name you want to search for. When you have the results of the search, hover over the thumbnail of the person’s profile pic, and in the pop-up that appears, right-click on the slightly larger image. If you’re using classic Edge, then you’ll be able to save the image locally, but if you’re on Chrome or the new Edge Dev browser, then you’ll easily be able to copy a link to it – paste that into a new browser tab, and you’ll get the full-size version of the profile pic so you can zoom in, save it, draw moustaches on it with your Surface Pen and so on. |
Category: Office


Tip o’ the Week 483 – mobile OCR and Office
|
Near OCR functionality is also pervading the slew of freely available Office apps for Android tablets, phones and even Chromebooks, and similar versions for iPad and iPhone. A recent addition to the iOS version of Excel is the ability to scan a table of printed data and use OCR plus a bit of tweaking, to import the data into the spreadsheet. See more here. The same functionality was first made available on Android a couple of months earlier …
Then the OCR goes to work and tries to lay out the data as closely as possible to its source – obviously, your accuracy will be improved by having a well-lit and clear original document, and you’ll get to tweak the contents in context of seeing the OCR’d data and the scan at the same time, before committing to insert it. |


Tip o’ the Week 482 – Paste History
|
![clip_image002[4]](https://tipoweek.azurewebsites.net/wp-content/uploads/2019/05/clip_image0024-1.gif "clip_image002[4]")
![clip_image004[4]](https://tipoweek.azurewebsites.net/wp-content/uploads/2019/05/clip_image0044.jpg "clip_image004[4]")
![clip_image006[4]](https://tipoweek.azurewebsites.net/wp-content/uploads/2019/05/clip_image0064-1.gif "clip_image006[4]")
![clip_image008[4]](https://tipoweek.azurewebsites.net/wp-content/uploads/2019/05/clip_image0084.gif "clip_image008[4]")
Tip o’ the Week 478 – O365 and Windows’ Mail and Calendar
|
The genesis of Outlook on the phone as we know it today, is perhaps the acquisition of a company called Accompli 5 years ago, and a great deal of refinement and effort since.
e.g. Hit WindowsKey+R then enter outlookcal: and you’ll jump straight into the Calendar app. Both have come a very long way – at first release, they were pretty basic, but they’re now so well featured that most people could use them as their primary email and calendar apps, most of the time.
Go into the settings on the Calendar app, then Manage accounts, then + Add account… or just Win+R then outlookaccounts: and you’ll be able to add your Office 365 account onto both Mail and Calendar. If you have multiple calendars connected – like home Office 365, Gmail or Outllook.com accounts as well as your corporate one – you could selectively enable them for display in the app, and the set of calendars that are shown will also appear in the agenda if you click on the clock / date on your taskbar. You can also see your upcoming appointments in a live tile on the Start menu, if you still use such things.
You’ll also see your next appointment on the Windows Lock Screen if you have it enabled under Lock screen settings. You may want to go into the Notifications & actions settings page (just press Start and begin typing notif…) and turning off Calendar notifications, or you’ll get a blizzard of reminders from desktop Outlook and the Calendar app. |


Tip o’ the Week 474 – Parse and Flow
|
Learn how to build Flows here. Many of the templates for Flow are quite esoteric – when a tweet on a particular topic appears, write a log to a Sharepoint site and send a notification to a Teams channel, that kind of thing. But there are plenty of really useful connectors that can be combined in time-saving ways; here’s a really handy way of bringing traditional data sources into the modern era: an email parser, called Parserr. After signing up with Parserr – free if you only need a few uses per month – you can then crack open mail that is consistent in format and contains some information you’d like to extract and use elsewhere, such as confirmation of an appointment or maybe a travel booking. In practice, you get given an inbox with a unique email address within Parserr and you’d set up a rule in Office365 or Outlook.com to send mails that meet some inbox rule to that address, where it would be parsed for you and key data fields then sent back to Flow. e.g. if email comes from a specific source address or it has a subject that indicates it’s a particular type of reservation, then forward to your nnnnn@mg.parserr.com inbox address, extract the details of the booking then do something with them within Flow.
Create a rule for each piece of information you want to extract, and it will effectively create a field:
Once set up, you create the Flow by choosing the connectors for Parserr and whatever other applications you need to work on the information. In this example, we’re using Office 365 to create an appointment that matches a reservation – the arrival and departure dates are provided by the source email, and converted to YYYY-MM-DD format within Parserr, then dragged across in Flow to match the Start & End times of an “event”. We’ll tack on T16:00 to the arrival time and T10:00 to the departure as that’s the check in and check out times, and thus create an ISO8601-compliant date/time such as 2019-04-05T08:00, which Office365 will use as the start or end time of an appointment. “Advanced options” gives you further control (such as adding body text that might contain static text and other fields provided by Parserr, other addresses to forward the invite to, setting if you want it to be free/busy/tentative, reminder duration, time zones etc).
And that’s it: you can test the logic is working within each system – in Parserr, you can continually re-run the processing of your initial sample mail until you know the data is being extracted as you’d like, and within Flow you can keep testing your formatting etc by Once you’re happy just save the Flow, and it will automatically create an appointment in your calendar every time you get a matching email forwarded to the Parserr system – all in a few seconds. See more on using Parserr with Flow and here’s a worked example. |


Tip o’ the Week 472 – Update Store & Office apps
|
The Windows 10 October 2018 is now being pushed to (nearly) everyone, though business users will have the option of pausing Windows Updates in case they want to enact a temporary delay for some particular reason – you’re about to go on a trip, for example – though it’s not meant as a centralised policy control: IT departments have other ways to do that. Windows 10 Homes users will soon get the ability to defer updates for up to 35 days, too. How often applications update themselves is largely down to the publisher,
Or check the View Updates option at any time, and it’ll take you to the web to see what the latest updates contain. |
![clip_image001[4]](https://tipoweek.azurewebsites.net/wp-content/uploads/2019/04/clip_image0014.png "clip_image001[4]")
![clip_image003[4]](https://tipoweek.azurewebsites.net/wp-content/uploads/2019/04/clip_image0034.png "clip_image003[4]")
![clip_image004[4]](https://tipoweek.azurewebsites.net/wp-content/uploads/2019/04/clip_image0044.png "clip_image004[4]")
![clip_image006[4]](https://tipoweek.azurewebsites.net/wp-content/uploads/2019/04/clip_image0064.png "clip_image006[4]")
![clip_image008[4]](https://tipoweek.azurewebsites.net/wp-content/uploads/2019/04/clip_image0084.png "clip_image008[4]")
![clip_image009[4]](https://tipoweek.azurewebsites.net/wp-content/uploads/2019/04/clip_image0094.png "clip_image009[4]")
![clip_image011[4]](https://tipoweek.azurewebsites.net/wp-content/uploads/2019/04/clip_image0114.png "clip_image011[4]")
Tip o’ the Week 468 – Get Office, My Office, Office app appears
|
Get Office became “My Office”, which was a lot more useful in the sense that it was showing documents you used etc, but its main aim appeared to still be to help you find and launch Office apps, or buy them if you’re not already using them.
The search bar also reaches across SharePoint sites you use, OneDrive locations you have and even brings in the global address list so you can get to people details really quickly, including a really fast org chart ability. The new Office app will be delivered automatically for a lot of people as it will replace the My Office and Get Office apps in due course; if you’d like to check it out sooner, go to the Store. |
![clip_image002[4]](https://msdnshared.blob.core.windows.net/media/2019/03/clip_image0024.png "clip_image002[4]")
![clip_image004[8]](https://msdnshared.blob.core.windows.net/media/2019/03/clip_image0048.png "clip_image004[8]")
Tip o’ the Week 453 – Outlook Quick Steps
|
Put simply, Quick Steps make some repetitive tasks easy with a single click or even a shortcut key combo – start by selecting a message you’d like to apply some action to (such as moving or categorizing it), or if you’d like to start some new item based on the contents of the message – like create a task or an appointment, including the body of the original mail.
If you haven’t played much with Quick Steps before, have a go – they’re fab-u-lous! |


Tip o’ the Week 451 – OneNote auto-listing
 Here’s a quick tip in OneNote – both the full-fat desktop client and the modern app version – which was inspired either through PEBKAC type unexpected clickery or maybe an Office update that inadvertently switched something off. A common feature stopped working, and it caused a serious dent in productivity… Here’s a quick tip in OneNote – both the full-fat desktop client and the modern app version – which was inspired either through PEBKAC type unexpected clickery or maybe an Office update that inadvertently switched something off. A common feature stopped working, and it caused a serious dent in productivity…
Despite the two parallel PC versions of OneNote – which have been covered previously in ToWs #441, #427, #386, #320, et al – offering a good chunk of similar functionality to each other, there are still quite a few areas where the old desktop x86 version wins through. Add-in support is available in the 2016 variant, for example, so you can run OneTastic (and in particular, OneCalendar, which is immensely helpful if you use many notebooks and take a lot of notes throughout your week).
Search in the desktop OneNote is more powerful, too – CTRL-F takes you to the search box, CTRL-E expands your search, but the most powerful and probably least used is to press ALT-O when you have search results from the CTRL-E dialog; it will order them by the date of the page update… helping to filter out current vs obsolete info.
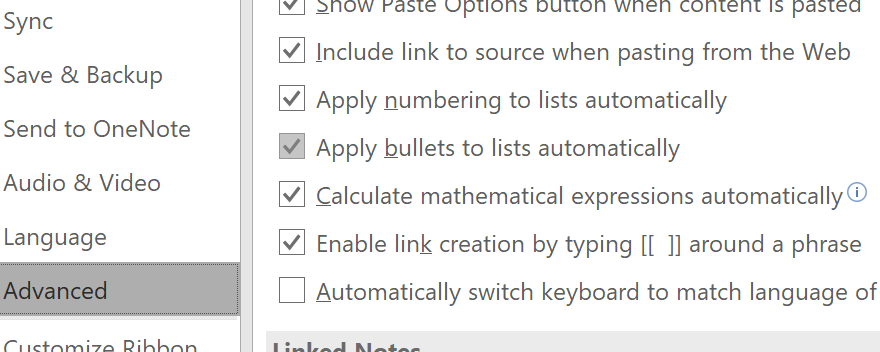
Bullet lists & indentations (sounds like a Muse song) Did you know that, in both OneNote versions, if you’re typing notes and press the asterisk or dash key at the start of a new line, and then the space bar, it automatically turns your text into a bulleted list? Asterisks in the middle of a text block are ignored; it’s only seen as an auto-correct function if on a new line. Just hit enter after you’ve started typing to add another new bullet or hit enter at the beginning of new bullet to finish the list. TAB and SHIFT-TAB lets you indent and un-indent a bulleted line. It doesn’t sound all that revolutionary, but if you’re typing notes during a phone call, it can make all the difference between keeping up or missing discussion points as you fish around with the mouse looking to click the toolbar. If you’re used to it and it gets switched off, it’s a real pain. The same kind of functionality exists in Word and Outlook too, but now and again it does get in the way – if you’re marking a block of text* that you then want to expand on later without auto-bulleting, for example. * The simplest way to get an asterisk or dash at the start of a new line is to quickly press Undo – CTRL-Z – as soon as the indentation with the bullet happens, and you’ll be reverted to simply having the character at the start of the line. To enable or disable the automatic list features on desktop OneNote, go into Options and look under Advanced…
There doesn’t appear to be any way of disabling the feature on the Modern App (which you can start by running onenote-cmd: at the Win+R box, if you read ToW #445 and #443) – maybe that’s a good thing, preventing the user from harming their own productivity… |
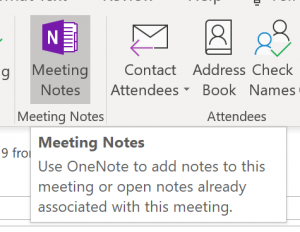 A simpler and more useful feature for many is the ability to grab the contents and context of a meeting request from your Outlook calendar – so you can take notes during a phone call or a meeting, with all the text in the invite, names and email addresses of attendees etc. Can’t do that with
Tip o’ the Week 450 – blur: team life?
|
Back in the OCS days, it was assumed you had a server on-premises (style note – the opposite of “in the cloud” is “on-premises”, ie in or on the premises you have, possibly abbreviated to “on-prem”. It is definitely not, ever, “on-premise”. If you are on-premise, that means you’re in agreement with a point of view, not that you still run your own datacent(re|er)…), not an assumption that you’d make today, with flexible working and Wi-Fi everywhere.
Anyway, as well as having on-prem kit that’s quite possibly connected to a physical phone system, Lync/S4B largely assumed your client (wired to a LAN) connected to a local server. That communicated to other clients and servers in the same environment (mostly) and, maybe via a gateway, to the outside world for the POTS. How cool it was to click a link in the communicator client, and next thing your desk phone was calling that number! As Teams imminently starts to replace Skype for Office 365 customers, we’re seeing lots of best practice guides and other resources for successful adoption. Further Teams ToWs will follow as well – in fact, if you have one you’d like to share, please write it up and send it over. This week’s tip focuses – or rather doesn’t – on a very cool trick when using Teams for video calling: the ability to blur your background, so as to remove distractions for other parties in the call. There’s a great short video ad illustrating the feature, here. See it in action here.
Blur background was made generally available to coincide with Ignite – as were a bunch of other updates. |


