 Screen-grabbing has been around in some forms since the earliest days of the IBM PC – there is a PrtScn key on most keyboards, for example. Back in the day it would have sent the contents of the screen to a physical printer but later might save the info to a file or copy it to the clipboard.
Windows has had a screen grabbing utility for a while called Snipping Tool, which was replaced with a new tool called Snip & Sketch. The gist of these tools was that pressing some key combo (eg SHIFT+WindowsKey+S) would grab a portion of the screen and copy it into the clipboard. Snip & Sketch ultimately gave way to a new version, called, er, Snipping Tool. There have been many ways to take screen shots over time.
![]()
 The latest iteration of the app throws a toolbar at the top of the screen when invoked with SHIFT+WIN+S, and gives a variety of options on how to grab that screenshot. You can also set Windows to use the physical PrtScn key to do the same in case you forget the shortcut combo.
After completing it, you’ll see a pop-up in the lower right to tell you that it has completed.
In previous versions, if you wanted to manipulate or save the screen grab, you’d need to click quickly on that toast to then launch the Snipping Tool UI with the grab inside, or else you’d need to paste the image that is now in the clipboard into another image manipulation tool and modify or save it to a file from there. Annoyingly, there’s never been an option to paste what’s in the clipboard into the Snipping Tool’s UI, so you could edit or save it quickly.
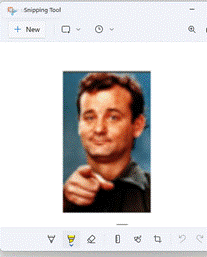
 An alternative approach would be to start the Snipping Tool first and initiate the screen-grab from within; you could make some simple tweaks and highlights (like cropping it, or circling a part of the screen in red ink) from there. Kicking off the snipping from within the tool gives you other options too – like grabbing in a few seconds, to give you time to ready the app you’re trying to capture.
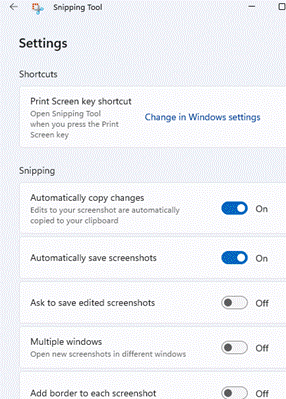
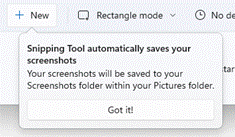
 A new feature to the Snipping Tool is the default setting that it saves snips to a “Screenshots” folder; it’s configured in the Tool itself, should you want to disable it.
The Screenshots folder itself is within your “Pictures” folder, unless you’ve decided to move it somewhere else (if you’re that way inclined, open the Pictures folder, right-click on Screenshots and under the Location tab, click Move to find a new home for it).
 It’s worth keeping an occasional eye on the size of the Screenshots folder, as it could well have hundreds of grabs totalling many megabytes of data. Screen grab files are named with the date and time in the filename, so you can easily get to the latest one by opening the folder and pressing the Home or End key (depending on how you have it sorted). Feel free to delete any you don’t need.
 The … menu in the top right of the Snipping Tool lets you quickly find your way to the Screenshots folder directly, or if you press WindowsKey+R and enter shell:screenshots, it’ll open in a new Explorer window.
If you favour command lines in general, you can also start the Snipping Tool by pressing Win+R and entering ms-screensketch: (including the comma) to run the full UI or ms-screenclip: to jump straight to the capture just as if you’d pressed SHIFT+Win+S.