
Hot on the heels of last week’s missive about how to snaffle more storage space, once again we turn to OneDrive to solve a problem. First, let’s journey back in time to recall some previous tools.
Once, there was a peer-2-peer (P2P) file sychronisation product called FolderShare which was acquired by Microsoft nearly a decade ago; it allowed files and folders to be replicated amongst multiple machines, essentially for backup or for making sure you had your stuff (music, pictures etc) everywhere you needed it.
FolderShare begat Mesh or Windows Live Mesh, which became Windows Live Sync and eventually all became part of SkyDrive, as the latter became less of a simple place-to-put-stuff-in-the-sky/cloud and more of a storage mechanism with a means to sync and replicate it onto multiple places. Now OneDrive is part of Windows, and as well as giving away oodles of online disk space, it’s the mechanism by which Windows 8 and 10 users can synchronise settings between computers. It’s getting better and more granular all the time, too.
One of the nice features of Live Mesh/Sync was the ability to automatically keep several settings on multiple PCs in sync with each other – like IE favourites, or settings from Office like dictionaries, templates and email signatures. Though it’s now obsolete, this was first covered in ToW #69, back in 2011. Email .sigs used to be a big deal.
Windows manages to do a good job of keeping PC-specific settings in sync between machines, or even just backing up settings from one machine to the cloud using OneDrive – so once you’ve signed in to your shiny new machine with your MSA, then it’s quite amazing how much of your stuff just appears. But one thing that doesn’t is your Outlook email signature. If you want to back up your .sig and also make it/them available on multiple PCs, you need to work a bit harder.
The Dark Art of Symbolic Links
Worry not, however. Through a cunning bit of sleight of hand, it’s possible to fool dusty old Outlook into thinking that its Signatures folder is stored in the usual place, however we all know it can be moved into OneDrive and therefore made available to multiple machines. This is similar to the technique of replicating Desktop which was covered a little while back, except that instead of changing a registry setting to tell Windows where the folder is, we need to create a special kind of folder, which is really just a redirection to somewhere else.
Here’s the method – it’s best to close Outlook while doing this.
-
Find your current Signatures location – try pressing WindowsKey + R then paste into the run box, %appdata%\Microsoft (which opens the special location that many applications will use to store files that
 pertain to how they work).
 -
Then look for the Signatures folder – select it, copy it and paste into your OneDrive folder (in Explorer; paste it into the OneDrive\Documents folder, for example).
-
… rename the original Signatures folder to something like Signatures.old
-
 Now, we need to create a Symbolic Link to make something that looks like a folder at the same location, but points elsewhere – start an elevated command prompt (on Windows 8 or 10, press WindowsKey-X then press A to start an admin command prompt).
-
Now create the symbolic link by entering the following as one line into the command window:
mklink /d %appdata%\Microsoft\Signatures %userprofile%\OneDrive\Documents\Signatures
(if you know your OneDrive folder is in a different place, then substitute the 2nd parameter for whatever is appropriate – maybe D:\OneDrive\Documents\Signatures, for example) -
If you now go back to the %appdata%\microsoft location from the 1st step, you’ll see the Signatures folder
 with a special icon showing that it represents a link rather than a real folder. Open it to check that your signature files – as stored in the OneDrive folder from earlier – are showing up in there as expected. Feel free to close the command window.
-
Now, on each other PC you want to synchronise with, go back to the first instruction and repeat, except that you don’t need to do the “copy to OneDrive bit” since your Signatures folder is already there – in other words, you create the Symbolic Link to the local replica of the OneDrive folder, and Outlook will think that the data is in its own appdata location.
-
Don’t worry if you get to the 2nd step on a destination PC and realise the Signatures folder doesn’t exist – it’s only created when you first set up a .sig

 the screen).
 in the top right of that very page. If you happened to temporarily set your
 As has been
 Did you know, to add a quick horizontal line in Word or in Outlook, all you need to do is press the minus/dash key three times (“—“) and press Enter? Well OneNote doesn’t do that out of the box, so you may find Omer’s macros a
  good solution.
 There are loads of other macros: from setting colours quickly, to creating tables of contents (listing every page in a notebook or section, with links directly to each page). Have a good look through Macroland, and if you’re a OneNote power user, you’ll be like a dog with two tails.
  There’s a great deal of etiquette bound up in email communications – and it varies by culture and sometimes by country. Some people politely make the point of always addressing the recipient in an email, and in thanking them at the end, whereas others apparently look on it as a badge of honour to contain everything in a single terse line with no capitalization. Especially when it comes to
  handy at times.
  BCC is very handy when you’re emailing a group of people – maybe sending an external mail to a bunch of customers and you don’t want to inadvertently share everyone’s address with each other.
  But feat not, intrepid readers – it is possible to effectively BCC people on a meeting request, by inviting them as
  This brings up a dialog box that will expect you to select people from the address list, and select them as Required or Optional attendees (does anyone ever use Optional?). Or, in fact, Resources – the thinking being that the address book could have entries for resources like meeting rooms or even bookable equipment, that you could invite to your meeting thereby claiming it for your exclusive use.


 Well,
Well,  There are a few particularly cool additions; like the ability to group icons on your home screen into folders, where a tap on the group will expand it out into a s
 ection with larger tiles so you can start the apps quickly. It’s one extra tap on the home screen but it means you can get quicker access to key apps without needing to scroll around on the usual list of apps.
  action center

 The Lens app (
 Once you’ve photographed the card, you can choose if you want to select & use it, delete it and try again, or possibly add another image – so if your card has info on both sides or you want to batch people from the same company up in one go, then you can have multiple images per contact page.
  Happy New Year! For many of us, time to chuck out trees, and pack away any and all decorations, never to be seen again until December ‘15. Before you recycle the cards you may have received over the holiday season, here’s a quick way of using Outlook to make the job of sending your cards that bit easier.
 Create a new view
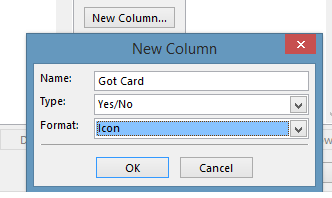 track interesting bits of info – like whether you sent a card to this contact, and if you got one in return. Click on the New Column button and for the name enter Got Card, then choose Type Yes/No and leave Format as Icon. Press OK to create, and repeat the process for the Sent Card field.
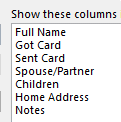 All Contact fields from the “select available columns…” drop-down box, then pick some of the more esoteric contact fields that already exist – Spouse/Partner and Children fields will let you remember who to make the cards out to, and Home Address and Notes are pretty self-explanatory.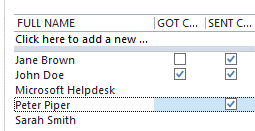
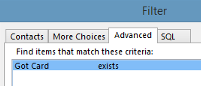
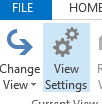 OK, now we have a quorum of contacts tagged with Got & Sent attributes, go into View Settings and click the Filter button, then switch to the Advanced pane. From
 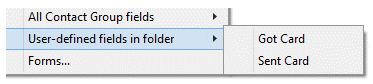 the Field drop-down box, choose User-defined fields in folder and add Got Card.
 want to change the Sort order to Full Name.
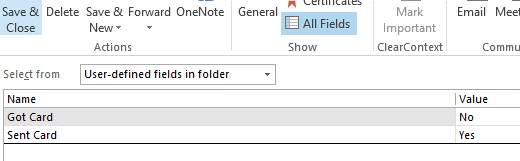 If you want to continue adding contacts to the list, simply open your existing contact (maybe from the main Outlook contacts view), then click on All Fields, and select the fields from the user-defined fields in folder – you can then set Yes or No for each of the custom fields, and that contact will now show up in your Christmas Cards view.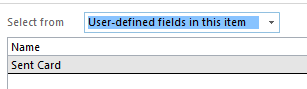
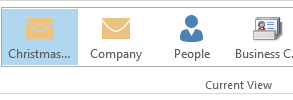 So what’s the point of all this faffing about? Well, in 11 months’ time when you come to do your next round of cards, just select the view in Outlook and if you select File / Print and select Table Style, you’ll get a nice sheet or two of all the details and addresses you’ll need to write all your cards.

 Remote Power
 As with temperature sensors, there are
  There is a 3rd party app called SmartHome for
 Tip o’ the Week goes
 Microsoft announced recently that the

