|
That said, email distribution lists were an early form of mass collaboration – powered by the likes of LISTSERV, where online communities formed, in some ways an alternative to USENET and the web forums that now host many interest groups online. In the days of LISTSERV, email volumes would be relatively low, and it provided a simple distribution system that fired mail out to everyone on the list, and people could easily join and leave, by simply mailing a JOIN or LEAVE command to the address. Next time there’s an internal company email storm (the famous Bedlam DL3 storm at Microsoft occurred just over 20 years ago), it’s not necessarily counter-intuitive for people to respond in the “take me off this list” manner, even though the perpetrators themselves are probably unaware of that. If you find yourself getting unwanted email from marketeers or newsletters you’re not interested in, there are a variety of ways of opting-out – most kosher bulk email tools will allow you to unsubscribe with a link at the bottom; if the email is completely unsolicited, however, then clicking on an “unsubscribe” link in a spam message might just mark you as a real person, and you’ll get even more spam in future. If in doubt, you might want to rely on some of the built-in tools within Outlook, to protect you from further spammage. 3rd party bulk unsubscribe tools like https://unroll.me/ might help clean up subscriptions for consumer mail platforms like Outlook.com, Gmail etc, though exercise with caution as there’s always a risk they’ll just be exposing your data to people you shouldn’t. Though aggregated news apps and websites are ten-a-penny, there are some very good resources out there that are worth signing up to receive mail from – for example…
|

Tip o’ the Week 407 – e-books in Edge
|
The book business has been a metaphor for big vs small biz for years, as well – from the Shop Around the Corner in You’ve Got Mail to the phenomenon of Amazon and the massed ranks of bricks & mortar sellers. For years now, the assumption has been that real books are going the way of the CD or the DVD – still around, but in terminal decline as technology has changed the game to allow people to read content electronically rather than needing the inconvenience of printing, distributing, retailing and storing all those bits of dead tree. Despite gloomy forecasts for the future of the printed word, earlier this year, it was reported that sales of electronic books were falling, against a rise in sales of physical books. The dedicated ebook reader appears to have had its day, with mobiles and tablets occupying that niche more, but younger readers are turning to real books again, presumably so they thumb through the tomes while listening to their LPs.
You can download eBooks from a variety of online resources – including Microsoft Virtual Academy. In more recent Insider builds for Windows 10, the functionality and layout has changed (there’s no more “Shop for books” link, as the revamped Store has – at least for now – no obvious way of distributing books), and more change is likely to come. Still, Microsoft employees can open the books section, sign in with their Microsoft.com address, and see the employee edition of Satya’s Hit Refresh eBook automatically provisioned. |


Tip o’ the Week 405 – Bye Bye, Bird’s Eye
|
If the bird’s eye option is greyed out, that means the view is not available – or no longer available, as out of date maps have been temporarily removed from the platform. Or at least removed from being easily found – if the missing area is on a boundary between data sets that are being updated, it may be possible to find a nearby place, and scroll across to find the view you’d originally searched for.
If selecting the view doesn’t work for you, try clicking on the “hamburger” menu in the top right, and change the country setting to be United States… whereupon the bird’s eye will work, but the Ordnance Survey view will disappear. So for a while, it looks like Brits needed to say Bye Bye, to the Bird’s Eye (for your morning coffee, see what that last link will mean for Western civilisation). Boom Boom.
In some cases, more recent images are available if you switch 3D off, by going to the hamburger menu in the top left; try disabling 3D to see what difference that makes to your aerial view. |


Tip o’ the Week 406 – A path! A path!
 One issue that’s plagued the user experience of computer application design, is the traditional need to force the end user to understand the file system of their machine. In a nutshell, the hierarchy that operating system designers decided was a necessary way of storing or at least referencing files (and it is generally a Good Thing) can be a bit confusing for users who don’t need to know how the internals of their OS work. They might tinker with the contents of the C:\Windows folder too, thinking that it takes up rather a lot of space… Fortunately, Windows now provides a few layers of protection to stop users from knackering their own machines, so that’s less of a problem now. One issue that’s plagued the user experience of computer application design, is the traditional need to force the end user to understand the file system of their machine. In a nutshell, the hierarchy that operating system designers decided was a necessary way of storing or at least referencing files (and it is generally a Good Thing) can be a bit confusing for users who don’t need to know how the internals of their OS work. They might tinker with the contents of the C:\Windows folder too, thinking that it takes up rather a lot of space… Fortunately, Windows now provides a few layers of protection to stop users from knackering their own machines, so that’s less of a problem now.
Allowing users to save stuff to their local hard disk was also often a good way of helping them lose data, as there probably won’t be a backup of the most important files that the user has stuffed somewhere in their own twisted hierarchy of files & folders. There are numerous ways for users to be blocked from saving stuff to their own PC, forcing them instead to put data onto some networked share. App designers – especially “modern” apps in Windows, or mobile apps meant for other platforms like iPad or Android – may present a simplified UI to guide users to put stuff in commonly referenced folders by default, and hide access to any off-piste areas too. Fortunately, with file synchronisation systems like OneDrive When dealing with any files that are also synched somewhere, it’s often handy to get the path that either points to the location of the file (to save you clicking through the hierarchy to arrive at it), or indeed directly to the file itself…
Still the most useful hidden command, some say, is the Copy as path option. Right-click a file in Windows Explorer, and you’ll see a bunch of context-sensitive stuff you can do.
|
 , it’s very easy to both write data to the local machine and also to sync it with the cloud, more-or-less immediately. These solutions mean you put stuff on your own PC’s file system, but nothing you write to it will be orphaned there – so if you move to another PC, or your machine gets wiped or lost, you’ve still got access to everything.
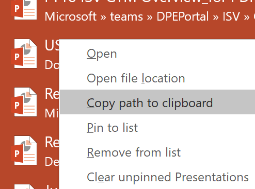 Right-clicking within the most-recently-used files list from the File menu in Office apps often gives you the chance to open the location of the file or copy
 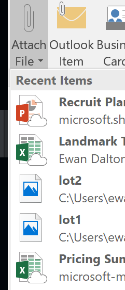 its path to the clipboard, for later consumption, like pasting a link into email (though with the Attach File option in Outlook now offering a most recently-used files list, it may be unnecessary to grub around looking for where the file is – just click the list to add it).
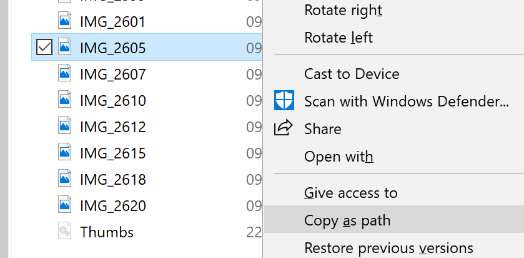 Hold SHIFT while you right-click the file, and you’ll get an extra option to copy its path (in fact, the full filename including its path) to the clipboard, for future use. Once you remember this neat shortcut, you’ll use it far more often than you’d think – especially if you deal with inserting images into web pages, emails etc.
Tip o’ the Week 404 – [%subject%] not found %&

This CONTENT can’t be reached
Tip o’ the week’s author could not be found.
- Did you mean http://www.typoweek.com/?
- Search bing for tipoweek
ERR_NAME_NOT_RESOLVED
 Just kidding! Just kidding!
Time to celebrate the error page most people probably see the most, or at least that’s what you might think. In truth, some years back admittedly, Google suggested than 500 (Internal Server Error) may be the most common. Gotta get a better server, maybe? An entry in Microsoft’s “Microspeak” archive on the intranet (and some on the outside, too), says: 404 Someone who’s clueless. From the World Wide Web message “404, URL Not Found,” meaning that the document you’ve tried to access can’t be located. “Don’t bother asking him…he’s 404.” … though instances of “he’s 404” still being used post-1997 are themselves probably non-existent. Just take comfort that absence exists in other fields too. It’s one of the better entries in the glossary, still; though not as good as… PNAMBC Pronounced “panambic.” An acronym meaning “Pay No Attention to the Man Behind the Curtain.” Usually used for demos that look like, but aren’t really, the real product. It comes from “The Wizard of Oz.” … another one never much used. If you’re interested in what the other HTTP Status Lines mean, read more here (and it’s actually more interesting than you might think), and for more details on 404, including some of its more controversial uses, see here. |
Tip o’ the Week 403 – Office Insiders and training
 The Windows Insiders program is well known as an early-access scheme for Windows, with millions of users trialling out new versions regularly and getting new functionality ahead of general release. A new “fast ring” version of Windows 10 came out just the other day, in fact.
Did you know that Office has a similar programme? Office Insiders is geared towards Office 365 subscribers who want to opt-in to early releases.
 Regardless if you are or are not in the Insiders group, you can see what’s new in the latest version of Office you’re running (assuming you’re on Office 2016 and subscribing to Office 365).

Try looking under File | (Office) Account menu, and check under the Office Updates section to make sure you’ve got the latest versions available to you.
Click on What’s New and you’ll see a pop-up of the latest features, with a “Learn More” link to find more. To see the latest for Office Insiders, check here.
One new feature that’s previewing for Insiders but available to anyone on the web is the new Office Training Center, which offers help in a number of features, templates and the like. There are short videos showing tips on how to use Office apps in conjunction with Office365 – check out some of the “try new things” category to see if they really are new to you.
Tip o’ the Week 400 – Shake your Groove thing
|
Groove Music Pass (which was Xbox Music Pass before that and originally launched as a service for Zune music players), is/was an arguably equivalent service to many others out there… but despite having similar catalog and pricing as other, newer services, never really got the momentum to be a big success, at The Groove app itself soldiers on, as the default music playback app in Windows, and it’s a great way of playing music that you’ve uploaded to OneDrive on a variety of devices. Rumours abounded a couple of months ago about imminent feature updates coming to Groove, so there may still be development to come – time will tell. On the other side of the coin, the surprisingly successful Amazon Alexa gained a new skill – courtesy of Sonos, it’s now possible to control your Sonos kit using another device, like they entry-level Echo Dot. Sonos also unveiled a new speaker which has a built-in mic for using Alexa with, so despite Amazon bringing multi-room audio to the larger Echo device, the two companies are working together for the benefit of their mutual end users. (applause) You can still stream your Groove music collection and playlists to your Sonos, controlled by Alexa, at least until the end of the year, when the Groove Music Pass will cease to be. Spotify integrates into Sonos too, but only if you buy the Premium offering. Amazon’s own Music Unlimited service is worth a look if you’re already a Prime customer, as you get money off every month, so it could be the cheapest of the main streaming services out there, and is the first (& only, so far?) streaming service that can be voice controlled using Alexa but played back on Sonos. Spotify support is supposedly coming soon. |


Tip o’ the Week 399 – What’s in Store?
|
The original idea behind the Apps that were to be distributed via the Store was that they would be easy to install and share, but perhaps most importantly, heavily sandboxed so they couldn’t hog the performance of the machine, couldn’t be a vector for attack by spreading malware and the likes or drain the battery of the laptop (or phone) through excessive background execution. Anyone who’s ever looked in Task Manager on their PC and seen Runtime Broker run amok might disagree that it’s worked out, but ‘tis still a noble aim. The idea of Windows Store apps evolved into Universal Windows Platform apps in Windows 10, the plan being that the same app could run on PCs, Hololens, Surface Hub, phones, Xbox…
There’s nothing obviously new in the Store app yet, but MJF reports that Progressive Web Apps will be featured in the catalogue of apps in future. In other news, the bricks’n’mortar Microsoft Store is coming to London. |


Tip o’ the Week 401 – Go with the Flow
|
We all get notified of stuff that we’re probably interested in, but
* some may take issue with “simple”. Bah. Flow promises to do all sorts of groovy things that nobody ever needs, like writing every email to a Google Sheet then sending your calendar a reminder to look at it. But there are lots of potentially interesting and useful things you can put together, either by using the many templates or by building your own custom flow based on simple logic. You could connect all kinds of disparate web-based services together and using triggers, fire off actions based on events happening – like a tweet about a particular topic, or a new event added to a calendar. Let’s take an example – say, you have an Office 365 work mail account and associated calendar. When you put something in your calendar which is both an all-day event, and is also marked “Out of the Office”, that probably means you’ll be out of the office all day, maybe away on a business trip or possibly even on holiday. Wouldn’t it be useful to be able to copy that to a calendar that your nearest and dearest can see, maybe even adding all the events from several family members into one place, shared with all the others? First off, you may want to log into www.outlook.com, go into Calendar and create a new shared calendar (if you don’t have one already) –
Now, to create the flow to copy stuff from your work to Family Calendar…
Now you should be able to see any new, all-day events that appear in your work calendar, showing up in your shared Outlook.com custom calendar. A further refinement might be to add a condition to only trigger the sync when the original meeting is set to “Out of Office” – click on Update flow to edit, then add another
It’s worth having a play around with Flow, as you can do some interesting things with it (and there are connectors for all kinds of services, including Google mail & calendar, Wunderlist tasks, even grown-up apps like Dynamics or Salesforce. There are mobile apps that can take part in flows, too); do bear in mind that it takes anything up to a few minutes to fire these kinds of events, and if there’s a problem running your logic, then you’ll be notified. It may be worth adding a debug step that can be easily removed later, by getting the flow to send you an email with the values of the fields you’re interested in…
|


Tip o’ the Week 398 – New Dimensions in Sound
|
High fidelity sound is delivered via a combination of lots of overlapping but distinct technology; from the quality of the original recording equipment, technique and media the sound was recorded onto (if analogue), or the bit-depth & format used to encode all the way from the point of recording to the moment of consumption (if digital), and all of the equipment used to turn the sound recording back into vibrating air. Many words are written on the merits of this bit of kit, or that piece of cable – YMMV. Lucasfilm realised in the late 1970s that despite going to great lengths at the point of production to assure the quality of video and audio, there was little way of guaranteeing that cinemas showing films had anything like the quality of AV reproduction kit required to render the experience for the movie-goers. As a result, they came up with THX – a certification system rather than a specific recording technology, though many viewers confused the two; maybe because of the various THX idents that preceded popular movies, starting in 1983 with Return of the Jedi, through other mainstream hits like Terminator 2 and even a spoof-turned-ident Simpsons special.
You may have seen some of their idents before… like here and here. And if you’ve bought an Audio-Visual Amplifier in the last 20 years, it probably came festooned in stickers proclaiming all the certifications it had. Dolby Atmos is one more recent development of surround sound encoding & reproduction technology; originally designed for movie theatres with hundreds of speakers and able to precisely position a pin-drop anywhere in the auditorium. There are a growing number of Atmos-equipped cinemas around, but the curious would still need to go out of their way to find both a suitable location and the right content to watch and listen to. Predictably, there’s an Atmos consumer version aimed at enticing AV users to upgrade their existing 7.1 system to a fancier setup. And there’s also a version of Dolby Atmos for the PC, too – maybe most useful for headphone users, and delivered to Windows 10 users via the Dolby Access store app. It costs cash money to use, but you can trial for 30 days free of charge and make up your mind if it’s worth the $15 to keep it going. It won’t turn your 2-channel headphones into a 64-channel Atmos theatre, but it does provide some interesting software-driven tuning, akin to several other 3D software sound systems. Interestingly, it also runs on Xbox One, showcasing the benefits of the Win10 PC and Xbox sharing the same base OS. There’s the free Windows Sonic that might give you a similar experience.
A note from intrepid reader, Peter Martin – if you have some Carlos Fandango Bose wireless noise cancelling jobs (as worn by frequent flyers as if to say, “I travel so much, I carry these $400 cans that take up half my hand luggage, because they’re Just Better”), then it’s worth heading to Bose’s firmware update page and installing the software to check and update your chunky funks. Pete also says:
For some cool sounding audio effects, check out Windows Sonic and Dolby Atmos settings. Also, if you’re looking for a more robust sound, enable the enhancements on the Headphones device. Note that the enhancements can be a bit over the top, especially on bass, so play around to your liking…
When connected, if you hear audio dropouts during audio calls, try disabling Signal Enhancement on the Hands-Free device setting…
|


