|
In Outlook, any time there’s a date field (like when you’re setting a reminder, or In some date fields (like an appointment start time), if you say “4 days” then press enter or TAB, it will evaluate the new date; if you return and put “4 days” again, it may add those extra days to the last date. Try a few other things like “next Christmas”, “3rd Sunday in November”, “2mo” , “7d” or some special days – there are some surprising ones there, like “Lincoln’s birthday”, and other events with static dates … though nothing that might change the actual date from year to year (like Easter, or Thanksgiving).
Another way might be to insert the current date or time into the text: to do so, press SHIFT-ALT-D, or SHIFT-ALT-T for the current time, or SHIFT-ALT-F for the current date and time. The last one is really handy if you’re taking notes about a phone call, and want to quickly note the time that your insurance company said that everything was all fine, or when you started the indefinite call to the airline. The same shortcuts apply to the desktop OneNote 2016 application and also the OneNote store app.
Since Outlook uses Word as its text editor behind the scenes, the same shortcut keys will also insert date fields into the text of an Outlook email. |
Month: September 2017


Tip o’ the Week 395 – Resizing pictures in Windows 10
|
This is especially the case if you’re sharing pictures with others – though it does rather depend on how. Email programs usually have ways to reduce the size of images, varying in method but increasingly very integrated to the sending process, and often with little real control of what’s going on. This doesn’t make the image smaller in the number of bytes it takes up, however – so you might think you’ve made your massive picture a nice thumbnail, only to find it’s still actually 7MB in size. In order to make the image data size get smaller in Outlook, select it by left-clicking, then from the Picture Tools | Format menu, you’ll find a Compress Pictures com mand that lets you make this image (or every other one in the mail), smaller.
The same thing happens in PowerPoints as well – tiny little watermarks on the background of a presentation making the file too big to ever email to anyone. A similar process can radically reduce the size of your presentations by compressing the size of images before saving. Files If you have pictures in the file system, there used to be a variety of ways for Windows to offer resize capabilities – one of which was to install the now-defunct Windows Live Photo Gallery, which had a nice wizard to resize images to standard sizes. Now, in Windows 10, there’s no easy, out-of-the-box way of doing it, as the Photos app doesn’t offer resizing and nothing shows up in the desktop / file system mode. If you have a habit of uploading photos you’ve taken to online forums and the like, some of them will deal with resizing for you (as does Facebook, Yammer etc too), but if they don’t, you may find you’ll need to radically reduce the dimensions of your pic before you can share it.
Afterwards, right-click within Windows Explorer on your chosen image – or select several and do the same – and resize the image(s) to a given set of dimensions in a trice. Then you’re ready to upload the resulting new pics to your online forum of choice.
|


Tip o’ the Week 394 – Change your lock screen
|
As any fule kno, good corporate typ
The default Windows spotlight option shows some lovely images downloaded from Bing – if you like seeing those, then by all means leave it as it is, and if you want to grab those image files for other purposes (setting your desktop image, maybe), there’s a handy tutorial here. If you have your own photo or folder(s) of photos you’d like to show instead, then just choose the appropriate option under the background drop-down, and point Windows to where your files are. You need to ensure your photos fit on the screen properly, though, as they might be a different size or orientation, and you won’t want to cut key features of your picture out. Fortunately, there’s a quick & simple way of doing so using the Photos app. Start by copying all the images you’d like to use for your lockscreen into a new folder (to make it easy to point the at them if you’d like a slideshow), and then open each one in Photos.
These options will show you a window over your photo, you then drag the picture around underneath so as to line up the features you want and when you’re happy with If you’re just doing one picture, click or tap Set as >, and you can quickly make the pic your lock screen or background. |


Tip o’ the Week 393 – Searching in OneNote
|
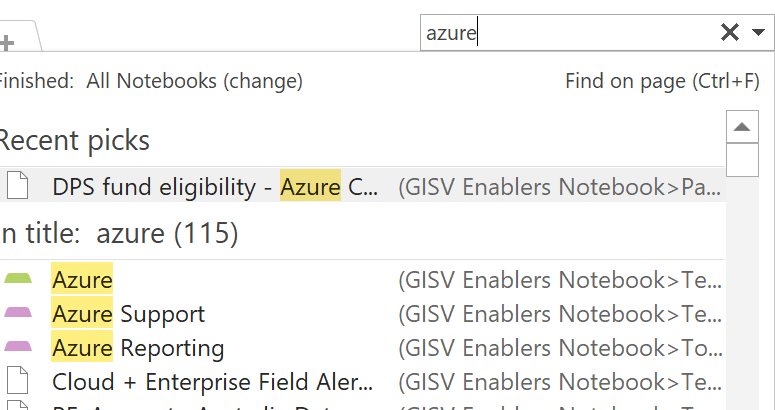
Tip o’ the Week ❤ OneNote. Both the full-fat trad Windows app version (OneNote 2016), If you’re using the regular OneNote 2016 application, and go to search content (by entering the search
Referring to this option as “Pin” may make you think it’s a bit more permanent (such as pinning to taskbar or Start, or pinning to a menu somewhere), but it’s There’s no obvious equivalent of this search granularity in the OneNote store app. ☹ |
 and the Store
 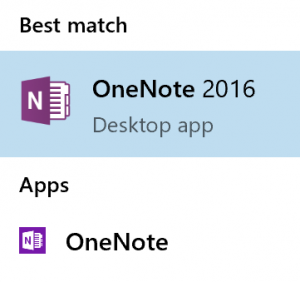 (just “
 term into the box on the top right, maybe by
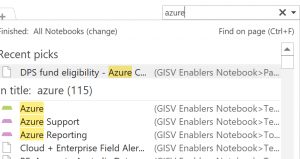 just pressing CTRL+E to jump straight to it), you may find that the results you get include a lot of old content which isn’t all that easy to parse – the name of the notebook occupies much of the column showing the location of the matching page or section, there’s no date of last update or any means of sorting – so it’s hard to know what’s recent and what might be years old.
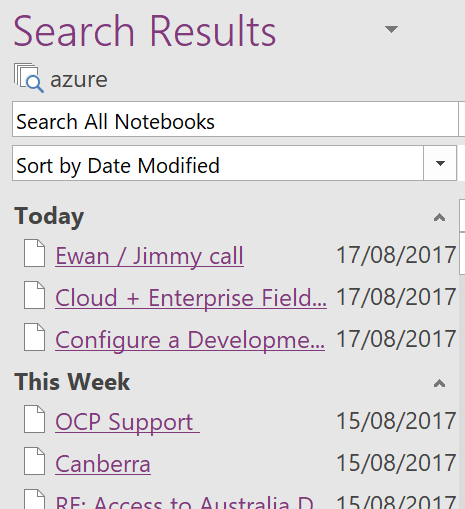
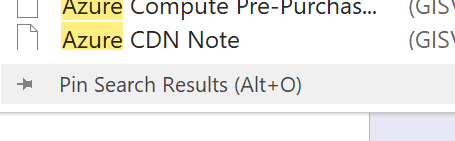
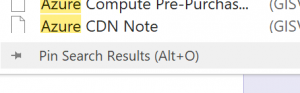 If you click on “Pin Search Results” at the very bottom of the results list, or press ALT-O, then you’ll see the results appearing in a pane to the right of the OneNote window, where you can change sorting and filtering options, and see the date the pages were last modified.
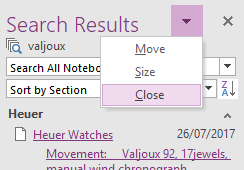 as easy to dismiss the results pane as it is to invoke it in the first place – just click the X in the top right of the window pane, or the close option on the drop down arrow which also lets you resize the pane or even move/undock it from the main Outlook window altogether.