 Many companies have products or services whose time comes, and they are – gently or otherwise – put into maintenance mode, put out to pasture, taken out the back etc. Some never go away entirely but they get superseded by other technologies, or their original reason for being gets diluted to the point where nobody cares any more. Time for a misty-eyed retrospective on some defunct technology…
Remember disk compression tools, like Stacker? 25 years ago, when your hard disk was sized 125Mb and cost $350, every megabyte counted, and software like Stacker let you cram more stuff on your drive. Nowadays, you can buy a disk 32,000x as large for one third the price (nearly one sixth of the price if you adjust for inflation) ergo, nobody cares about disk compression any more.
Well, not entirely true, actually – Windows 10 has some really effective file compression algorithms that are used to reduce the size of the OS itself, meaning it can fit on relatively small tablet devices with puny storage capacities. But the market for disk compression programs has pretty well gone.
Turning to music
Another side effect of the vastly lower cost in storage, is that compressed music formats are less of a thing these days. When MP3 players were starting to take off, it was common to buy a device like a Diamond Rio, which shipped with a massive 32Mb of memory for only $200. When Smart Media cards were sized at up to 128Mb and cost 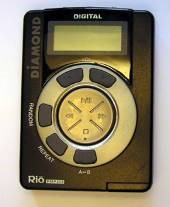 ~$2/Mb, you had to be pretty selective about what music you’d take with you, and how large it was. If you ripped MP3 files from your own CDs (as opposed to pirating them from Napster), then you’d need to decide how to trade off quality vs filesize.
When encoding audio, imagine that you’re going to be slicing the original sound into many samples every second. The more samples you make, and the larger each individual sample is, in general, the better it will sound.
You’d typically choose whether you want stereo or mono, choose a sample depth (how large each sample is going to be, eg 8-bit, 16-bit, 24-bit; larger is better, to a point) and the sample rate (eg 44.1khz, ie 44,100 samples per second).
Audio on CDs is mastered using 44.1khz sampling at 16 bits in stereo, so that works out at 44,100 x 2 channels x 2 bytes for every second – roughly 172KBytes/sec (approx. 1,411kbps), so a single 3 minute song would take over 30Mb, neatly filling a quarter of your $250 Smart media card in 1998.
[NB: if you are ripping CDs, there is no real point sampling at 24-bit and 96khz – it won’t improve the original sound]
Fortunately, creating an MP3 file compresses the resulting music using a “lossy” format which sacrifices data that isn’t crucial to the aural representation of the sound, though how much it reduces the quality in relation to size of the file depends on the bitrate of the MP3 that’s produced – if your MP3 is only 64kbps, then it will sound quite thin and tinny when compared to a 320kbps file, or the uncompressed music (that’s 10+ times the file size).
Format wars
Microsoft’s Windows Media Audio was created to rival MP3, arguably being more effective at retaining better quality of sound even when using small files / low bitrates, and WMA was supported by quite a few music players, CD players and the like. WMA also featured DRM capabilities so music could be distributed in a controlled fashion: something that was appealing to content owners, but less so to consumers as it complicated their ability to buy and use legitimate media. In fact, if you bought music that was DRM protected WMA, you might find that the rights management is about to expire.
These days, if you’re not bothered about resulting file size, you’re better off using Lossless ripping codecs, like Lossless MP3 or Lossless WMA; then you know that the file you’ve ripped is supposedly indistinguishable from the original, rather than a lossy and therefore inferior copy. You could even rip your media lossless for archival, and run conversion tools to produce a lossy (but still high quality) version that you’d be able to put on your phone, in the car etc. If you have a collection of audio that’s been ripped from CDs to MP3 or WMA over the years, it might be worth revisiting to preserve it for the future in a lossless format.
Lots of people have moved to using FLAC, which is lossless, open and is now widely supported (except, of course, by Apple, who push their own proprietary format) and is a good way of ripping your CDs for archival purposes as well as being supported by most modern playback devices and software – Windows 10 features native FLAC playback without the need for additional software.
Rip me a new one
It’s quite an undertaking to re-rip all of your old audio CDs, but could be a worthwhile exercise to occupy a few hours over the forthcoming holiday season..
One friend decided to do so, and fetched the large cardboard box of CDs from the loft. As it was sitting in the hall, his 9 year-old daughter asked, “Daddy, what are all these DVDs?”. When it was explained they were CDs and they had music on, they realised that she had never known a world where music wasn’t just “there” and that it needed media of some sort.
You’d want to start with a new ripper, not just use the Windows Media Player or iTunes type software – get a dedicated ripper that supports AccurateRip or similar, a technology that reads and re-reads the drive and makes sure it has a true representation of what’s on the original CD. The payoff is a much slower ripping speed, but that’s OK if you’re just ploughing through your collection once, and all for the last time…
 Imagine a CD player streaming uncompressed data in real time from the laser reading the surface of the CD, at the rate of 1.4 million bits/second, it’s no surprise that sometimes it won’t get everything clean, so error correction will kick in and smooth over the gaps. Not something you’d probably notice when you’re listening that one time, but if you want to create a perfect copy of your CD, then AccurateRip will make sure it gets close.
Rippers of note include dbPowerAmp (which is paid-for but the ripper can be used for 2 weeks, fully featured, so may be long enough to get your collection done) or Exact Audio Copy, which is free and has been evolving for well over a decade. See a wider comparison here, should you need it. You might want to copy your resulting mahoosive music collection to OneDrive, so you can access it from everywhere.
 How do you like to start your applications?
  Most normal people these days will start applications from the Start menu, or the programs list that shows up when you press the Windows Key or click the Windows logo on the task bar. The app list has evolved somewhat, so now shows most-used apps near the top, and if you start typing a name (like outl) then you’ll be shown the relevant shortcut for that particular app.
  command, but you get little in the way of help in finding the right thing to type. Simply pressing the WindowsKey and starting to type will show you a load of options for a simple app launch that you might be looking for.
  Another option could be to follow a process familiar to Windows Phone users, though with a slightly different mode – if you click on one of the letters or symbols that show up at the top of each group of applications, you’ll get a grid of letters just like on the phone – tap or click on one of those to jump quickly to the right group of apps within.


 Back in the day, when it was an
  Microsoft’s early entrance into this market was a project called “
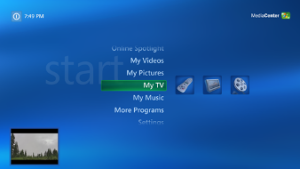 proliferation of delivery methods, formatting standards for TV channels, means of describing the program guide etc.
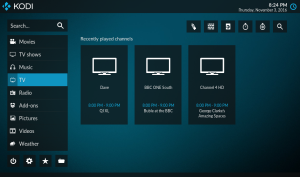 Kodi.tv
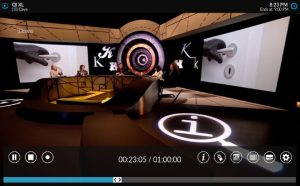 Install


