Tip o’ the Week 312 – Windows 10 Shell Commands

clip_image002The shell of an operating system is another name for its user interface (whether graphical or textual) – Microsoft Windows being one such shell, provides common UI elements like the taskbar, window controls etc (and a longish list of dead or obsolete elements, like charms).

Most Windows users will stick with the default shell, but alternatives do exist if you want to be individual and create more work for yourself. Desktop Linux users have a cornucopia of GUI and CLI shells to choose from, with names like Gnome, KDE, bash, tcsh, sh, tosh and bosh. Actually, the last two aren’t real. Probably.

Hardcore power users tend to eschew the namby-pamby niceties of a gooey WIMP system and prefer keyboard shortcuts to everything, but for normal people, there are some quick ways of jumping into parts of the UI using the shell, so you can shave a few tenths off common activities and yet still relax in the modern, graphical world.

It’s been possible for years to short-circuit sections of the Windows UI to make troubleshooting quicker – all of these would run from Start -> Run in previous versions, or just press WindowsKey+R in Windows 10. You can get to the old-fashioned Control Panel applets, for example, if you know the .cpl extension to activate them. If you don’t, you could try running %systemroot%\system32 to take you to the Windows System folder, then clip_image004filter by type to show only the Control panel items. Perhaps the most useful for troubleshooters is ncpa.cpl (which you can just run directly from WinKey+R), to take you to the Network Settings, without lots of right-clicking and faffing about.

There are a host of other handy shortcuts, from system environment variables (you can see the full list from a cmd prompt by just typing set, and use/reference them by strapping %’s to either end), to lots of relatively obscure shell commands which jump straight to otherwise hidden or deeply-nested bits of the OS. You can just run these commands as above, or if you want to create a shortcut, set it to explorer shell:command

Here are a few to try:

  • shell:accountpictures – could be useful if you’re putting your existing profile picture into a website or some such, though the pictures don’t get exposed here as PNG or JPG so YMMV.
  • shell:desktop – jumps straight to your desktop; handy if you use that as a dumping zone for docs etc
  • shell:downloads – jumps straight to your downloads folder
  • shell:onedrivecameraroll – especially useful when fishing out pics from your phone
  • shell:my pictures or shell:pictureslibrary – takes you to different places you might have photos stashed

Most of these have been around for a while, but may be comparatively unknown. For a supposedly-fulsome list, check here.

Tip o’ the Week 311 – Band on the Run

 … or bike, golf course, in the gym etc.

The original Microsoft Band might not have won many fans for its industrial design but it was a solidly functional thing with a decent and regularly-improving software stack sitting behind it. This pace of updates has continued with the Band 2, which is a lot better to look at and is proving to be more comfortable to wear, as well as more functional. Currently trading in Blighty on Microsoft Store & Amazon for £200, though it has been available for £30 less before Christmas.

As if an optical heart rate sensor, three-axis accelerometer, gyrometer, GPS, ambient light sensor, skin temperature sensor, UV sensor, capacitive sensor, galvanic skin response and a microphone weren’t enough, the new Band also finds room to include a barometer. This means the device can track your steps, location, heartbeat, sleep quality, burnt calories, elevation (courtesy of that new barometer) and more.

Phew. Time for a lie down already. Band 2, like its predecessor, is cross-platform, so potentially appeals to WinPhone users as well as Appleites and Googlers.

The Microsoft Health mobile app has had a bit of online heat because (as it’s been regularly-updated) it’s now more of a Band-specific thing rather than a generic health-monitoring app for Windows Phone users, but it’s gotten a lot more functional in conjunction with the web-based Health Dashboard.

 In December 2015, a slew of software updates were pushed out to the Band, such as the ability to control the music playing on your phone from your wrist (so when running, you could change tracks without fishing your phone out of a pocket) as well as a bunch of others – like an activity reminder that senses if you’ve been sedentary for too long, and suggests you get up and do something.

The original Band’s exercise tile/app would help your record activity that could be reviewed on the dashboard, tracking you on GPS and measuring your heart rate. This has improved further with Band 2 and with the recent updates to both the firmware, the Microsoft Health app and the online experience: one notable change being the ability to create your own custom workout sets.

The Band 1 & 2 both offered guided workouts from 3rd parties (such as Nuffield Health) but now you can also build your own, though you can’t add your own exercises (you need to search against a predefined list, with some of the naming maybe catching you out – eg press ups are listed as pushups).

You can share your custom workouts with other Band users too.

So, on that next business trip, keep neighbouring hotel room occupants guessing as you grunt and thump your way through sets of Tabata circuits, your band prompting you with each exercise and timing the durations or rests between.

Tip o’ the Week 310 – New Year, new Outlook discipline

Now that the festive period is behind us, it’s time to get back to the mundanity of the New Year. The salad bar in every restaurant is heaving, every gym has lots of red-faced semi-exuberant new members, and offices are chock full of workers who want to do things better this time around.

Those of you who ended 2015 with a clear inbox and task list, well done! Those of us who have a new resolution to get more organised in 2016, well, read on.

The “Getting Things Done” methodology (or GTD to its many devotees) espouses a system for making sure you don’t forget stuff and that you can prioritise what’s important, and like any similar system, it shies away from telling you which tool to use – if a stack of printed cards works for you, then go for it. There is, predictably, much discussion online as to which software tools to use and how to set them up “just so”. YMMV.

Out of the box, Outlook isn’t a fabulously GTD-optimised tool. There are numerous addins and guides online to try to get it set up in a suitable way (such as ClearContext, as featured in ToW #233), but true GTD evangelists often give up trying to wrangle Outlook tasks to do what they want: Wunderlist has a new tranche of fanatics. It’ll be interesting to see if and how its task management ideals start to bleed into other tools like Outlook.

Follow me, follow you

If you are a habitual email user and Outlook is your main tool, there are a couple of simple things that everyone could do without needing to get stuck into categories, tasks, projects and the likes.

  • Change your startup folder – When you start Outlook, do you really want to jump straight to your inbox, with all of the distractions it contains? What about starting in Tasks or Calendar instead? Easy – just go to File -> Options -> Advanced and you can pick a different place for Outlook to default to.
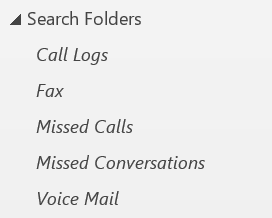
  • Create a search folder for your flagged mail – if you routinely flag messages for follow up, then it’s a good idea to keep track of them all. The Outlook tasks view can do that for you, but it can be a little confusing, especially if you rely on Wunderlist or some other tasks management app.
    If you expand the Search Folders list in Outlook (in the tree view on the left) you’ll see special folders that are actually a saved query, presenting the results to you from across your mailbox. If you don’t already have a “For Follow Up” folder (or similar), just right-click on the Search Folders heading, 
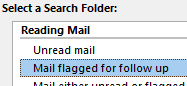
click New Search Folder and choose Mail flagged for follow up. This will create a new search folder fo you, and could even be set as the default folder (as per the first bullet).

Scheduled start

The problem here is, most of us don’t start Outlook from scratch very often – laptops get put to sleep and woken up again, and it could be days or weeks between reboots, so most of the time, you already have lots of Outlook windows open.

To work around this, we can fall back on a technology that’s been part of Windows since NT 3.1, all of 22 years ago – the AT command. This allows the console operator (ie you) to schedule some background task within the bowels of the OS, and to specify how it runs as well as when – will it be silent, will it be able to interact with the current logged in user?

The intrepid among you could delve into AT (just start a command prompt by pressing WindowsKey+X and choose the Command Prompt (Admin) from there) but most of us would prefer to use the Task Scheduler UI that was built to make the process easier. Reading the instructions below, this might sound like a faff, but if you follow them step-by-step, it’ll take 2 minutes.

What we’re going to do is to set a time when a new Outlook window will be fired up, at a specific folder. So, you could say at 7:00am or the next available time after (ie when your machine wakes from sleep), then create a new Outlook window pointing to the Follow Up search folder we just created above.

Start by running the Task Scheduler (press start, type task s…). Don’t be put off if you see lots of tasks you don’t recognise. 
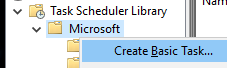
Expand the Task Scheduler Library and right-click on Microsoft then Create Basic Task.

This will walk you through a wizard to set up the task.

  • Call it something like Daily Outlook (next), choose a frequency – daily (next) then a time (7am?) (next), You want to start a program (next)
  • Now you need to find the path to the Outlook executable – it’s likely to be
    “C:\Program Files (x86)\microsoft office\root\Office16\OUTLOOK.EXE” or similar – try copying that text and enter it into the Run command (WindowsKey+R) – if it launches Outlook, you’re in business. If it doesn’t, then you might need to search your computer for OUTLOOK.EXE, and copy that path to the appropriate file.
  • Enter the appropriate path, wrapped in quotes (“”), into the task wizard Program/script box and in the Add arguments box, enter /select “outlook:search folders\For Follow Up”, or whatever folder you want to open (just put the path and folder name in the bit after outlook: in the argument above).

    • To test that argument, try just running (via WindowsKey+R)
      outlook /select “outlook:search folders\Sent Items” (or whatever your path is)

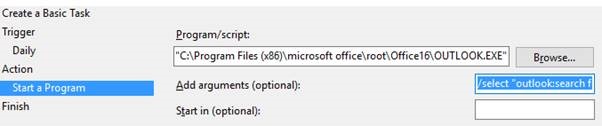
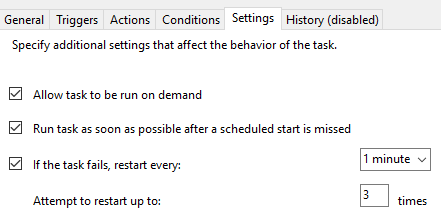
  • When you get to the end of the task wizard, tell it that you want to open the properties dialog for the task when you click finish. Navigate to the Settings tab, and check the box that you’d like to Run task as soon as possible after a scheduled start is missed – this way, if your laptop was still asleep at 7am, it would run Outlook up next time you log in. You might as well check the “restart every…” one too.

Now you can OK out of the properties and return to the task list view – right-click on your newly-created task, and try “Run”- you may not see the Outlook window come to the fore, but if you look on your task bar, at the collection of Outlook windows you may otherwise have, then it should be there. If you see the “Last run result” in the task view showing something other than (0x0), then something went wrong – you may want to open the task up again, and check that you’ve got the right path to Outlook and the right path to your chosen folder.

Tip o’ the Week 309 – Streaming media to Xbox One

clip_image002When the Xbox One was launched, one of its early ambitions was to be a home media hub, with TV and non-gaming content being a big part of the original brief. Things have changed somewhat, with a bigger focus being put back on the games – but Xbox One has all the hardware to support other entertainment uses too.

One of the strengths of the Xbox 360 was its built-in support for Windows Media Center – even if you didn’t want to use it to watch TV via the console, it was a brilliant way of streaming media, showing pictures etc on the telly in the living room. Xbox One came out without WMC support, and now that Media Center is no more, fans have turned to other ways for streaming of content.

One is to sit at your PC and “Play To(or “Cast To” in Windows 10), by right-clicking on your media file and choosing the Xbox as the place you’d like to play them to. Not bad, but it’s quite slow to get going, and you wouldn’t want to trot off to the PC to browse your media when sitting on your sofa. If you’re sitting at with a laptop, it may be OK, and there are other ways you might be able to send content to the big screen – via Edge, or by using wireless projection. Xbox One will eventually get the ability to receive Miracast streams, so you could use it to play back whatever you’re doing on a plethora of other devices. That said, it’s a feature that’s been in preview for a while, so it could be taking longer to complete than hoped.

clip_image004It’s possible to stream content to Xbox One using DLNA, but while the Media Player app is functional, it’s a little sparse and DLNA itself has a habit of throwing in random errors just to keep you on your toes. A better solution has been around for a while, but required shelling out for, previously – PLEX.


Plex on Xbox One now free

clip_image006And here’s the thing – PLEX has now ditched their paywall and allowed all Xbox One users to play media back on the console for free.  Huzzah!

So, if you have a home NAS box, a PC or Mac that stays on most/all of the time, or even another walking-dead product, WHS2011, then you can install PLEX server on it and stream content to your Xbox One.

The Plex server console is configured and available via the web (and can be controlled remotely, depending on your home network) and can be set to scan ‘n’ serve photos, music, movies, home videos and recorded TV shows.

There’s a Plex app for Windows (PC and Phone) too, and if you subscribe to the Plex Pass premium service for £4/month (which was previously required to use Plex on Xbox), you can take media offline as well as get other content and features.

Find out more about Xbox One Plex app, or even get the newly-released Sky app and you’ll have a few other streaming options too.

This is the last Tip o’ the Week until the New Year. Have a Merry Christmas & a Happy New Year, everyone!

Tip o’ the Week 308 – Home WiFi tuning

UK telecoms regulator Ofcom clip_image002recently gave out some warnings about how poor home WiFi could be responsible for users thinking their home internet speeds were bad; a seasonal twist even said it might be your fairy lamps that are causing your network to go south. They also launched an app to help check your WiFi quality, though predictably it’s only available for mainstream devices. Don’t worry, Windows users – it doesn’t do a lot anyway. No great loss.

The Ofcom app is actually developed by Samknows, a very useful website which might help you sort out issues with your line speed more than your WiFi – UK ADSL users can search for the telephone exchange you’re connected to, and see what services are offered – here’s an example – and you’ll see if there are LLU options that maybe would give you better/faster service than the default BT package.

The gist of the Ofcom advice is that other stuff in your house might be nuking your WiFi, so don’t go blaming rubbish performance on your network provider. That’s quite sensible, to a point – there are lots of domestic devices that might interfere with WiFi, though if you see poor conditions when wired in, it’s a different matter.

In the early days of WiFi networks, there’s a story of one company which was flummoxed by the fact that their network kept blowing up at certain times of the day, until they realised the next door company had a kitchen with a couple of microwave ovens for staff to heat their lunch, on the other side of the party wall… Here’s why.


Doctor, Doctor

First thing’s first, if you think you have a problem – check the health of your network connection. ToW #199 gave some ideas a couple of years ago, that still hold true – try the WinMTR tool, and the advice for using Resource Monitor to see what’s using your network in particular. SkyDrive Pro OneDrive can be a hog these days, especially if it’s uploading a lot of stuff: you might see speed tests where the “ping” is measured nearly in seconds rather than ms, and the download speed will be a fraction of the norm (as the connection is being swamped by uploads).

clip_image003Windows 10 users can download the excellent Network Speed Test app to get an idea. Try running it on a wired connection if you can, thereby ruling out WiFi as the cause of any gremlins at first. Move your laptop around and try on WiFi – you’ll see a table of the previous results for comparison.

Other speed testing tools are available. Lots of them.


Dude, it’s your neighbo(u)rs

Fact is, though, the guy next door is probably your biggest enemy for home WiFi. If you live in a built-up area with lots of people using networks called NETGEAR3415 or similar, this may tell you that:

  • They never bothered to change the default network name. That’s not very good. Have some fun instead?
  • They probably haven’t changed their default router password either. That’s very, very bad.
  • They almost certainly left the router on its default channel, and that could mean it’s overlapping with yours.

It’s quite easy to get paranoid about home network setup & security (see here, for example) but a few golden rules should be applied – give it a name that neither ties it to your name or address, nor makes it obvious how to break into it. DEFINITELY change the default password, and ideally, the name of the admin account used to configure the router. Modern routers might be able to find a suitable WiFi channel to put themselves on, but the kind of junk you might have got from your company IT department or from your ISP, might not.

The radio spectrum used by WiFi networks is subdivided into 11 or 13/14 channels (depending on where you live) and making sure your router is on the channel that’s furthest apart from the other routers that are physically closest to it, will give you a better chance of avoiding interference from the neighbours.


Channel your strengths

There are tools to scan your network and show you what channels are available – this might then help you set your own router to occupy an appropriate position in the spectrum that’s a bit more in the clear – your results may vary and experimentation (even at different clip_image005days/times) may be required. Some internet folklore says you should use a channel either slap in the middle or at either end of the range – eg 1, 6 or 11/13.

Ideally, you’d like to see all the nearby networks, and by looking at their signal strength and channel, set your router to use the channel that has the weakest network(s) on it already (or preferably, none at all).

  • WiFi Analyser – neat Windows 10 app that displays the basics visually and as a list
  • NirSoft WiFiInfoView – pretty sparse but gives you text info and if you know what you’re doing may be all you need
  • MetaGeek inSSIDer 3.1.2.1 – free – nice tool that gives you a visual graph of what’s around you and lets you drill into a bit more detail
  • MetaGeek inSSIDer v4 – more polished and functional upgrade to the previously-free version, now $20

Run up the tool of your choice, see where your neighbours are, run your speed test app a couple of times, switch clip_image007the channel of your WiFi and repeat the test.

You might not notice any real difference, but it gives you something to do, doesn’t it?

Tip o’ the Week 307 – Skype Meeting Broadcasting

clip_image002It’s been a busy time for the Skype team at Microsoft. At the Convergence EMEA conference, it was recently announced that Office365 had a new SKU: Office365 Enterprise E5.

There are a few headline new things in the E5 package – but for Skype users, maybe the most significant are the Cloud PBX and PSTN Calling capabilities; these basically allow smaller businesses to use Office365 as their phone system, by using an on-premises gateway or eventually by having a cloud-provided service that functions as the phone system (the Private Branch eXchange). Here’s a pretty useful summaries of what’s new.

clip_image003The E1, E3 and E5 SKUs all get a new Skype for Business capability which enables users to do online meetings with up to 10,000 participants: Skype Meeting Broadcast.

You can produce and broadcast online events live to thousands of participants, using a high quality video stream to any device running any operating system without the need for plugins or downloads.  It can be used for internal All Hands meetings, as well as streaming broadcast events to external customers.

Other points of interest include:

  • Participants can join from anywhere, on any device; all they need is an internet connection and the link to the broadcast. Event organisers can restrict entry to only a named list, anyone from your company, or anyone who has the join link. Skype Meeting Broadcast is supported to accommodate up to 10,000 ‘live’ attendees. 
  • If get delayed and miss the beginning of a meeting: no problem.  Simply join the broadcast and rewind to start watching the event from the beginning. You can also take a break without missing a beat by pausing and restarting when you’re ready.
  • Skype Meeting Broadcast limits the real-time audio and video to presenters only, but your audience can join ‘live’ conversations using plugins like a Yammer feed and a Question Answer Manager or provide real-time feedback using Bing Pulse. So, no heavy breathing / dog barking / furious typing from the attendees to distract each other.
  • With familiar Skype controls, it’s easy to switch between video and content and spotlight presenters like a professional producer. Once the event is over, you can publish the recording to your preferred location, plus pull in-depth event metrics and create insightful reporting.

To learn more about Skype Meeting Broadcast, check out the Office.com site

Tip o’ the Week 306 – Remote Desktop at home

clip_image002A computer on every desk and in every home”; sounds like a good idea, right?
It’s quite unusual to have such clarity of purpose in any corporate mission statement today, let alone in something so radical at the time it was written. 40 years ago, it must have seemed like crazy talk. Nowadays, every desk has had a computer (and use of many computers has outlived their desks), and nearly every home has one – in fact, nearly every room in some homes has at least one.

If you have a proliferation of PCs then you might have a need to make stuff that happens on one be accessible from the other(s). What if you could sit on the sofa (post turkey-fest?) and connect to the others? Use your phone or your tablet to control a corporate laptop that’s Direct Access-connected back to base, refreshing a financial report or some such?

If you’ve a Professional or Enterprise version of Windows (like a corporate Windows 10 laptop), then you’ll have the ability to connect to your machine using the built-in Remote Desktop function, a technology rooted in the Terminal Services feature that first appeared in Windows Server back in the late 1990s.

clip_image004Checking Remote Desktop is available and switched on

Firstly, have a look in the System application (press WindowsKey+X then choose System from there, or press WindowsKey+ Pause|Break if you have a full-size keyboard). clip_image006You’ll see if you’re running Pro or Enterprise version of Windows, and you’ll also have the link to Remote settings – have a look in there, and you will hopefully see the Remote Desktop section. Make sure it’s enabled and that you’ve selected the right users to be allowed to connect. Whilst you have that dialogue open, click on the Computer Name tab and make a note of what your machine is called – you’ll need that in a sec. You might even want to rename your machine to something more memorable while you’re there…

If you don’t have the Remote Desktop section available, there are other options– see later in the tip.

clip_image008Now, from another Windows machine, you should be able to connect to your PC – type Remote at the start menu to see the Remote Desktop Connection app – or just press WindowsKey+R and enter mstsc to launch the same thing (the executable is named after Microsoft Terminal Server connection, before the technology was renamed Remote Desktop Servicess).

clip_image010If you have multiple machines you might want to connect to, then mstsc /v <name> will jump straight to each one, and the Most Recently Used list for the Run command will offer you previous-used entries. This can be a handy way of remembering the names for the machines you might use regularly, so isn’t as counter-intuitive as you might think.

If you just open the mstsc app on its own and click Show Options then you’ll be able to tweak the settings such as quality of display, whether you want to run full screen or in a window, or even use multi-monitors where available. When you’re happy with the settings for each machine, you could save them out as a separate .RDP file, and you can launch the session in future by opening that file directly.

There’s a Remote Desktop Windows 10 modern app too – here – which is touch-friendly and also keeps a handy list of previously-accessed machines, though it doesn’t offer quite the same level of control of the user experience as its desktop counterpart described above. Some users of the modern app use it to run regular x86 Windows applications on their Surface RT.

Microsoft also publishes Remote Desktop client apps for Android, iOS, Mac and Windows Phone.

Firewall check

If you see Remote Desktop switched on as above, but you can’t connect to the machine from your other client, there are a number of obvious things to check (Are you connected to the same network? Have you got the name right? etc) but there are a couple of Windows clip_image012Firewall related things that might trip you up.

It’s worth checking that the PC you’re looking to connect to thinks it’s on a home network, not a public one – have a look in the Network and Sharing Center clip_image014old-fashioned Control Panel applet, and make sure your PC thinks it’s connected to a Private network. If you need to change from Public to Private, launch the HomeGroup control panel applet, and you can switch from there.

Even if you think everything should be tickety-boo but you still can’t access the remote machine, double-check clip_image016that the appropriate Firewall Rules are enabled – go into the Windows Firewall with Advanced Security control panel app, and under Inbound Rules, make sure the rules beginning Remote Desktop… are all enabled (showing a little green tick).

Remote desktop to a home PC

If your home PC isn’t running Pro or Enterprise versions of Windows then there are still options to allow you to remotely control it – a load of third party software purports to do this, though like any freeware you find on the internet, be careful… when running the setup process, make sure you’re not installing any other guff you don’t need, and maybe even think about removing the software as soon as you’ve used it, if you don’t anticipate needing it regularly.

The most recommended options include LogMeIn and TeamViewer, the latter of which is free for home use and has many client apps, including a touch-friendly modern app.

Another warning, though: the fact that TeamViewer is free means it’s also the favoured tool of the shysters calling people up and claiming to be from Microsoft, so they can access the hapless user’s computer. Make sure if you do install it, you’re getting it directly from the official source, and that you it’s as locked-down as you can make it.

Tip o’ the Week 303 – Windows 10 UI tips

clip_image001Windows 10 is, in some ways, the least WIMPy version of Windows to date. If you’re not familiar with that term, it once stood for Windows, Icons, Menus, Pointer, in other words the same thing as a gooey.

Why so? Well, it’s got touch baked in for one, and that means the whole pointer bit is less relevant. And although windows (with a small “w”) are still there, even more so than in Windows 8, icons and menus might also be a bit different too.

That said, there are some good ol’ fashioned UI features in Windows 10 that might not be obvious to some users.

clip_image003Minimising everything – easily done; just press WindowsKey+D like in previous versions of Windows. Only works if you’re not in Tablet Mode, too. There’s another way, too, that was also present in Windows 8, but it’s even more relevant into Win10 – if you’re not in tablet mode, and click (or touch & hold) on the title bar of an open window then shake it from side-to-side using mouse or finger, it will minimise everything else except that window. Repeat the process on the same window to reverse the effect and restore everything else.

Jump to settings by pressing WindowsKey+I – especially handy if/when your PC decides not to show you search results like “windows update”. Launch settings (the new control panel) instead and try from there.

Task Bar icons can be activated quickly – either programs that are pinned there, or just apps that are running. Press WindowsKey+number, where number is the index of the icon along the menu, eg 4 would be Groove (and it’s already running, as indicated by clip_image005the line beneath), while 3 would launch OneNote (which isn’t already running).

Power User menu – another hangover from Windows 8 but still a lot of people don’t know about it – press WindowsKey+X to launch the pop-up menu from the bottom-left (as shown >>). Especially handy if you need to launch an elevated (ie Admin level) command prompt, though you could do the same by pressing WindowsKey, typing CMD then CTRL+SHIFT. It’s horses for courses.

Notifications / Action Center – to jump to the new notifications menu (or Action Center), press WindowsKey + A. Nothing more to see here, really. Move along.

Move Windows around – press WindowsKey and use the arrow keys to move your current window around. Press the SHIFT key as well to flick it between monitors if you have more than one. Simple.

Tip o’ the Week 302 – Bing Maps Preview

clip_image002Bing Maps has had a bit of a refresh recently, with a new look and some tweaks to functionality & feel. The quickest way to get to the site is to type bingmaps into your browser’s address bar then press CTRL+ENTER, to add the www and the .com bit to either end, and be redirected to the maps URL.

clip_image004If you end up looking at the old Bing Maps, then try replacing the /maps/… bit of the URL with /mapspreview, or just click the Try the new Bing Maps banner.

Sometimes, however, old things are cooler than new things. There are some missing features: maybe that’s part of being in “Preview”. There’s an intro video that’s shown to introduce what’s new in the Preview. Check it out here.

clip_image006The old Bing Maps featured lots of layouts of facilities such as shopping malls and museums when you click on the outline of the building (along with a directory on the side – compare the view on the right with the Preview below – not quite so nice, unfortunately).

clip_image008Still, there are plenty of other things that are better in the Preview, and there’s always an opportunity to provide feedback (link at the bottom right), and ask for any missing features to be restored.

You can switch back to the old format by clicking the Leave Preview button on the lower right if need be, and provide an explanation of why you’re bailing out.

The most visible difference is the change to the way search results are displayed – you get a history of different searches you’ve carried out, colour coded and stacked up on the left, while the information panel below the current result set is used for displaying all sorts of search info – on searching for a location or clicking a point on the map, context-sensitive info is displayed on the side, with details from Wikipedia, reviews from the likes of TripAdvisor and Yelp, and in the case of a tube or train station, times are displayed.

Navigation between different types of maps has changed, with a drop-down on the top right, now including Ordnance Survey maps view if you’re in the UK (or you go to the UK version). For Hallowe’en, you can Spookify your maps should you wish, and there may be other map variants to come.

The A-Z style London Street view has vanished from the UK variant too (maybe in the realisation that the old format just isn’t as easy to read as most smartphones maps), as has the ability to see the layout of the tube network by clicking on a station to see the familiar colour-coded lines superimposed on the real map. If you still want to see that kind of view, check out Here.com mapping and click on Transit to show the layout of train lines etc.

The Streetside service isn’t universally available – in the UK, major cities are covered pretty well but don’t go looking out in the sticks. Try right-clicking a point on the map and if Streetside is present, you’ll be able to select it from the context menu and see a quick preview without moving away from the current map view. Useful if you fancy a refreshment and yet your watering hole of choice is tucked away somewhat.

clip_image010

Shplendid.

Tip o’ the Week 304 – Xbox One goes to 10

clip_image001When the Xbox One console was released in November 2013, it marked a change in architecture compared to its wildly successful predecessor, moving away from a PowerPC processor and essentially a bespoke operating system, to instead using an AMD-powered but Intel-compatible architecture and the core elements of its operating environment running on a version of Windows 8. Although this was unnoticed by the majority of users – except that their old Xbox 360 games and peripherals didn’t work on the new console – it aimed to help developers build software to run on the console more easily.

Now, this week sees the general release of the “New Xbox One Experience” – aka NXOE – which delivers a load of new and changed functionality to the Xbox One, largely underpinned by a shift of the underlying OS to a version of Windows 10. This should mean that by the end of the year, you’ll be able to run the same OK – albeit different flavours – on your phone, tablet, laptop/desktop and home console/TV.

See more a few videos of NXOE, here. clip_image002

The big news for most Xbox fans, though, is that the NXOE also brings with it an ability to run selected Xbox 360 games on your Xbox One console – the intial list of 104 titles spans a variety of game genres with both Arcade games and full paid-for titles, with a promise of more to come in future.

So, if you didn’t pre-order COD: Black Ops III and therefore didn’t get the Nuketown bonus map, you might be able to play it on the original Black Ops, in a while.. Or you could do it for real…

Check your Xbox One this weekend – if you haven’t already taken part in the preview program – and you may be able to grab the update and start playing with the new console layout, and maybe dust down some of your old 360 games to see if you still have the magic, or you’ve lost it.